Manage User Groups via SCIM
Last updated: September 29, 2026
Manage Fireflies user groups directly from your Identity Provider (IdP) using SCIM provisioning. Once configured, you can create groups in your IdP, add or remove users, and automatically synchronize group membership with your Fireflies workspace.
In this guide, you'll learn how to:
Create and configure a user group in your Identity Provider.
Add users to a group and push it to Fireflies.
Verify and manage synchronized group membership in Fireflies.
Microsoft Entra ID users: The group provisioning workflow differs from Okta. To manage Fireflies user groups using Microsoft Entra ID, see Manage User Groups via SCIM with Microsoft Entra ID.
🔑 Prerequisites
Before you begin, make sure you have:
Complete How to Set Up Automatic User Provisioning with SCIM before continuing. This guide assumes SCIM provisioning is already configured.
Administrator access to your Identity Provider and Fireflies workspace.
⚙ Enable SCIM Group Provisioning in Okta
Before creating a group, make sure Push Groups is enabled for the Fireflies SCIM configuration in Okta.
This guide uses Okta as the example Identity Provider (IdP). If you're using a different IdP, the interface and navigation may vary, but the overall SCIM user group workflow is similar.
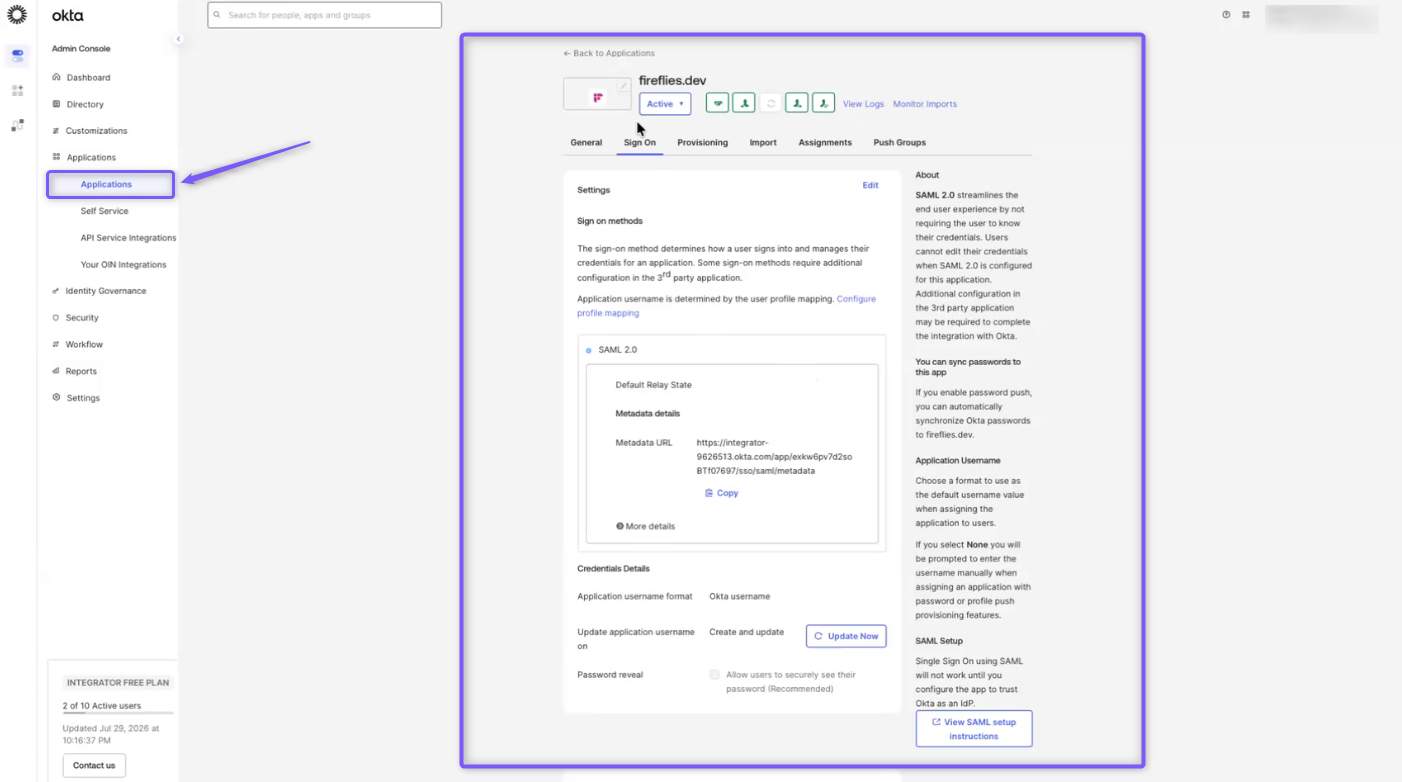
Step 1: In the Okta Admin Console, go to Applications and open the Fireflies application you previously configured for SCIM provisioning.
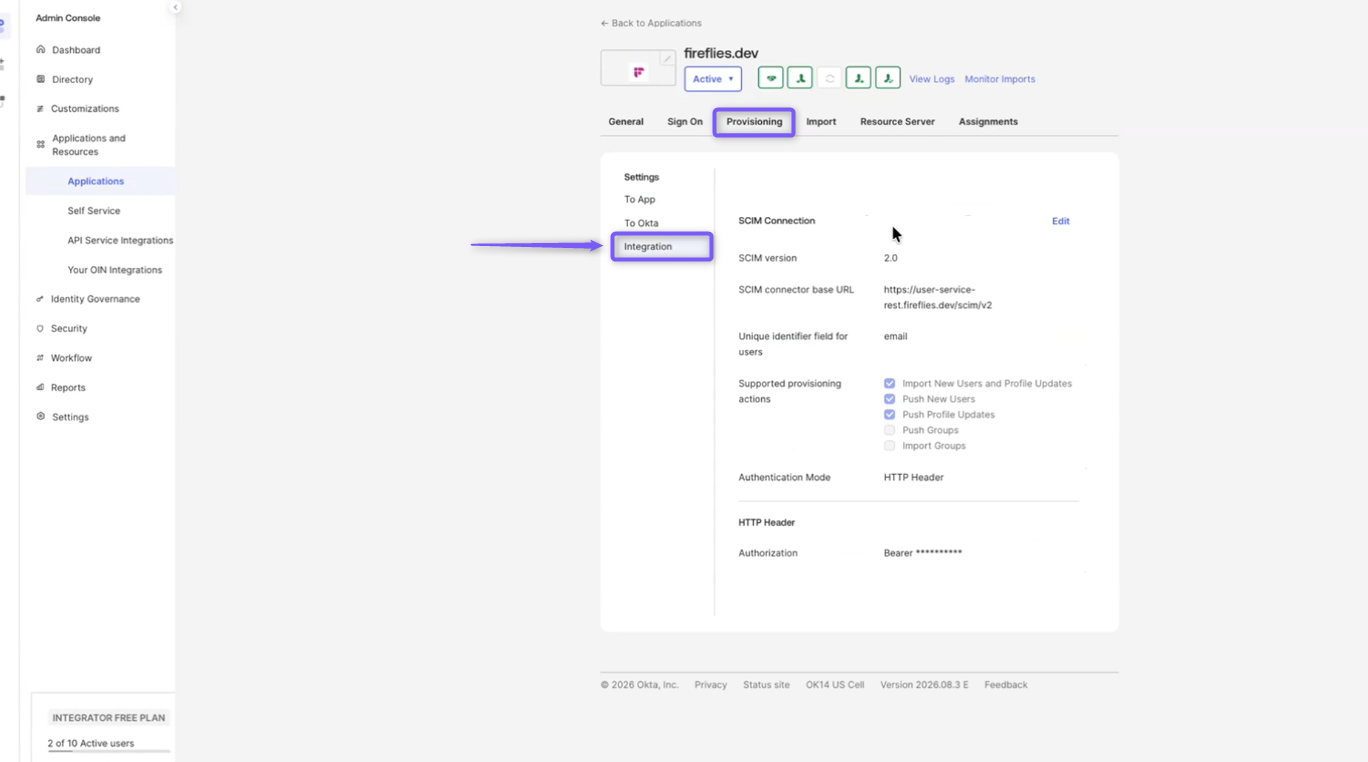
Step 2: Select the Provisioning tab, then click Integration next to the SCIM connection settings.
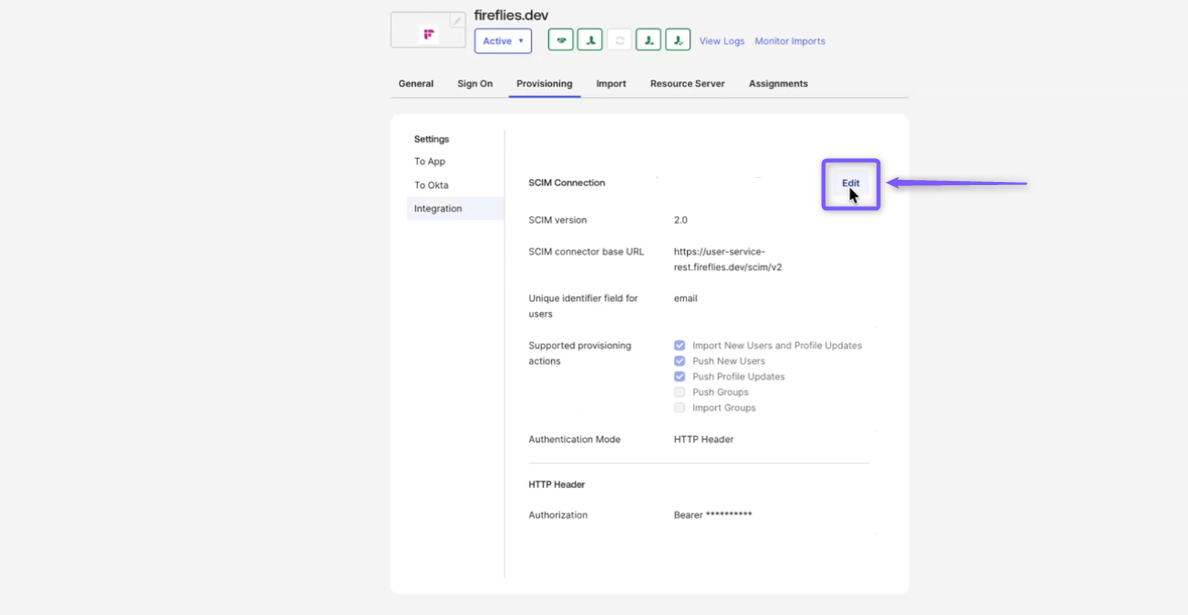
Step 3: Click Edit next to the SCIM connection settings.
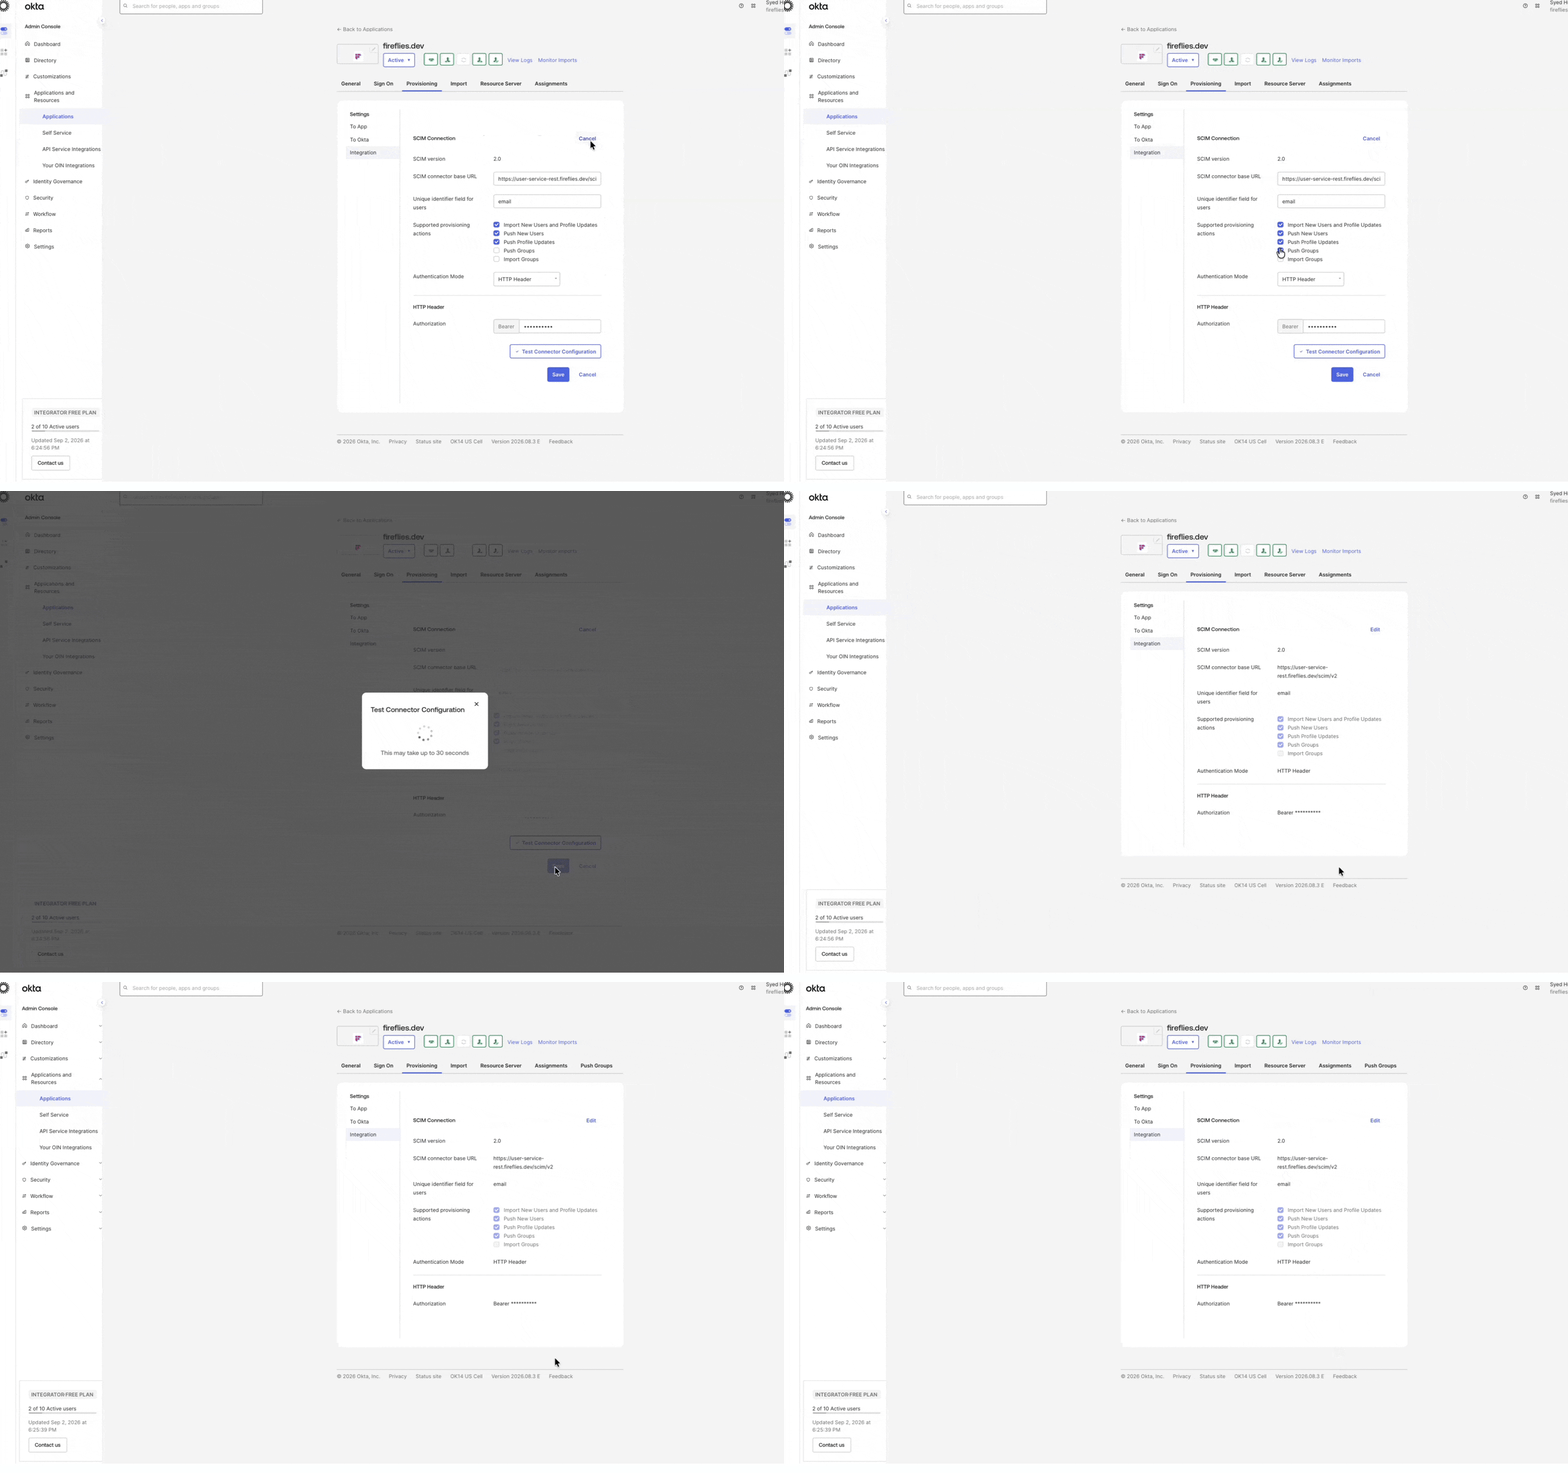
Step 4: Select Push Groups. Make sure the option is checked, then click Save.
⚙ Create a User Group in Your Identity Provider
Once Push Groups is enabled, create the group you want to synchronize with Fireflies.
Step 5: In the Okta Admin Console, go to Directory > Groups, then click Add group.
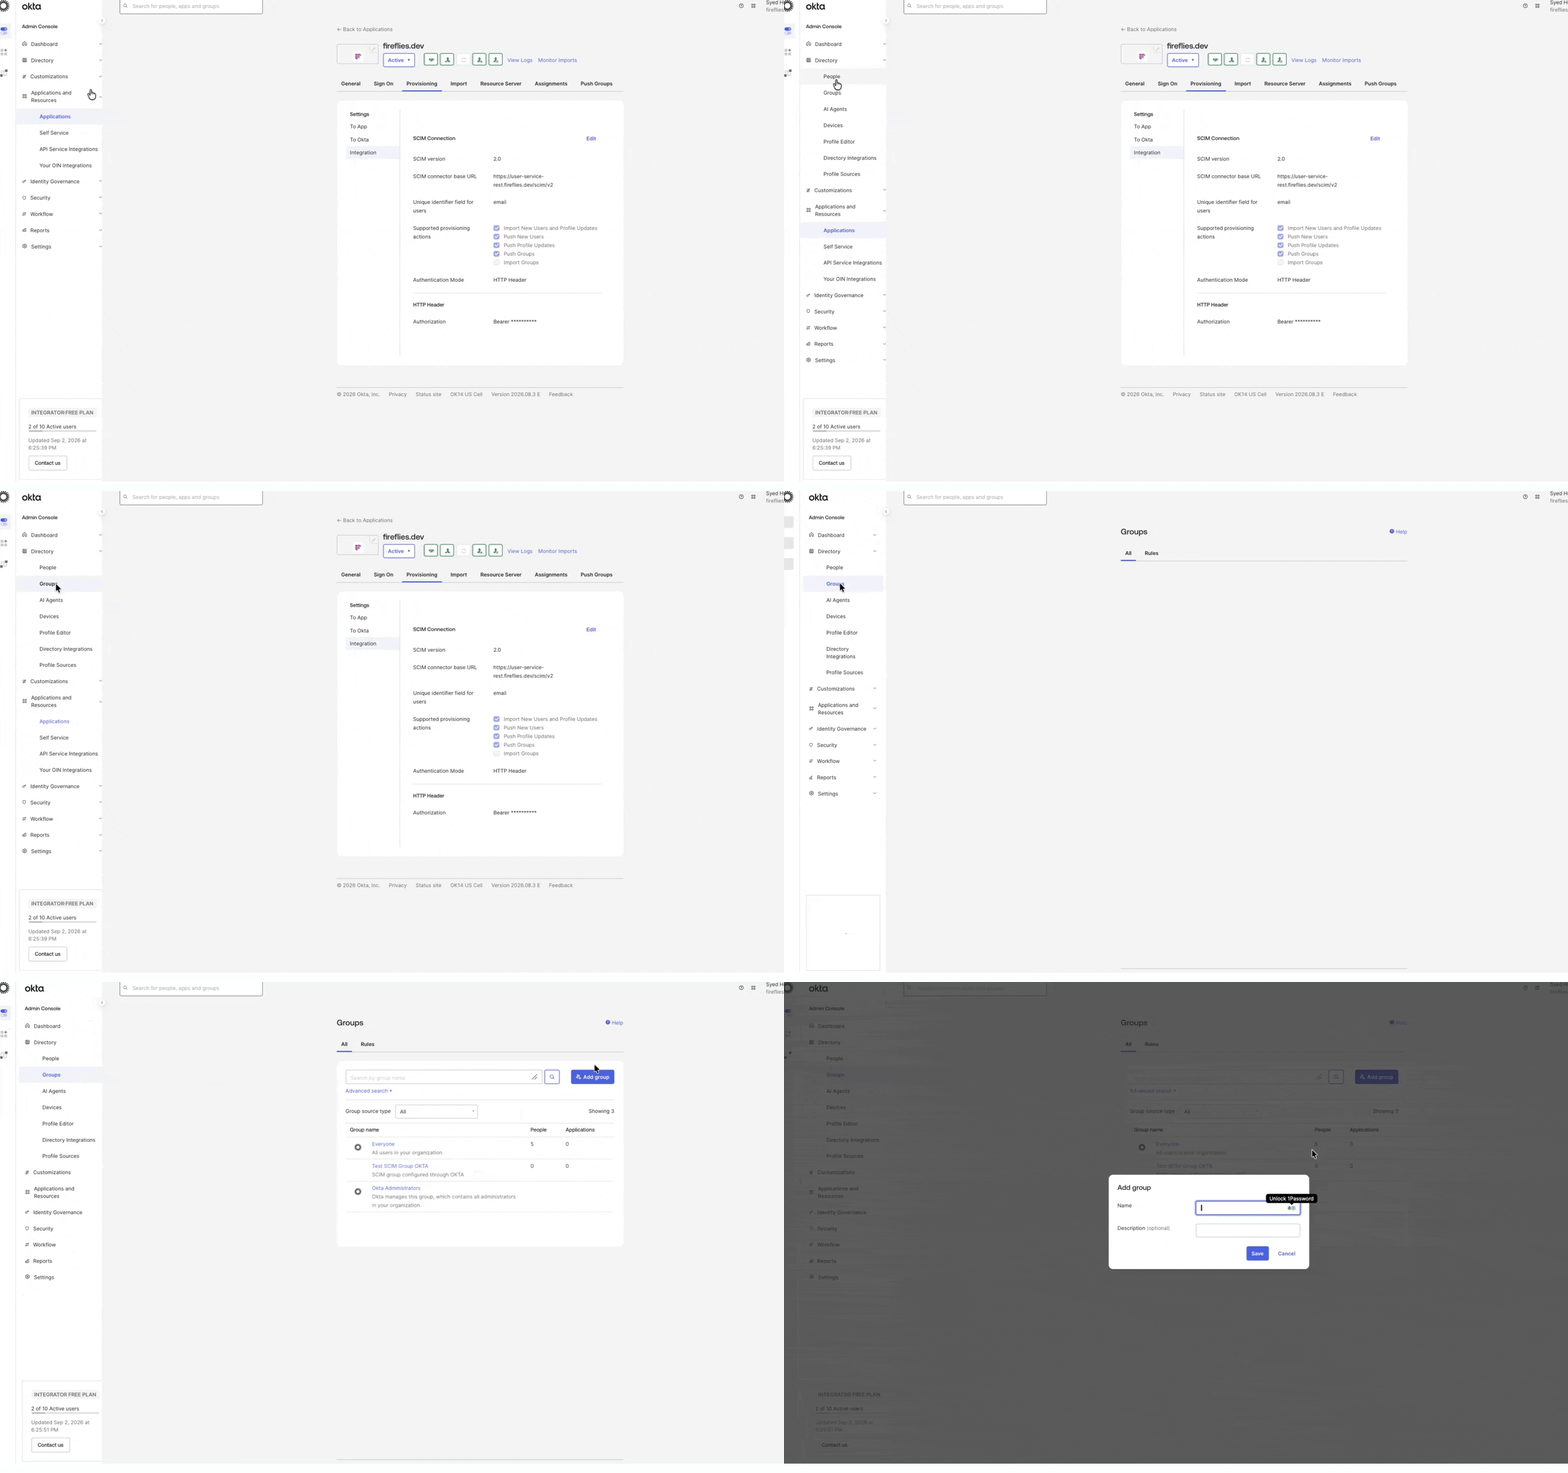
Step 6: Enter a name for the group and optionally add a description. For example, enter Fireflies SCIM Group. Then click Save.
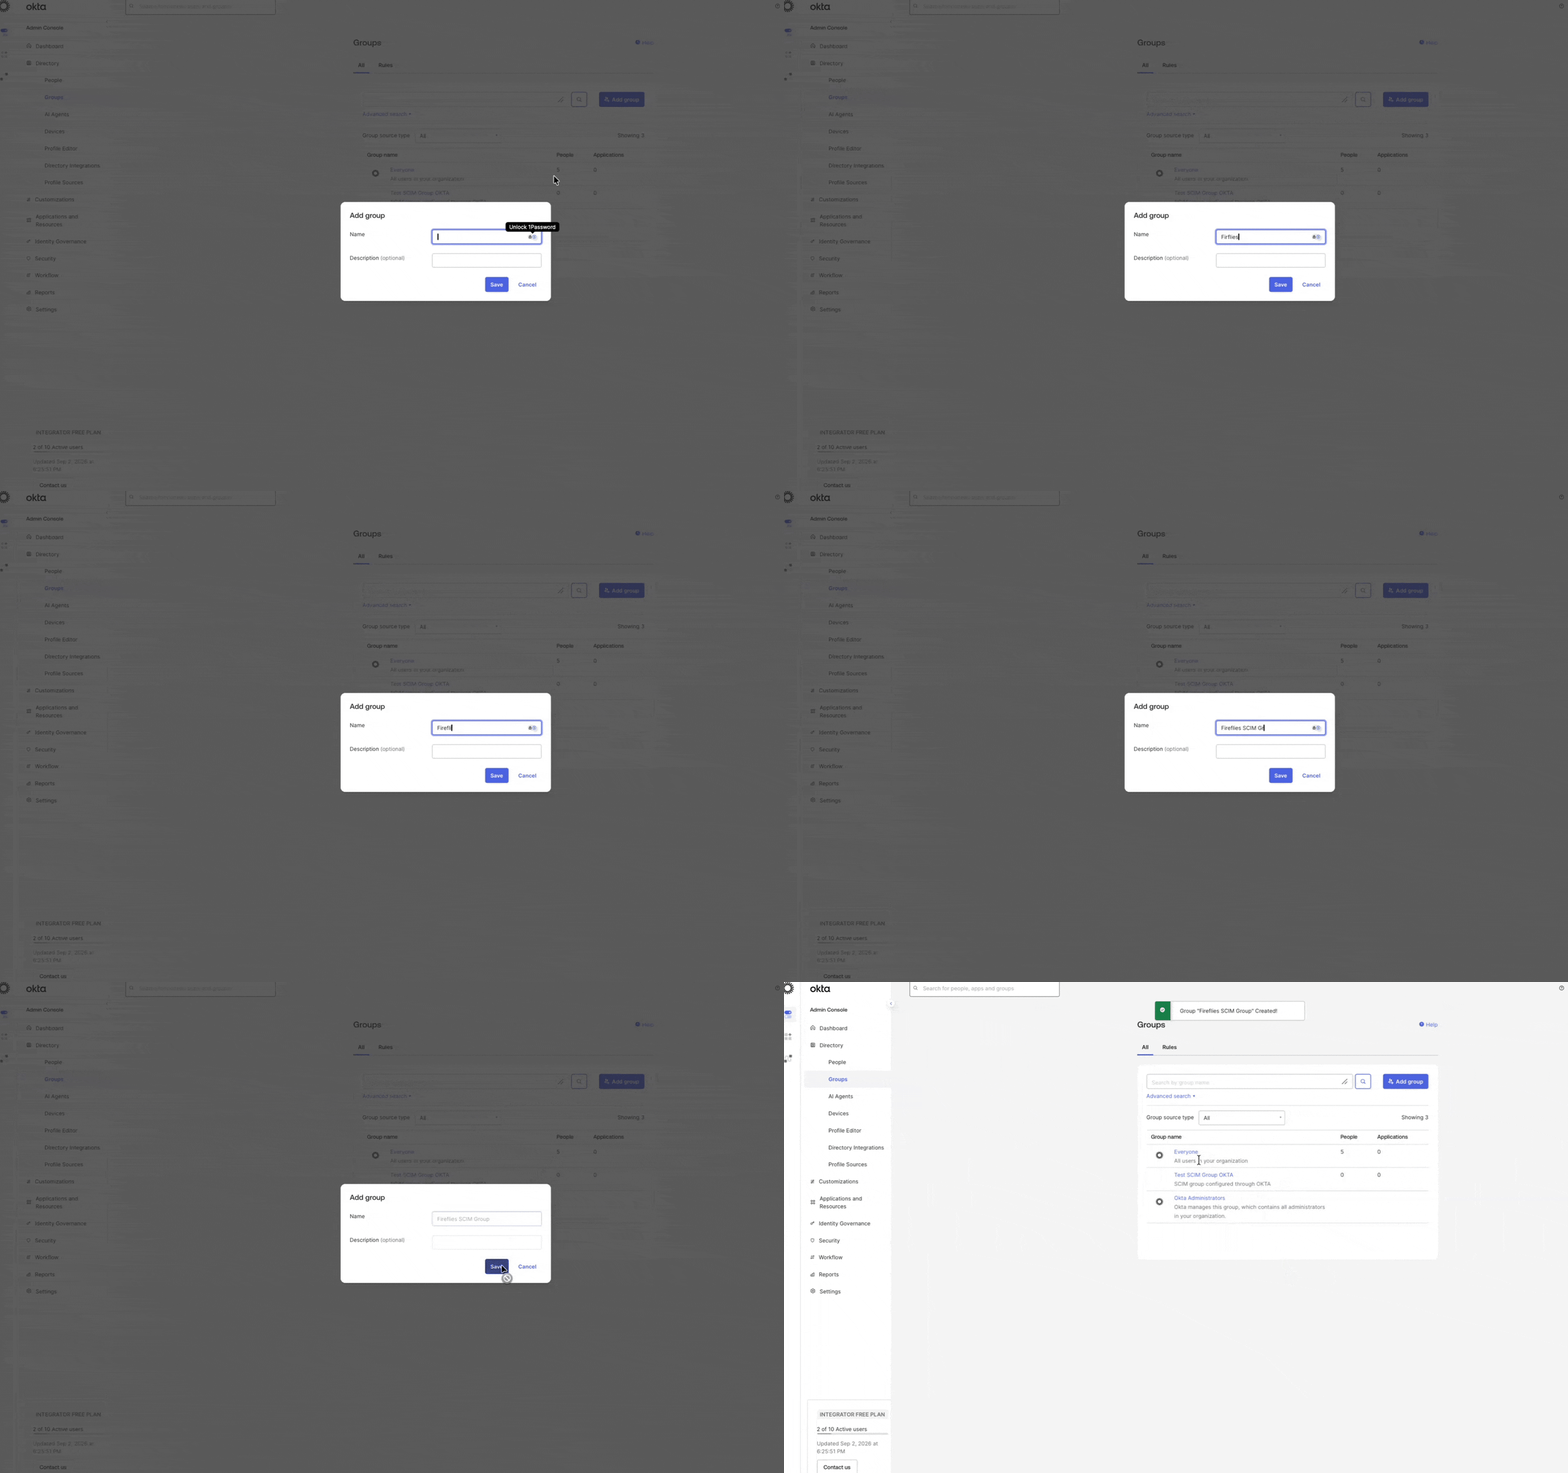
Step 7: Refresh the page to see the newly created group, then click the group to open it.
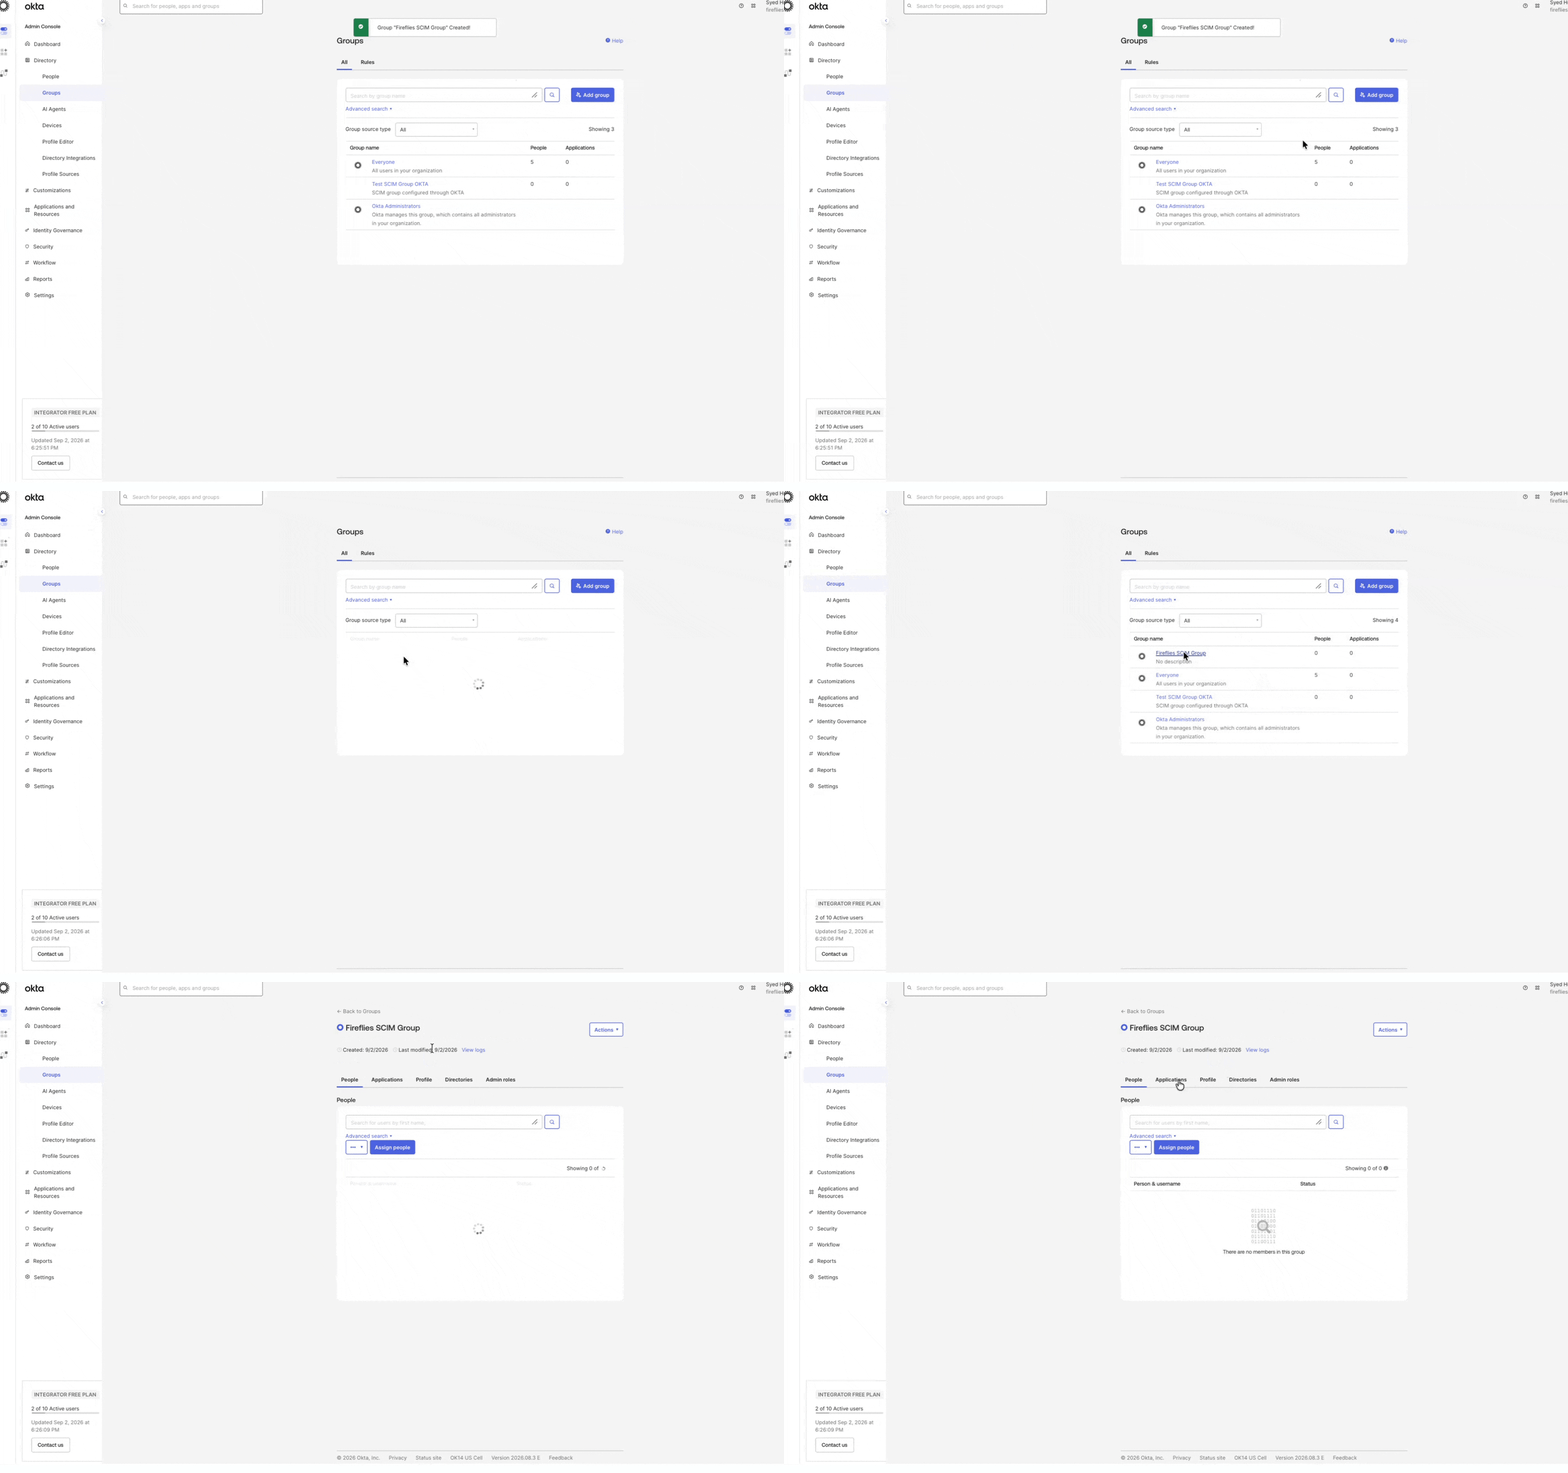
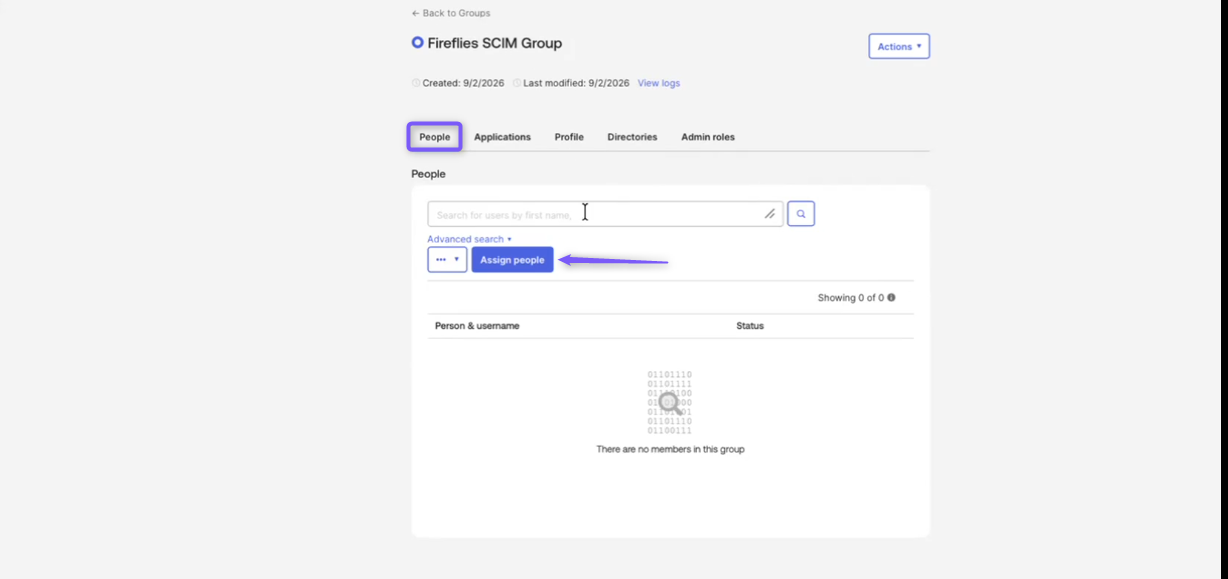
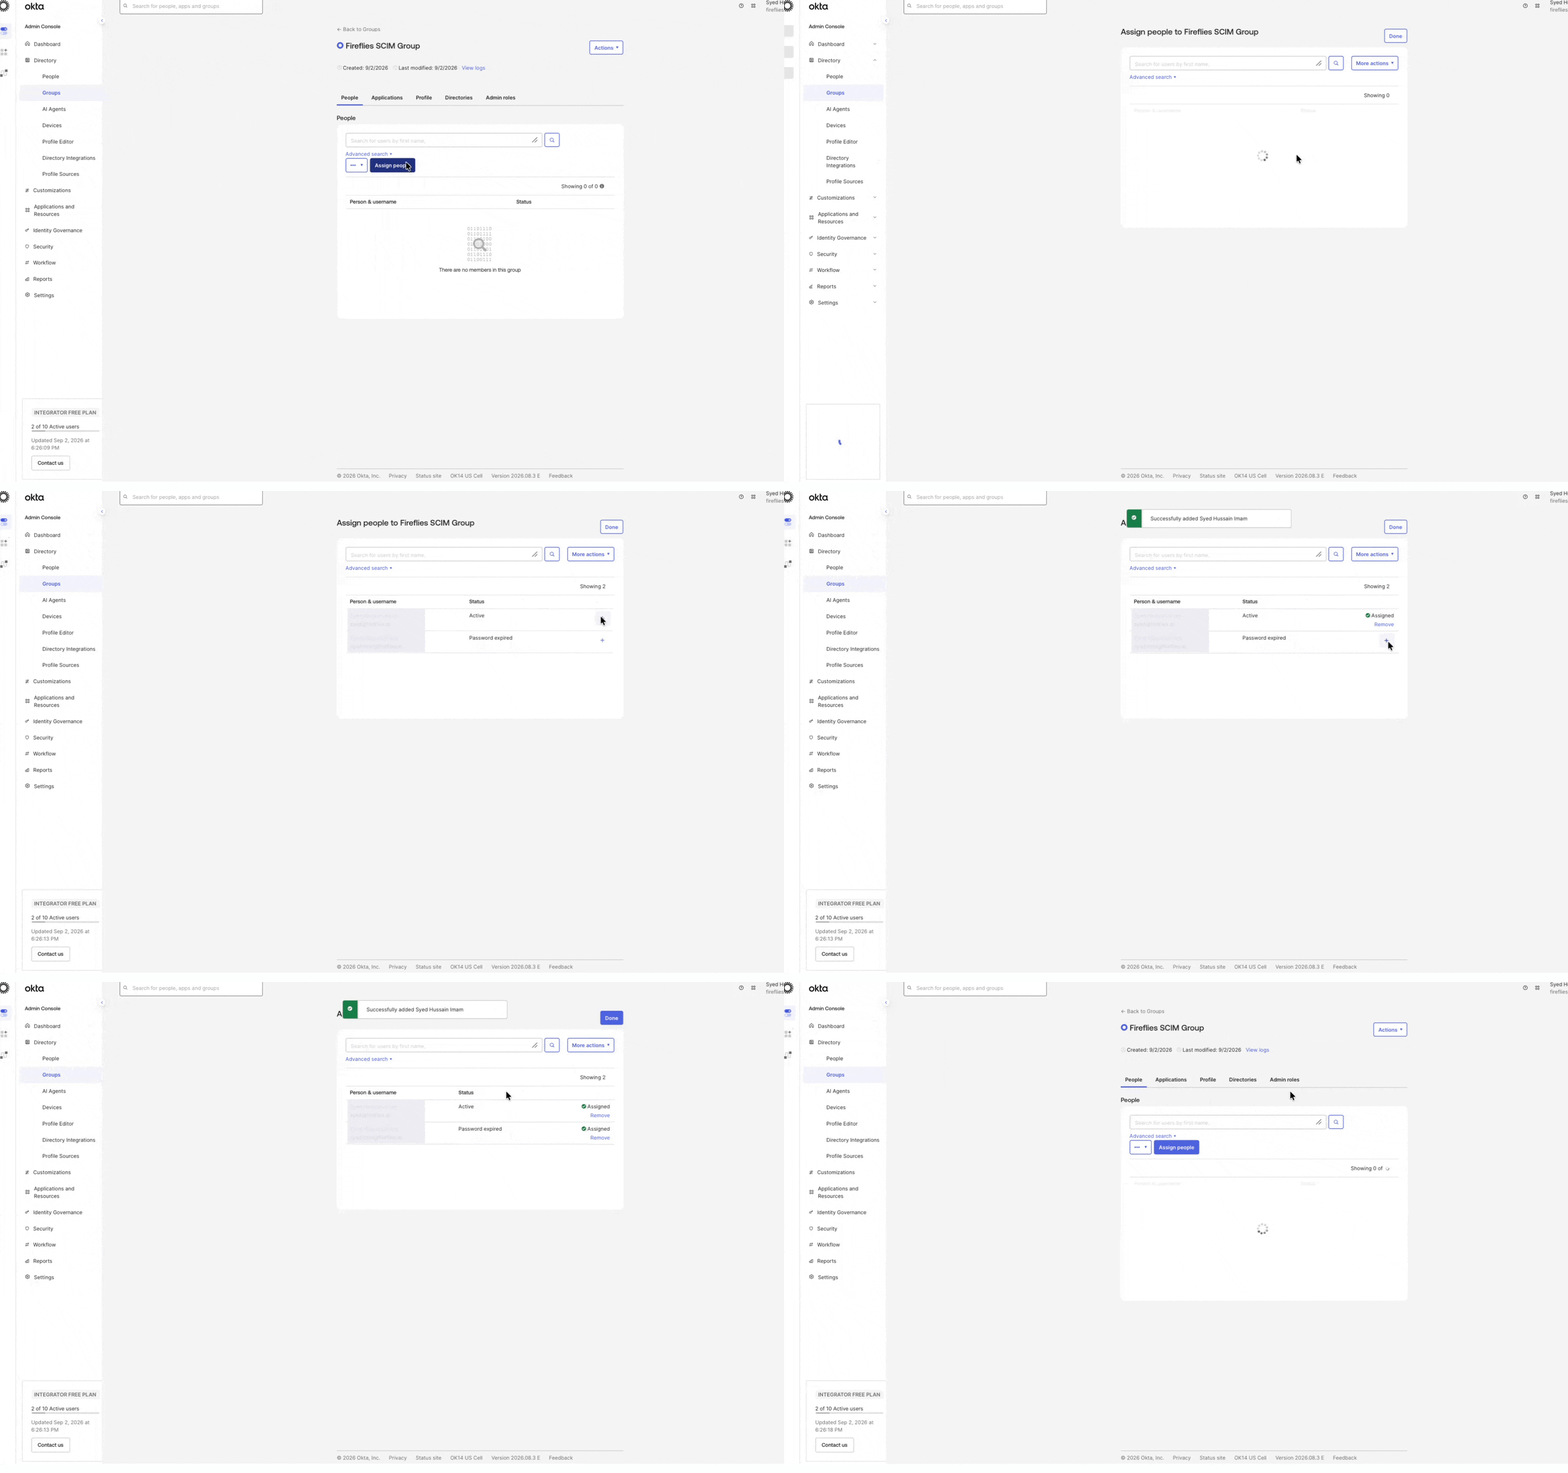
Step 8: Under the People tab, click Assign people.
Step 9: Select the users you want to add to the group by clicking the + icon next to each user, then click Done.
🚀 Push the User Group to Fireflies
After creating the group and adding users, push the group from Okta to Fireflies through the SCIM configuration.
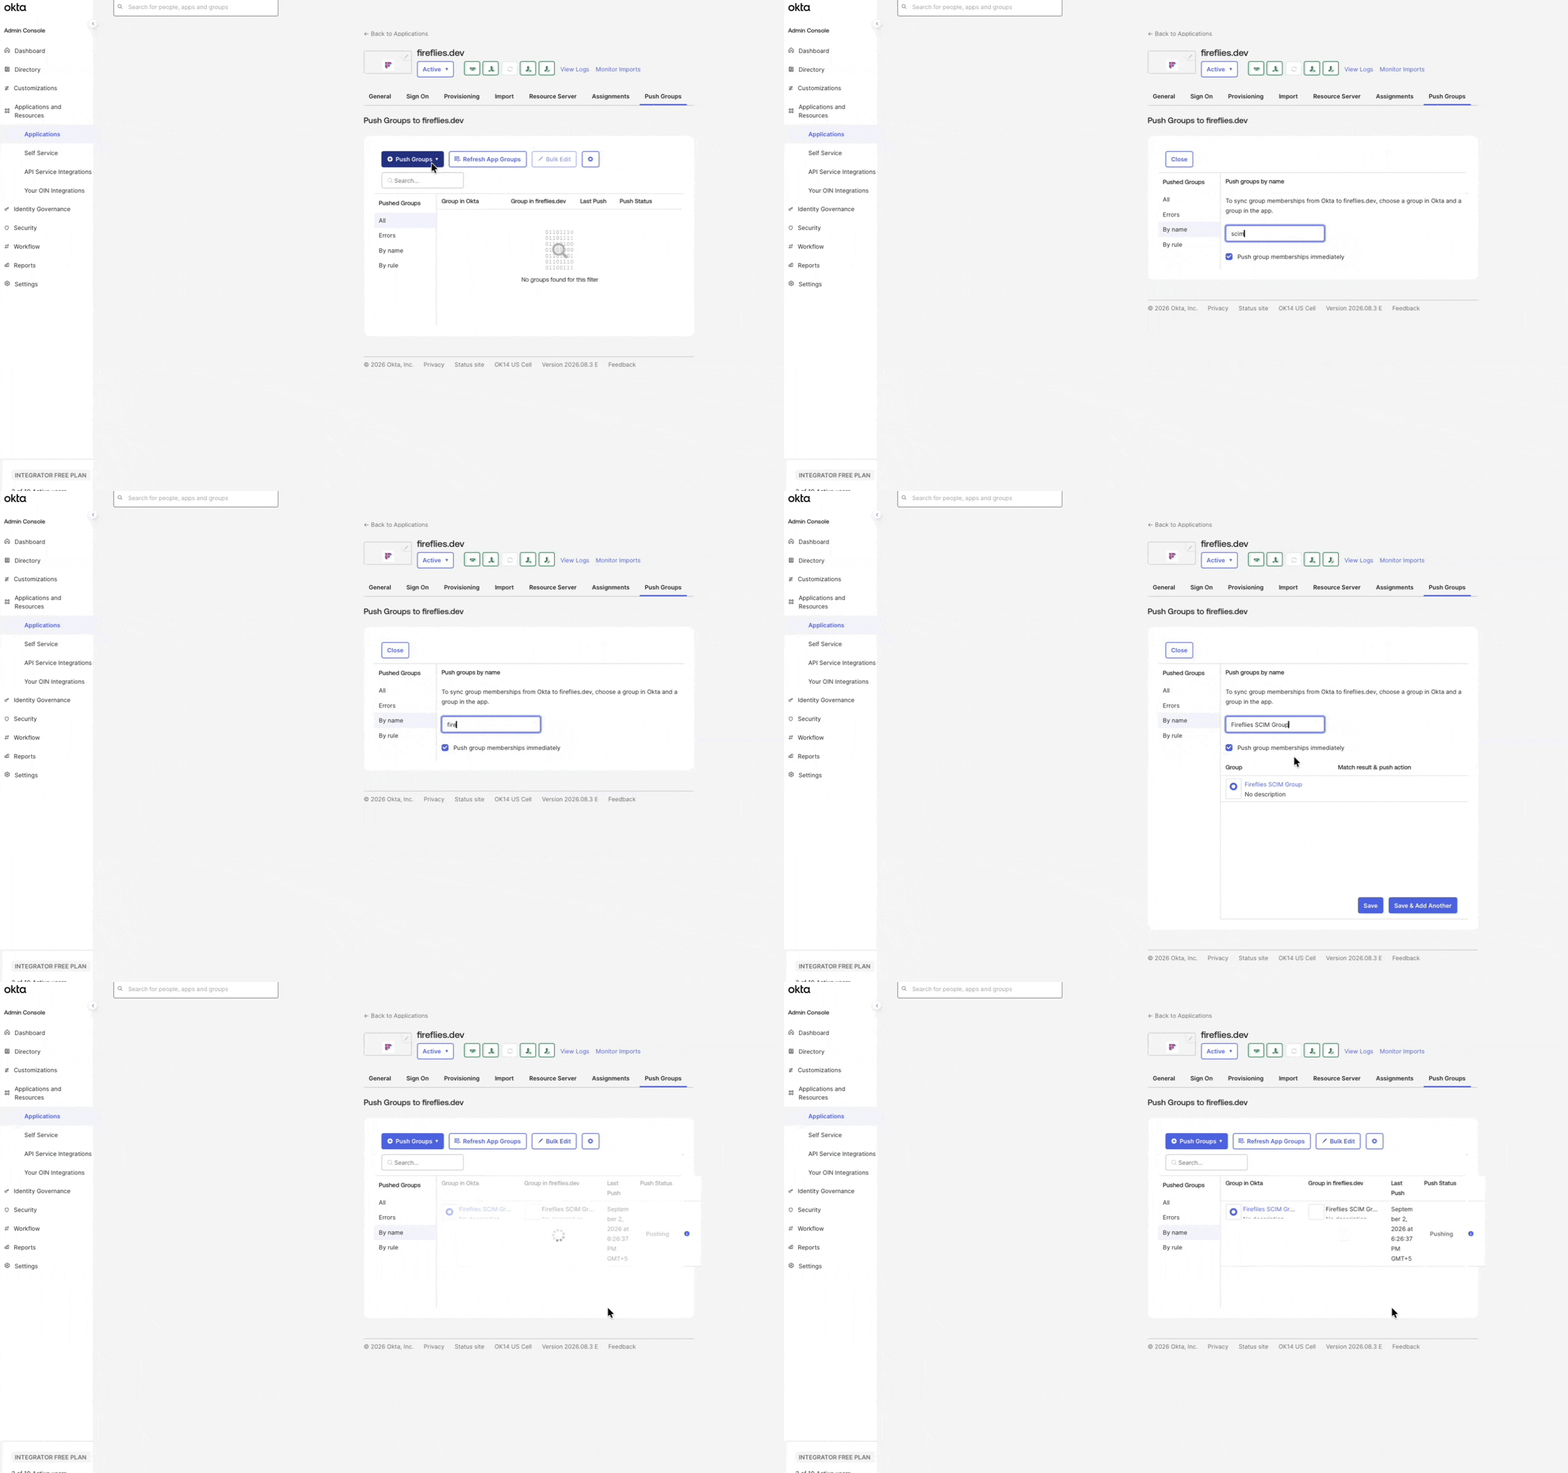
Step 10: In the Okta Admin Console, go to Applications and open the Fireflies application.
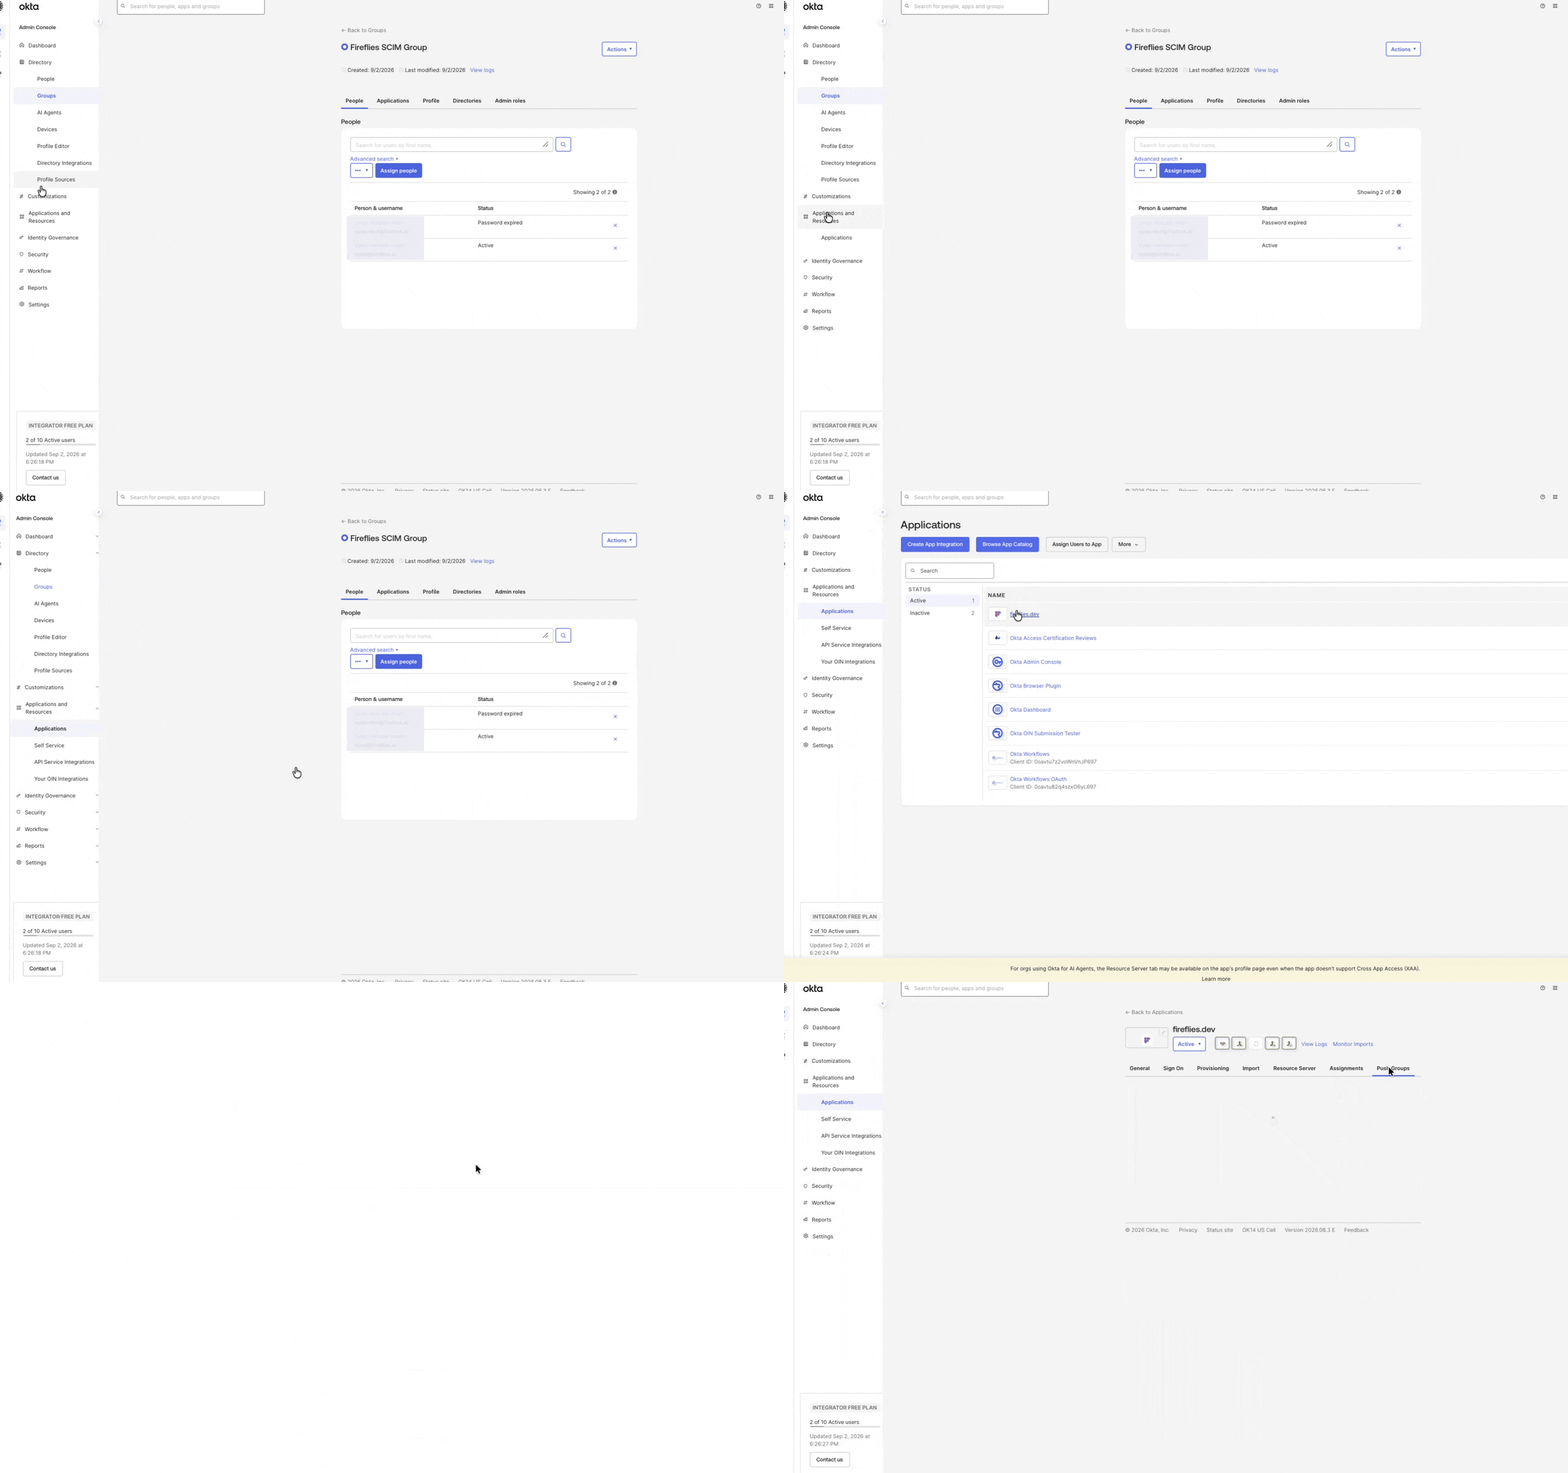
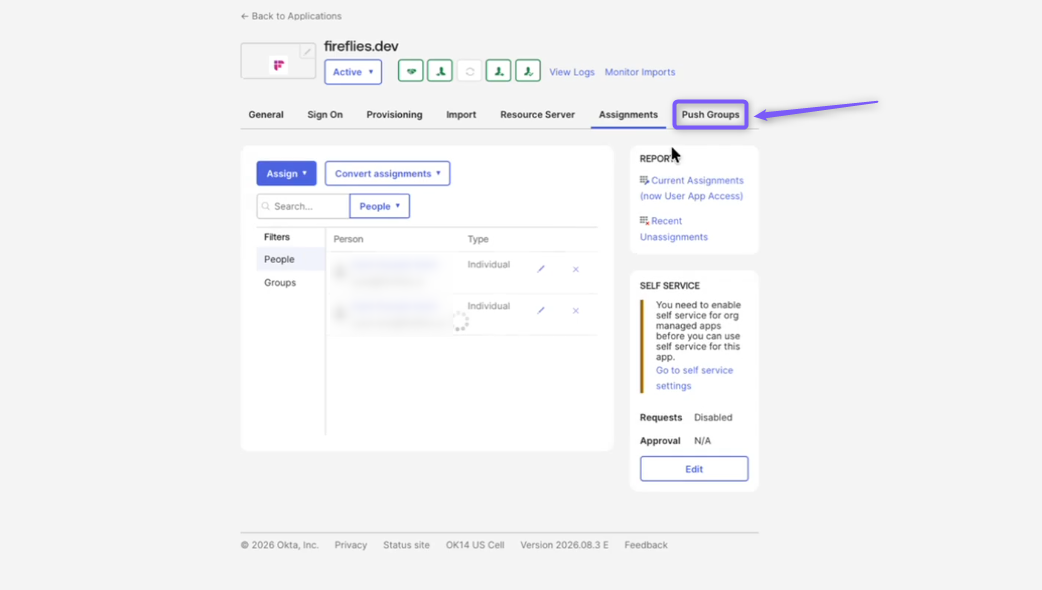
Step 11: You'll see a new Push Groups tab. Click it.
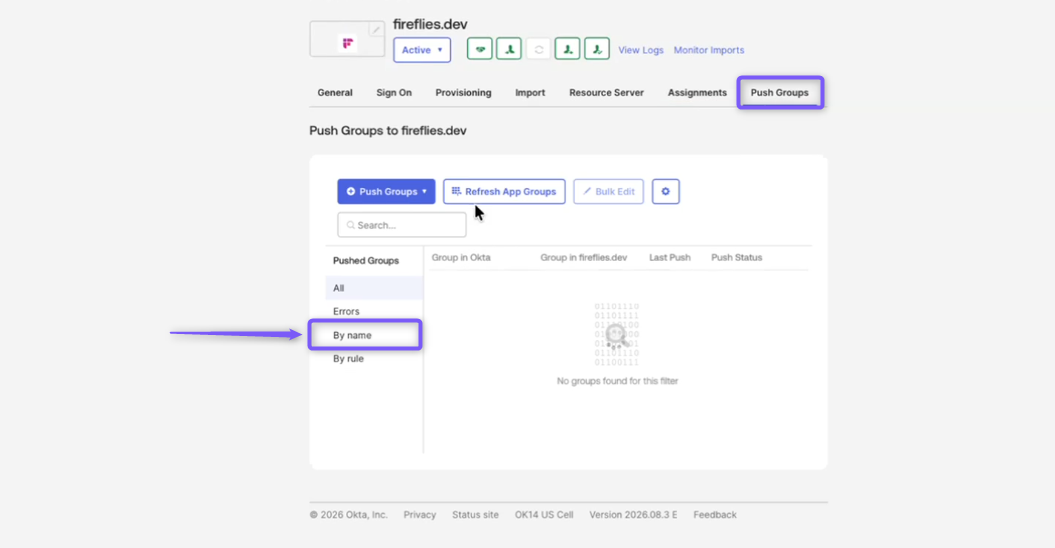
Step 12: Under Pushed Groups, select By name.
Step 13: Enter the name of the group you created, select the group, then click Save.
✅ Verify the User Group in Fireflies
After pushing the group from Okta, verify that the group and its members have been synchronized with Fireflies.
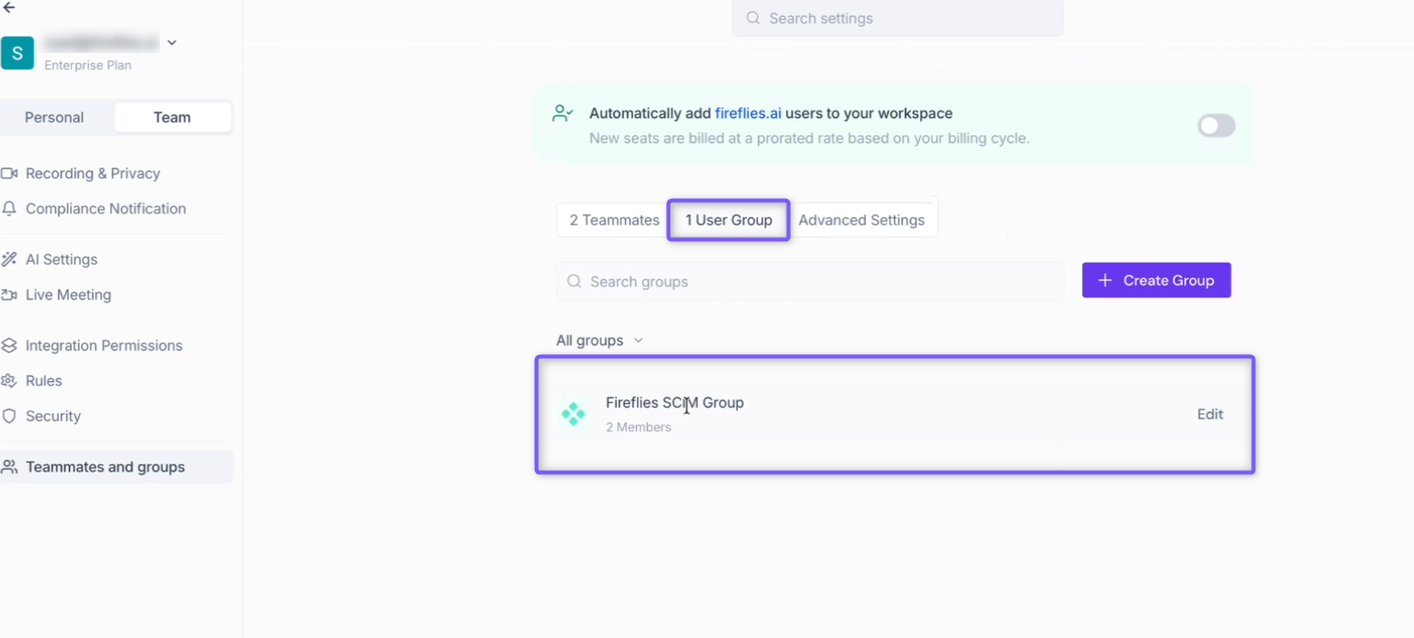
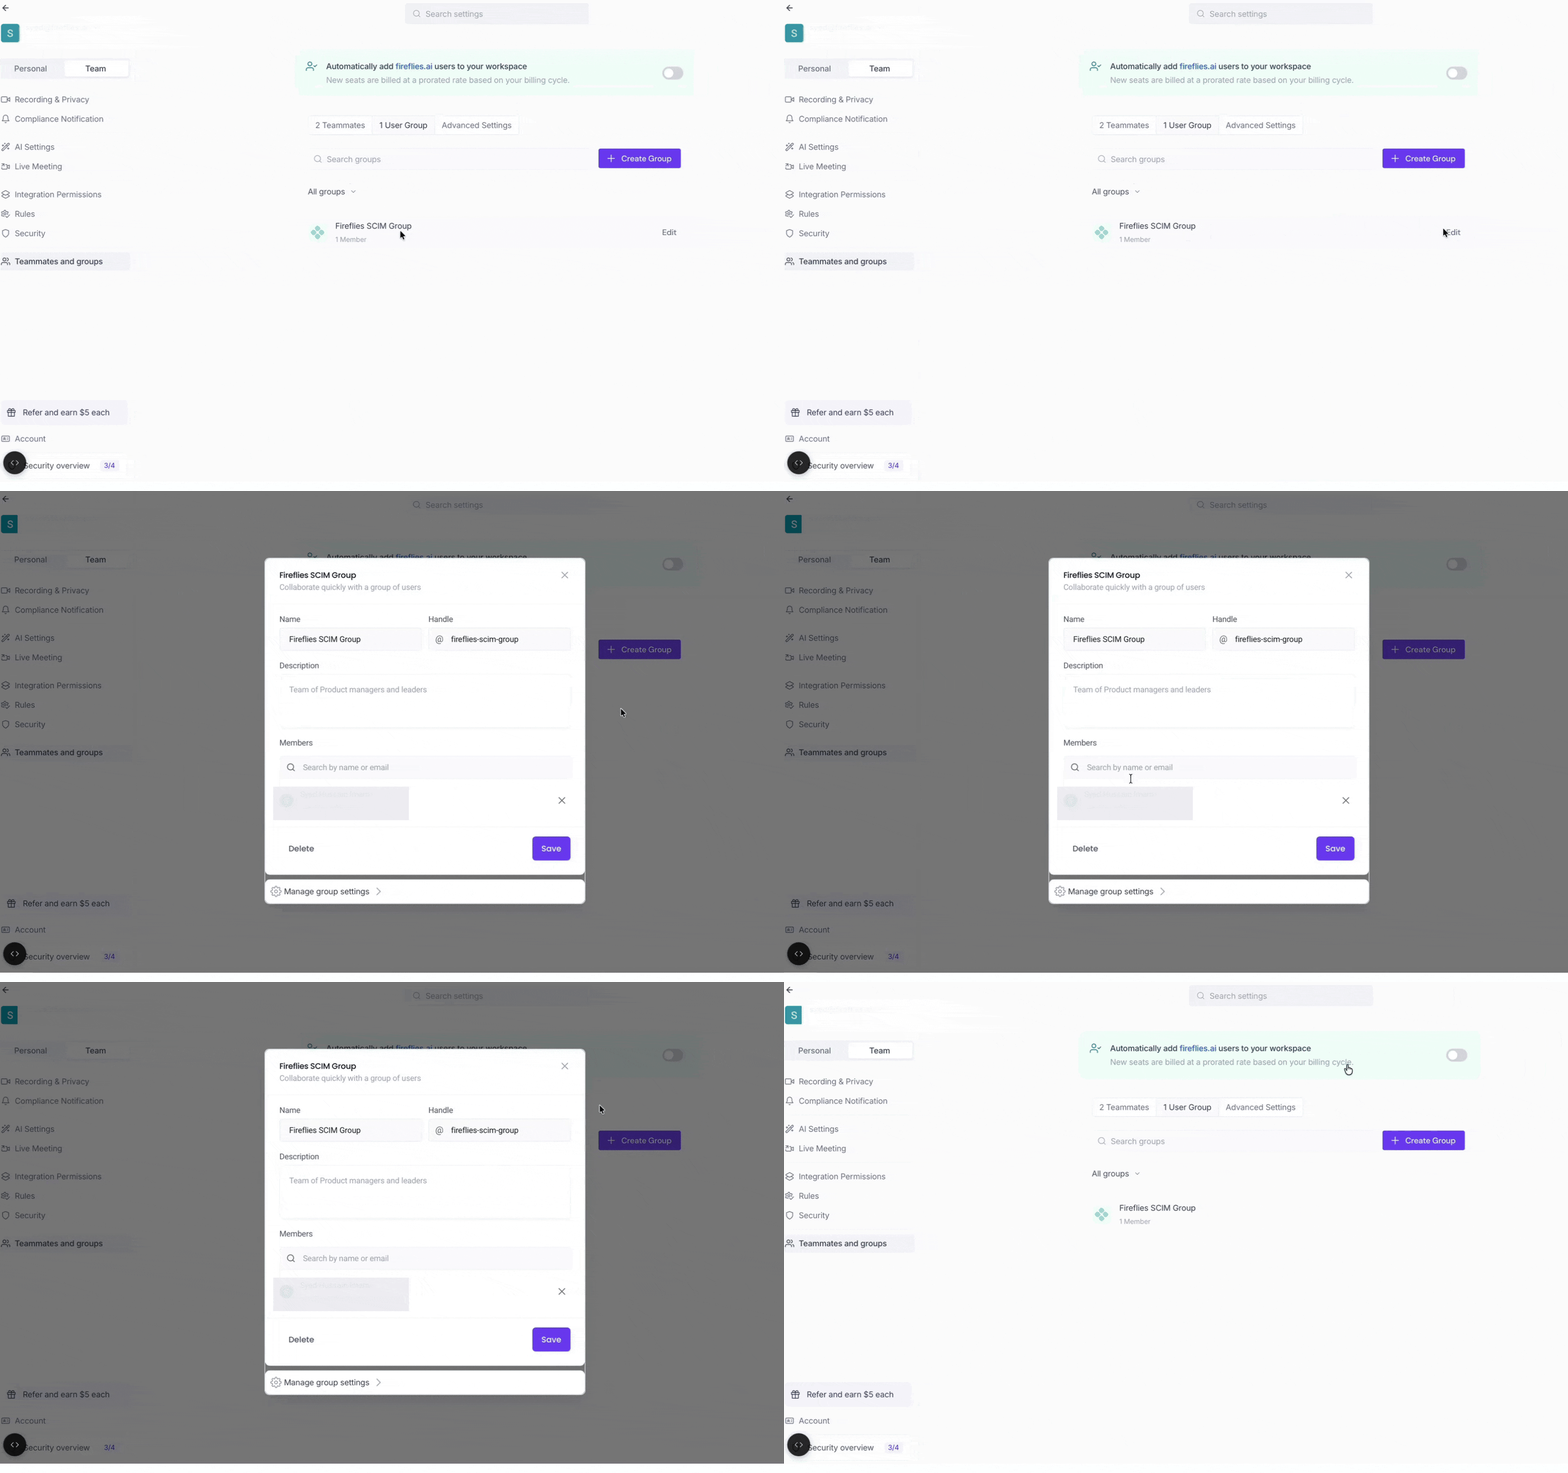
Step 14: Open your Fireflies workspace, click Settings (Team tab), then select Teammates and groups > User Groups.
If you don't see the group, refresh the page to see the newly synchronized group.
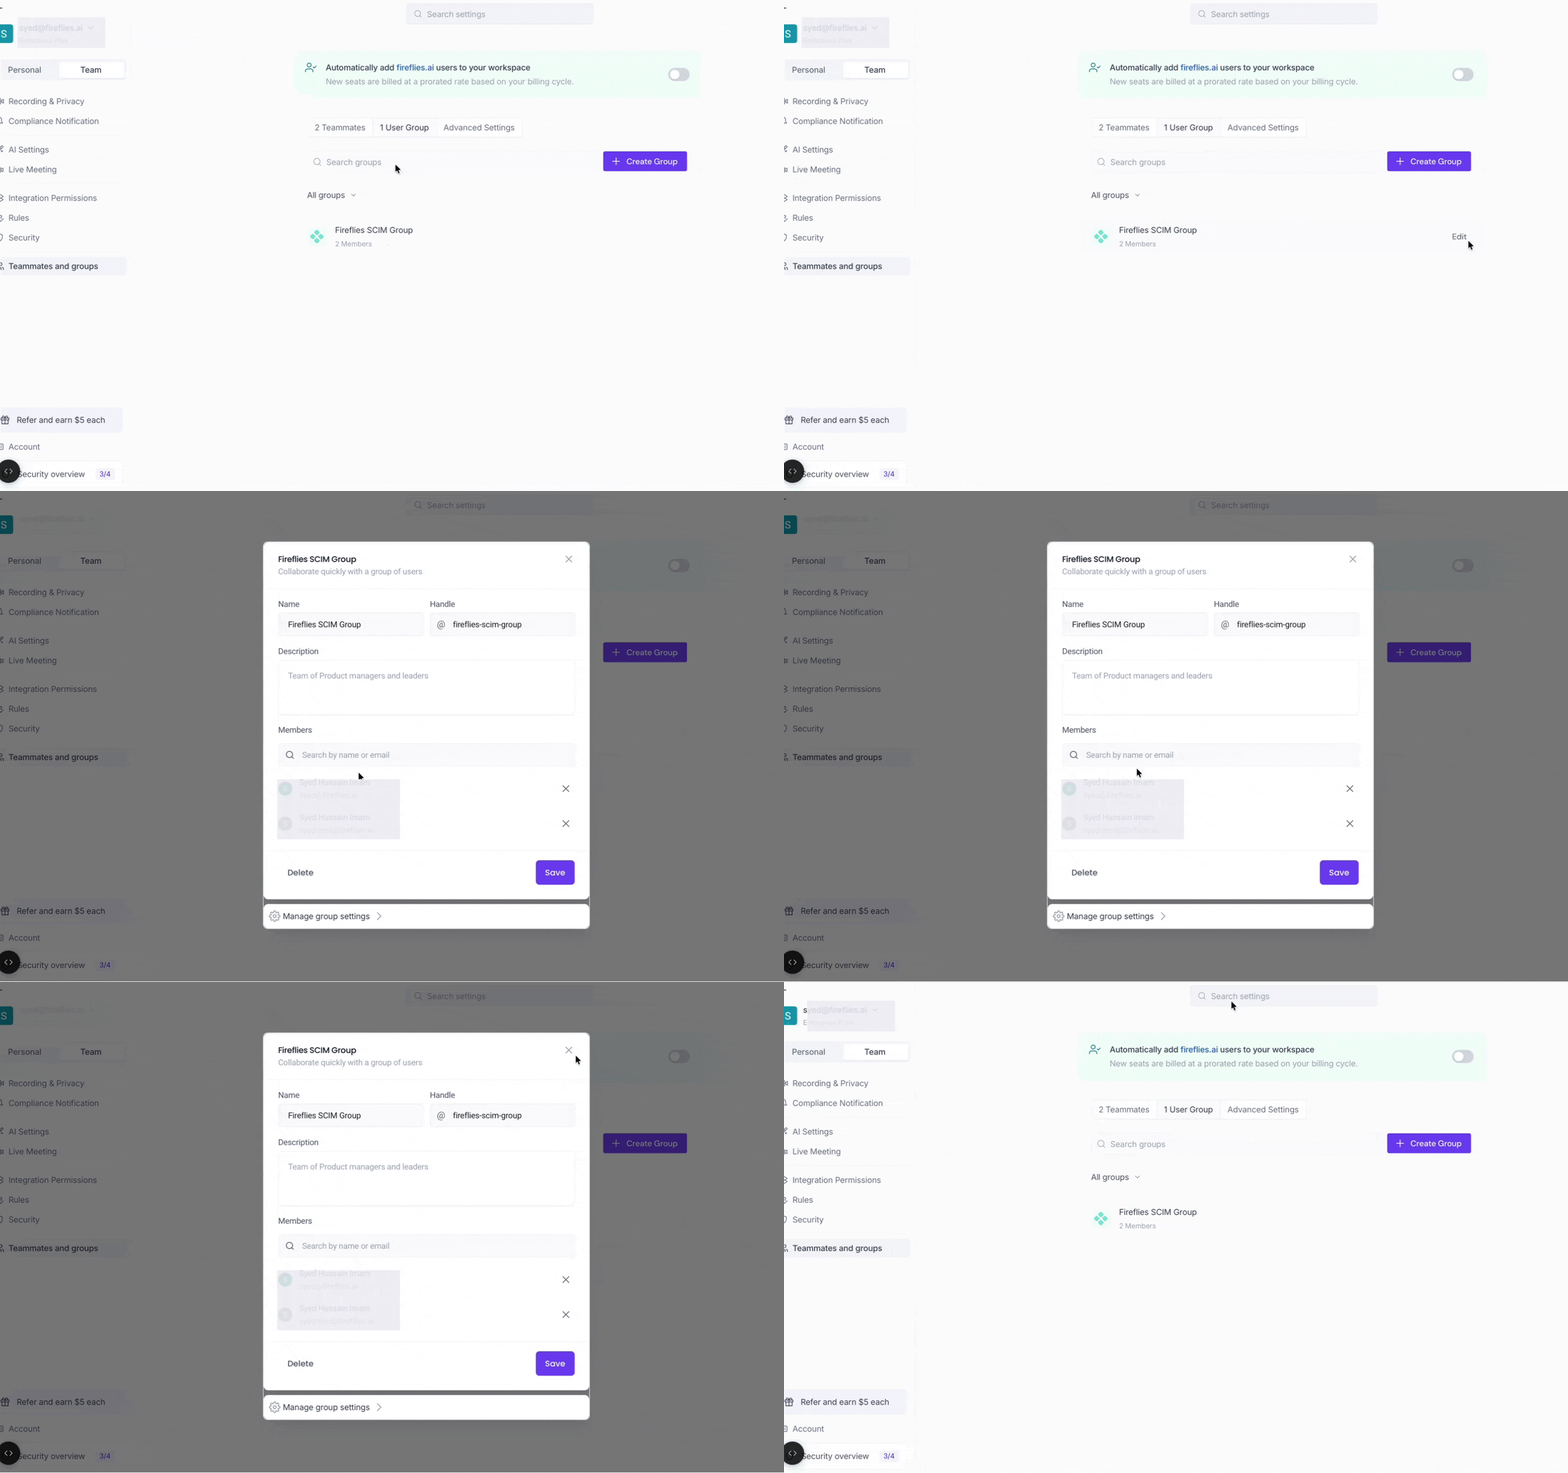
Step 15: To view the synchronized group members, hover over the group and click Edit. You’ll see all the members you added to the group in Okta.
🔄 Add or Remove Users from a Group
When you add or remove users from the group in Okta, the changes are synchronized with Fireflies through SCIM.
Step 16: In the Okta Admin Console, go to Directory > Groups and open the synchronized group.
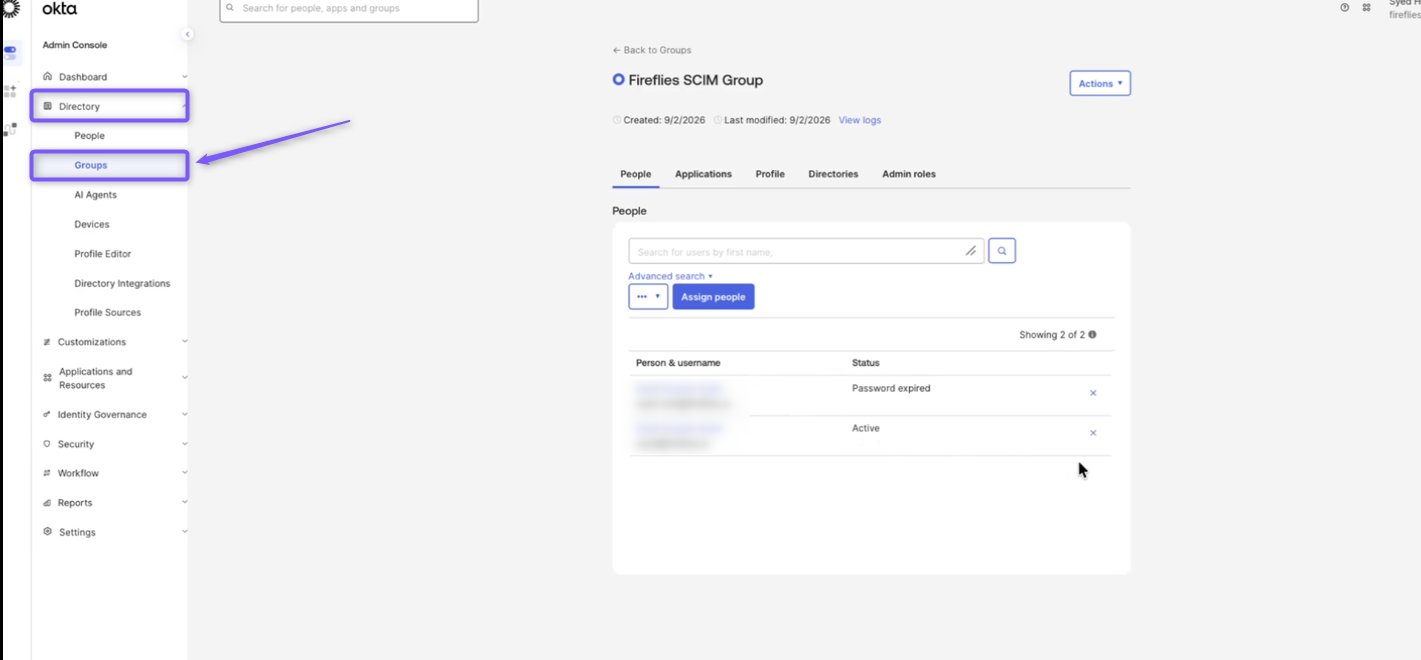
Step 17: Under the People tab, add or remove users from the group as needed.
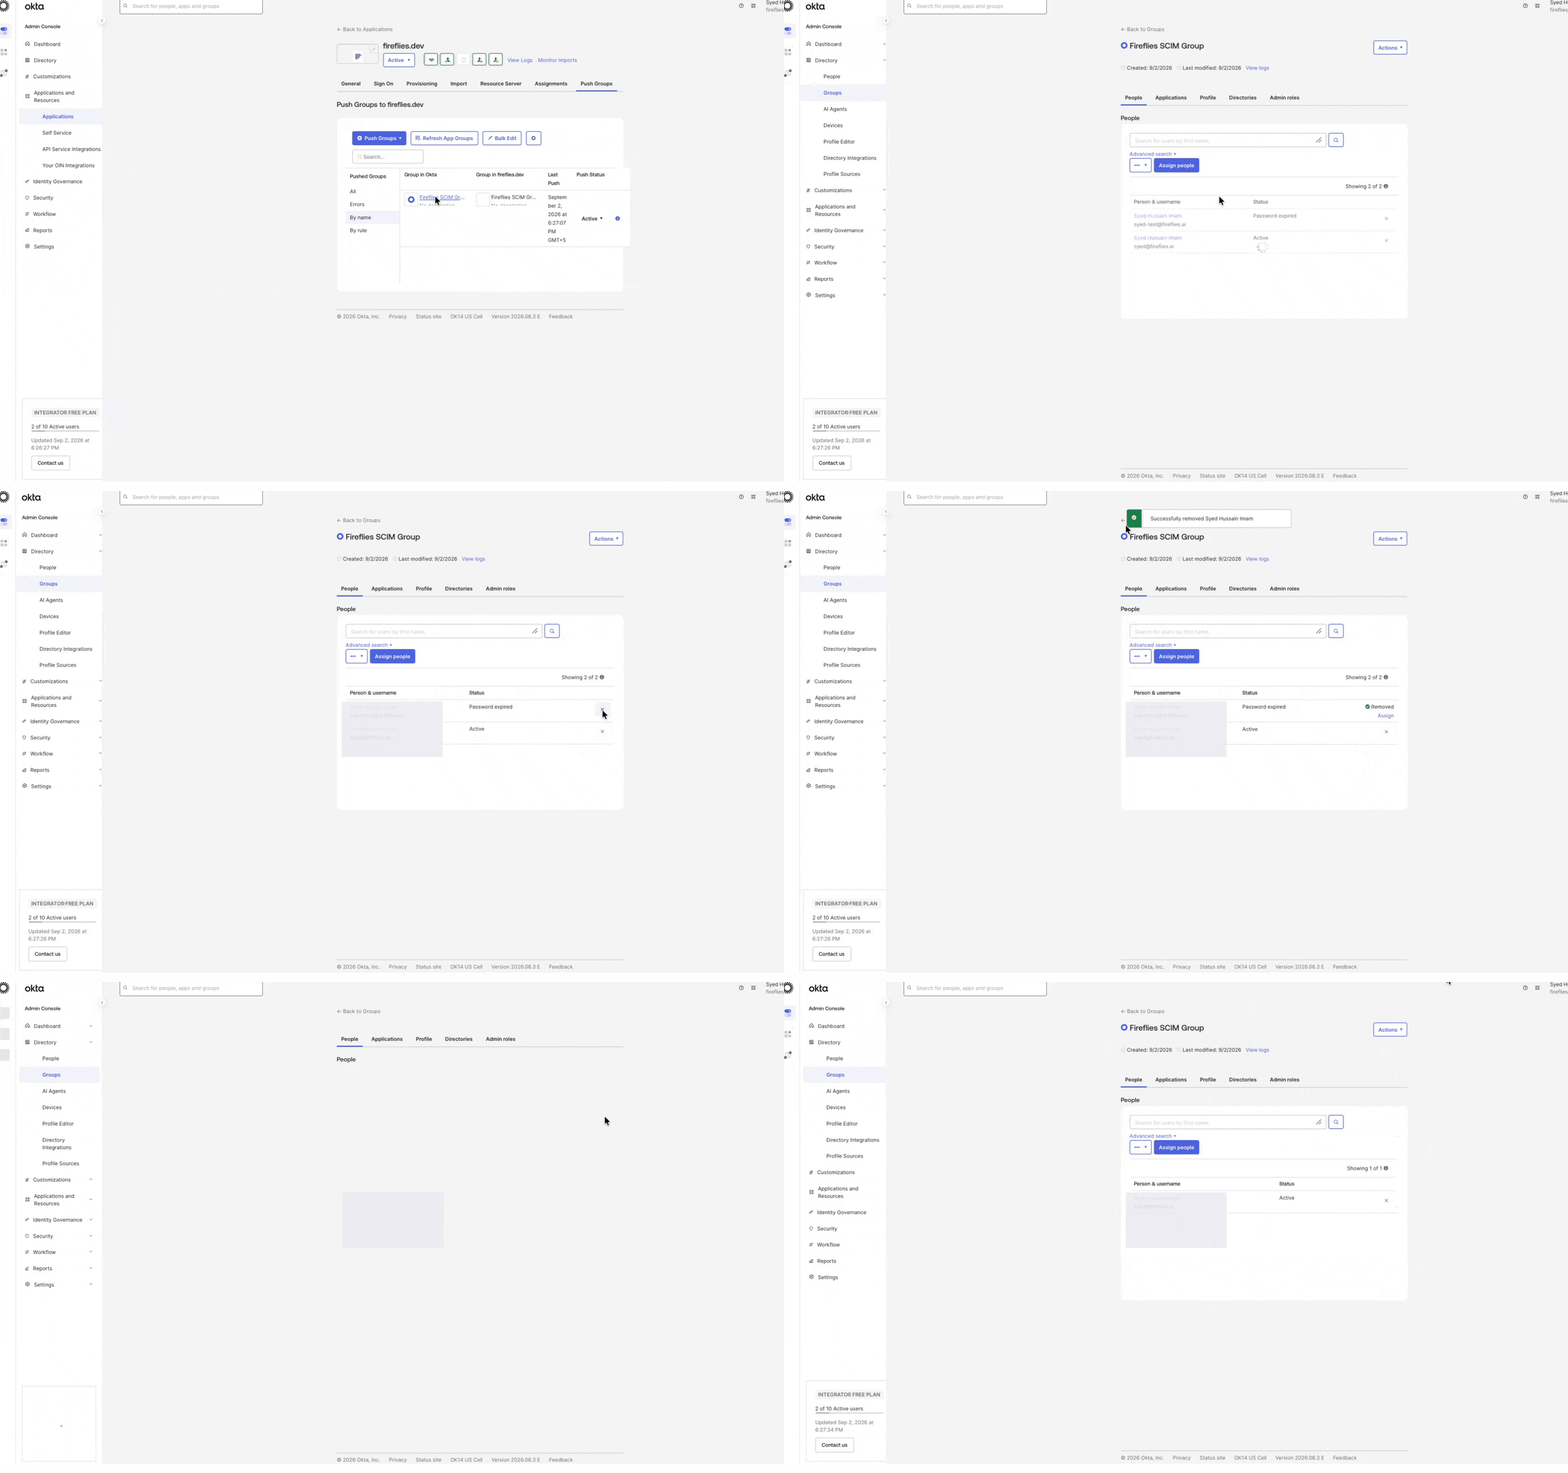
Step 18: Return to your Fireflies workspace, refresh the page, then go to Settings > Teammates and groups > User Groups.
Step 19: Open the synchronized group and verify that the users you added or removed in Okta are updated in Fireflies.
🗑 Unlink or Delete a User Group
If you no longer want to sync a group with Fireflies, you can unlink the pushed group from the SCIM configuration.
Step 20: In the Okta Admin Console, go to Applications and open the Fireflies application.
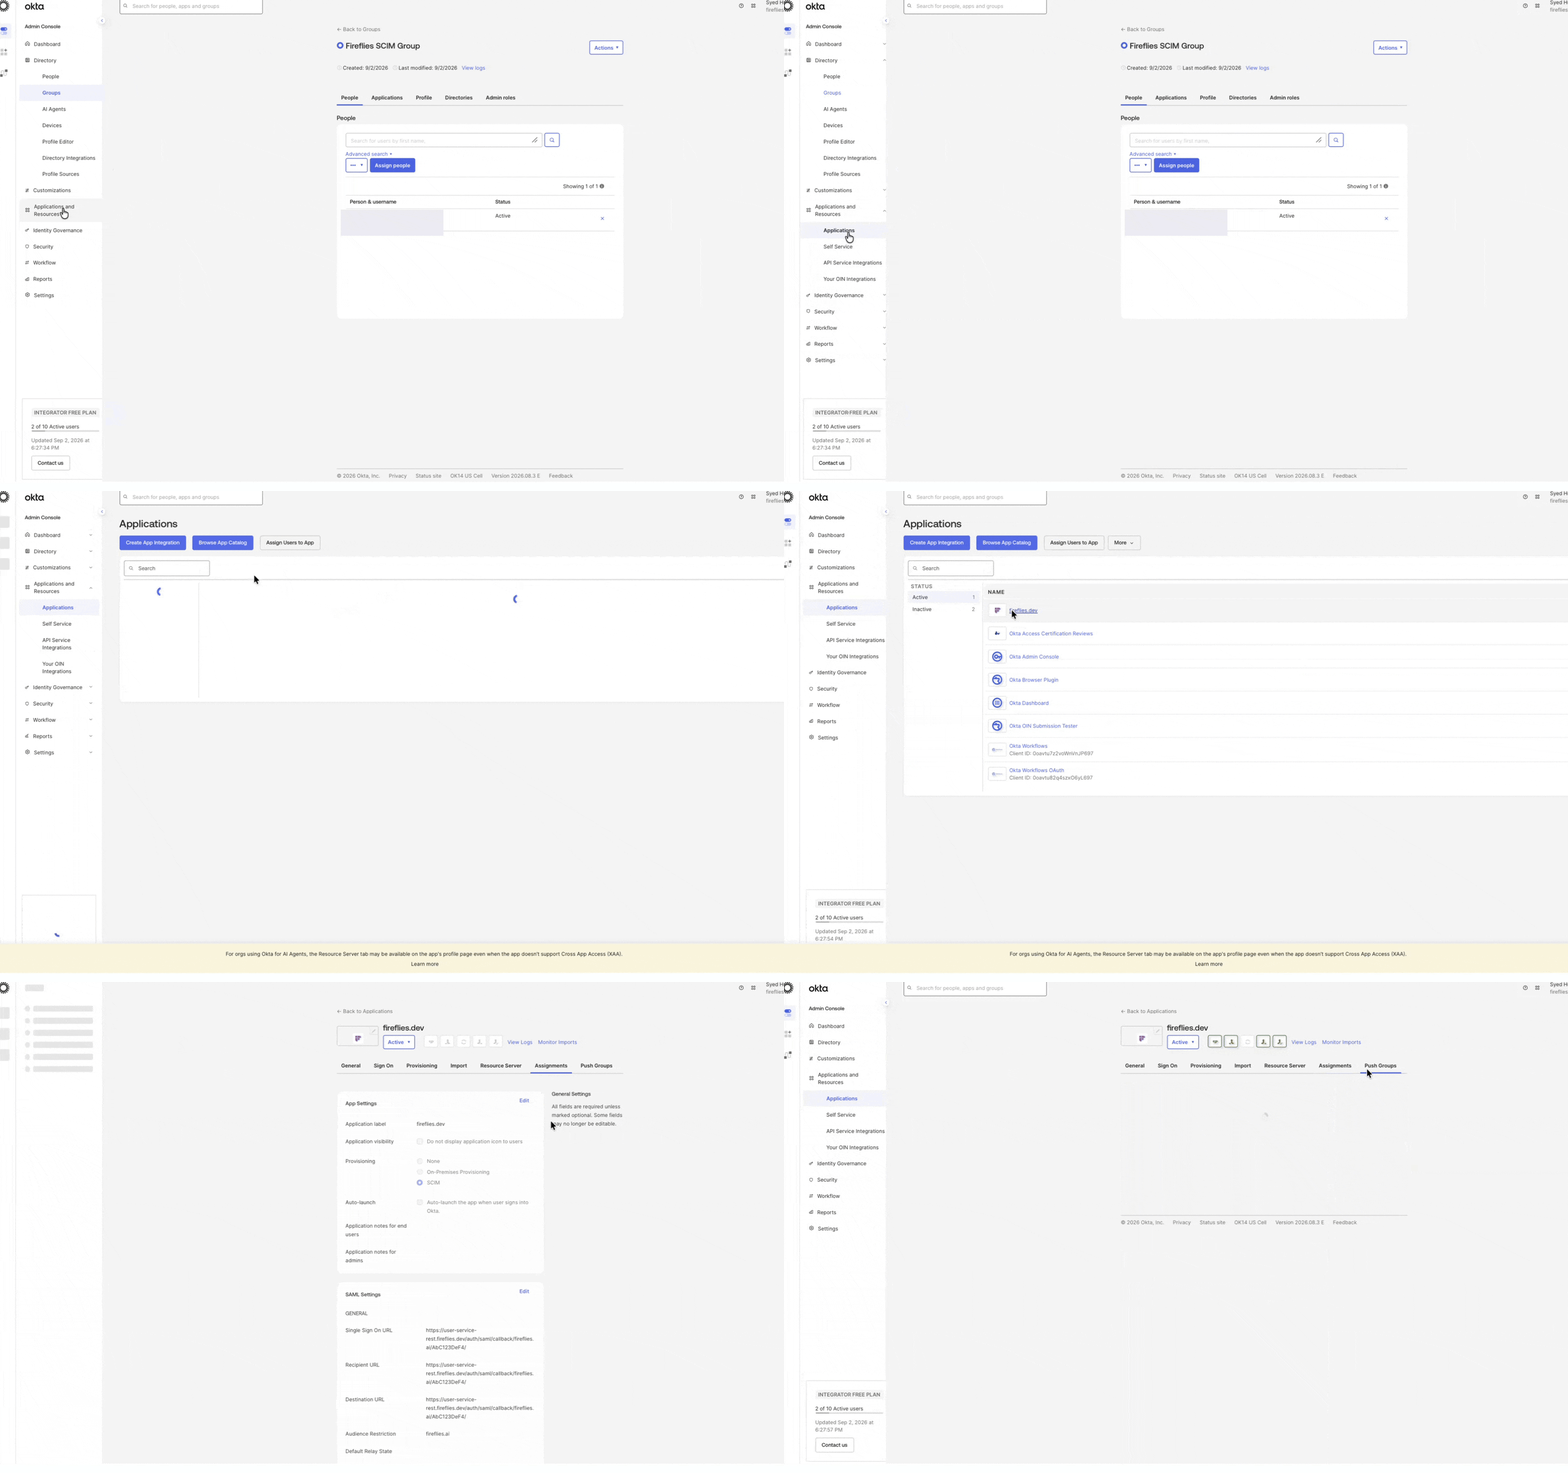
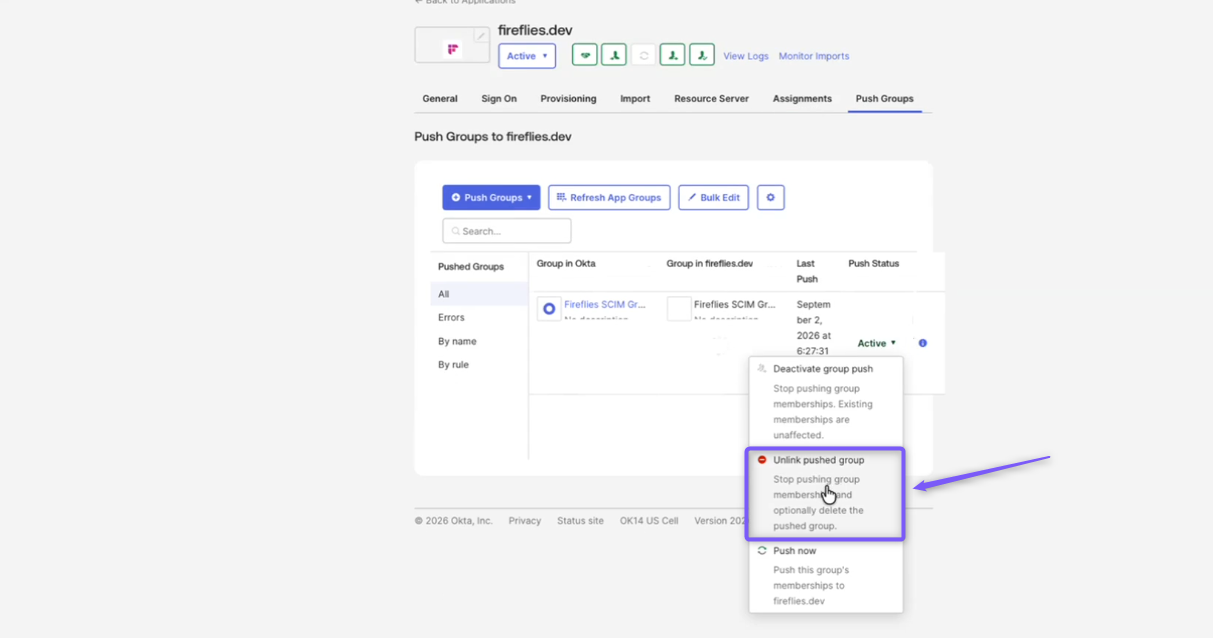
Step 21: Under the Push Groups tab, click the status dropdown next to the group you want to remove.
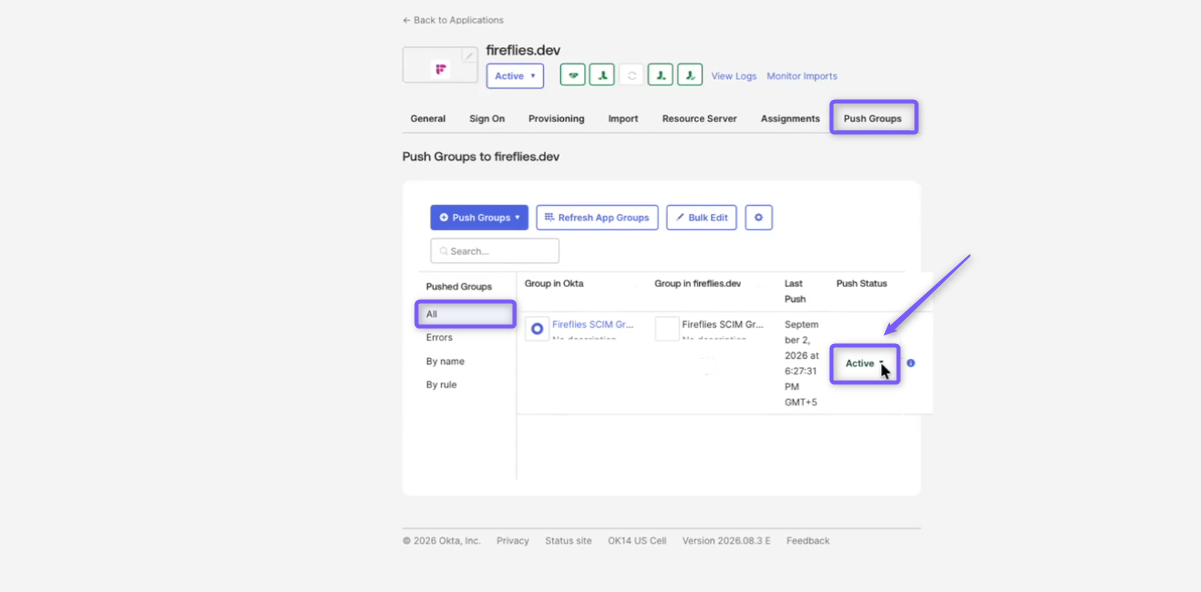
Step 22: Select Unlink pushed group.
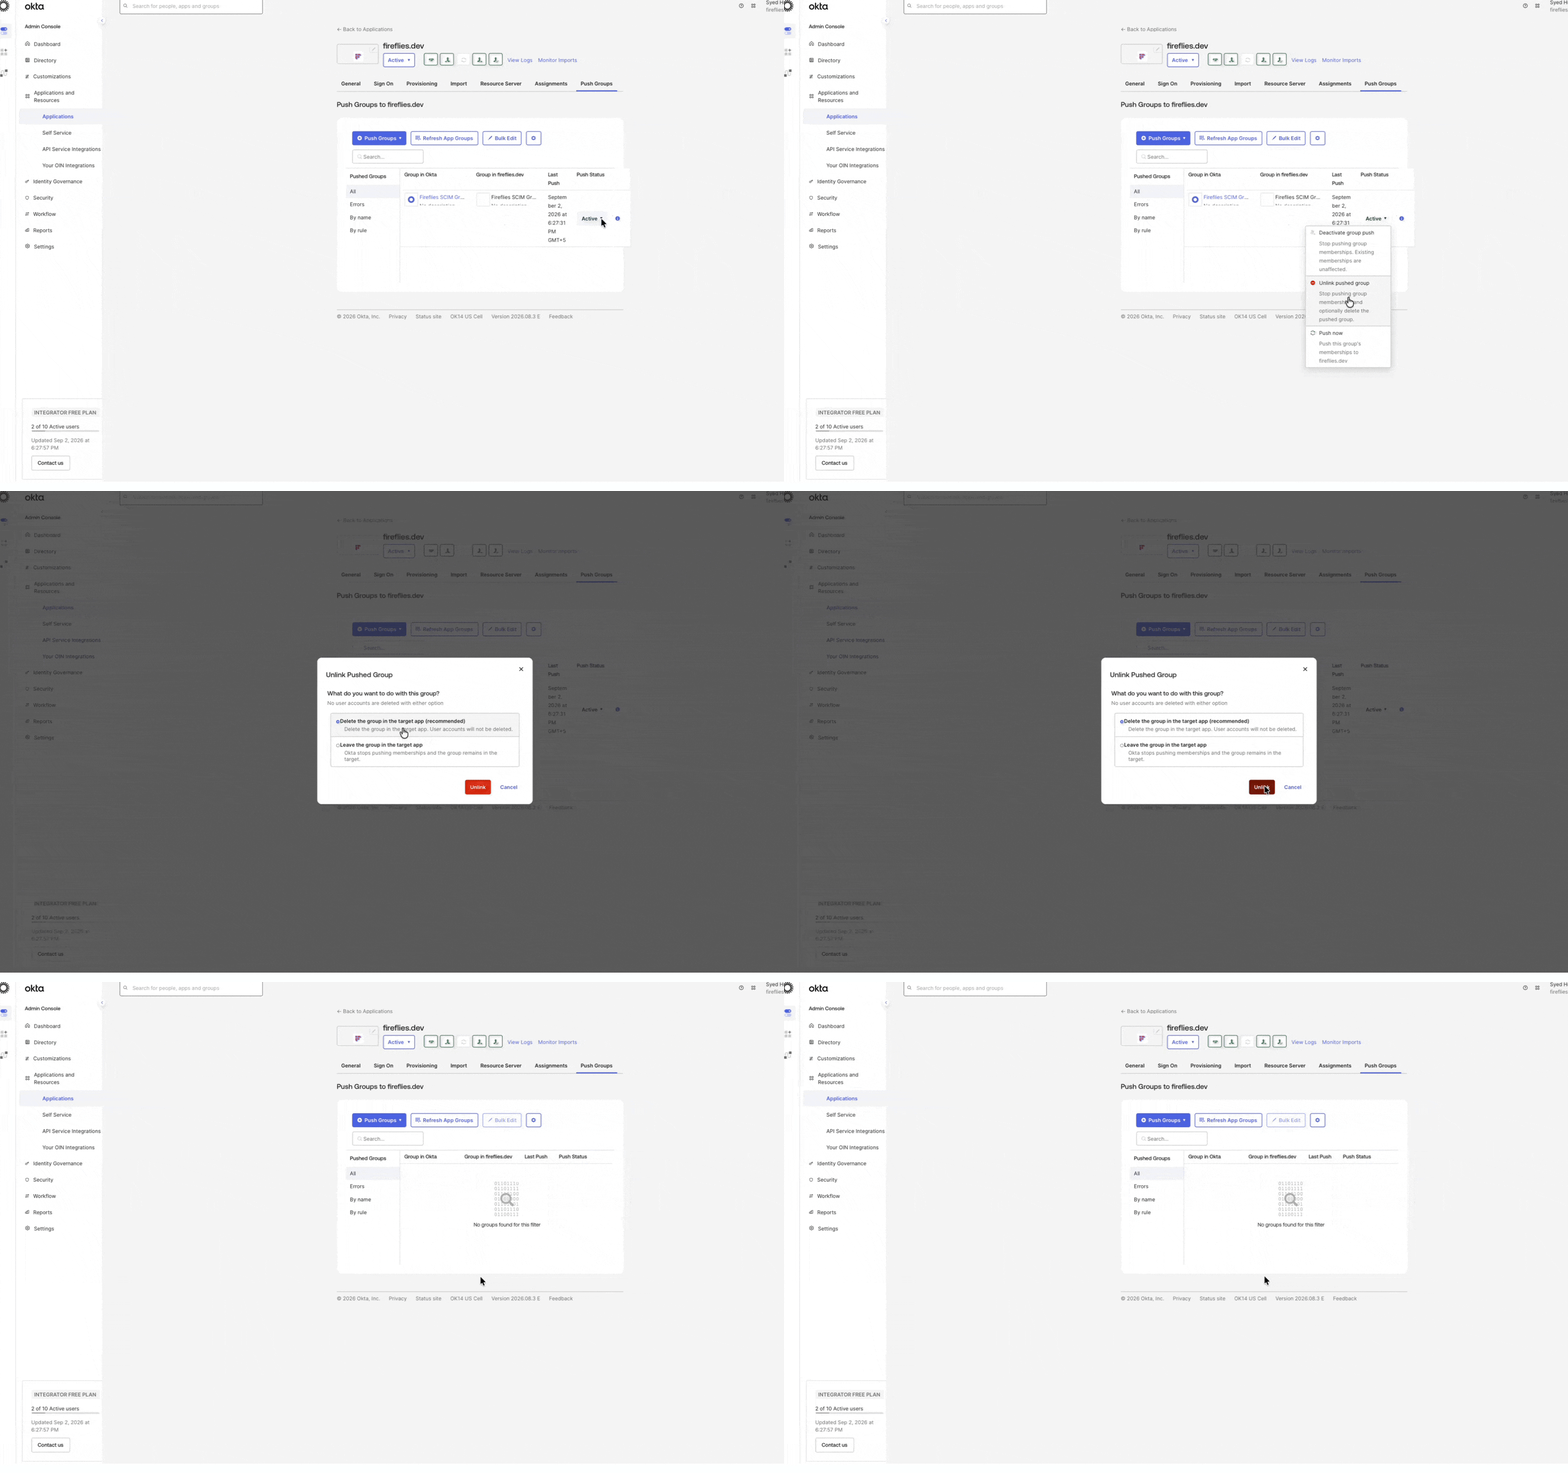
Step 23: A modal window apperrs, select Delete the group in the target app or Leave the group in the target app, depending on whether you want to delete or keep the group in Fireflies. Then click Unlink.
Note: Selecting Delete the group in the target app removes the group from Fireflies, but does not delete the user accounts. Select Leave the group in the target app if you want to keep the group in Fireflies after unlinking it.
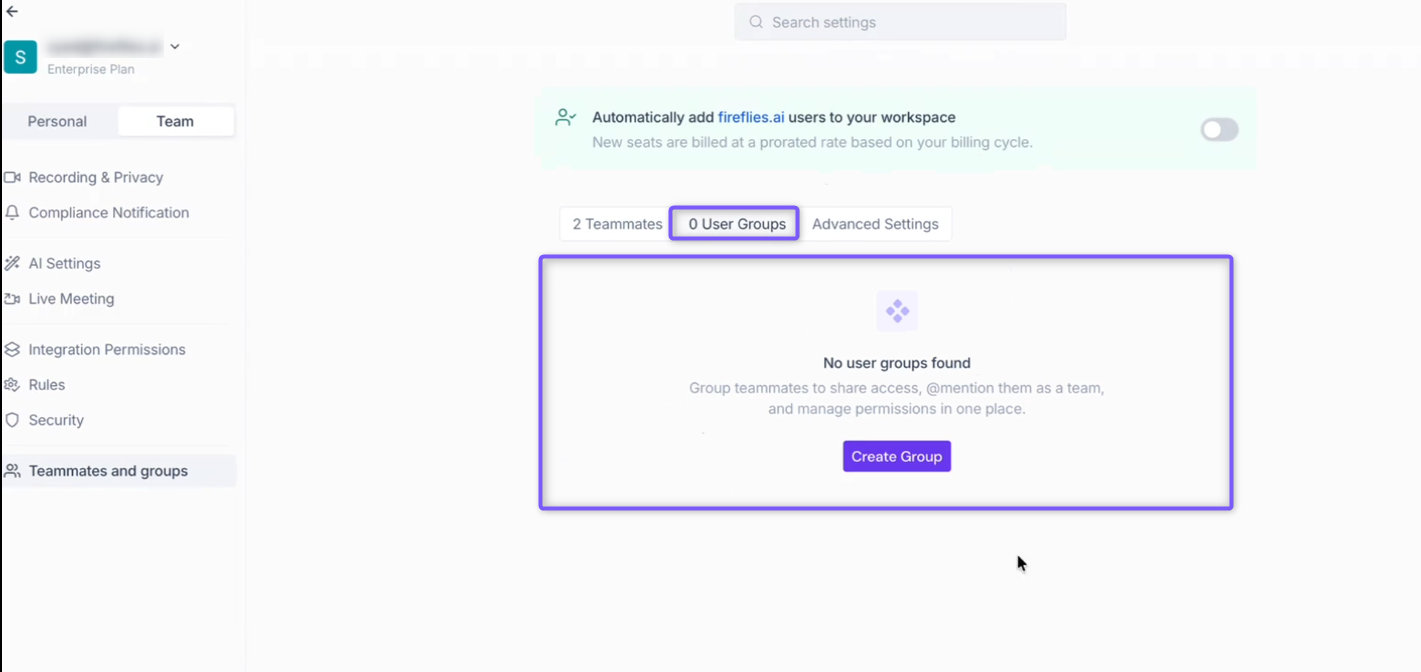
Step 24: Return to your Fireflies workspace and go to Settings > Team tab> Teammates and groups > User Groups. Refresh the page. If the group no longer appears, it has been successfully unlinked or deleted.
🎉 You're All Set!
You've successfully configured SCIM-based user group management for Fireflies. Going forward, you can manage group membership from Okta and keep your Fireflies user groups synchronized automatically.
📌 Related Guides
How to Set Up Automatic User Provisioning with SCIM – Configure SCIM provisioning before managing user roles.
Manage User Roles via SCIM – Assign and update Fireflies user roles directly from your Identity Provider.
How to Set Up SSO for Okta – Use Okta's SSO in Fireflies for a streamlined access.
Manage User Groups via SCIM with Microsoft Entra ID – Create and manage Fireflies user groups directly from your Entra ID.
Set Up SAML SSO for Azure AD – Enable SAML SSO with Azure ADD to enhance security and simplify user access.
Set Up SAML SSO for Google Workspace – Enable secure single sign-on with Google Workspace to centralize authentication and simplify user access.