Manage User Roles via SCIM
Last updated: September 3, 2026
Manage Fireflies user roles directly from your Identity Provider (IdP) using SCIM provisioning, eliminating the need to update roles manually in Fireflies. Once configured, changes to supported roles, such as Admin and User, are automatically synchronized with your Fireflies workspace.
In this guide, you'll learn how to:
Configure user role management using your Identity Provider.
Assign Admin or User roles to users.
Update existing user roles and verify that changes are automatically synchronize with Fireflies.
🔑 Prerequisites
Before you begin, make sure you have:
Complete How to Set Up Automatic User Provisioning with SCIM before continuing. This guide assumes SCIM provisioning is already configured.
Administrator access to your identity provider and Fireflies workspace.
⚙ Configure the Fireflies Role Attribute
To synchronize user roles with Fireflies, you must first create a custom role attribute in your Identity Provider. This attribute stores each user's Fireflies role and is synchronized automatically through SCIM.
This guide uses Okta as the example Identity Provider (IdP). If you're using a different IdP, the interface and navigation may vary, but the overall SCIM role management workflow is similar.
Step 1: Sign in to the Okta Admin Console, go to Applications, open the Fireflies application you previously configured for SCIM provisioning.
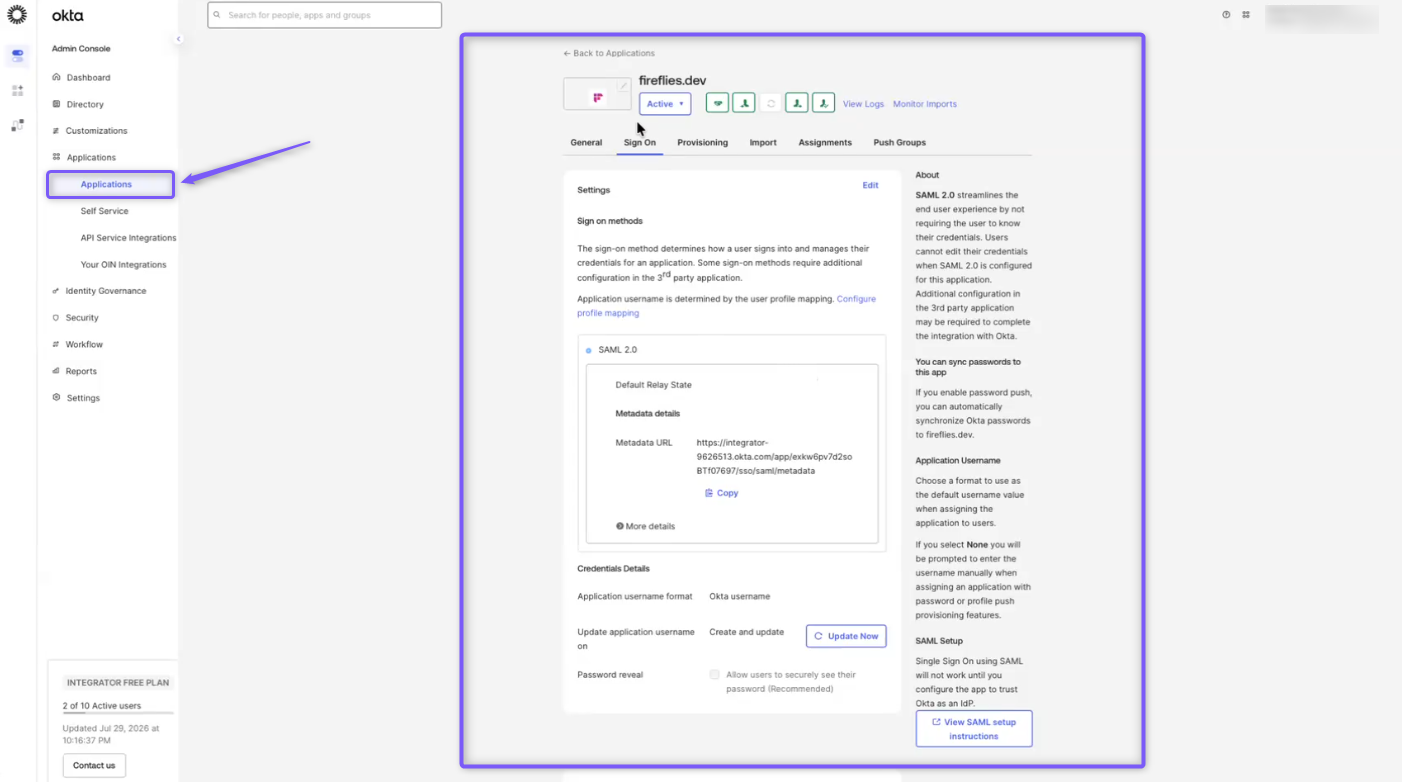
Step 2: Under the Sign On tab, click Configure Profile Mapping to open the Profile Editor.
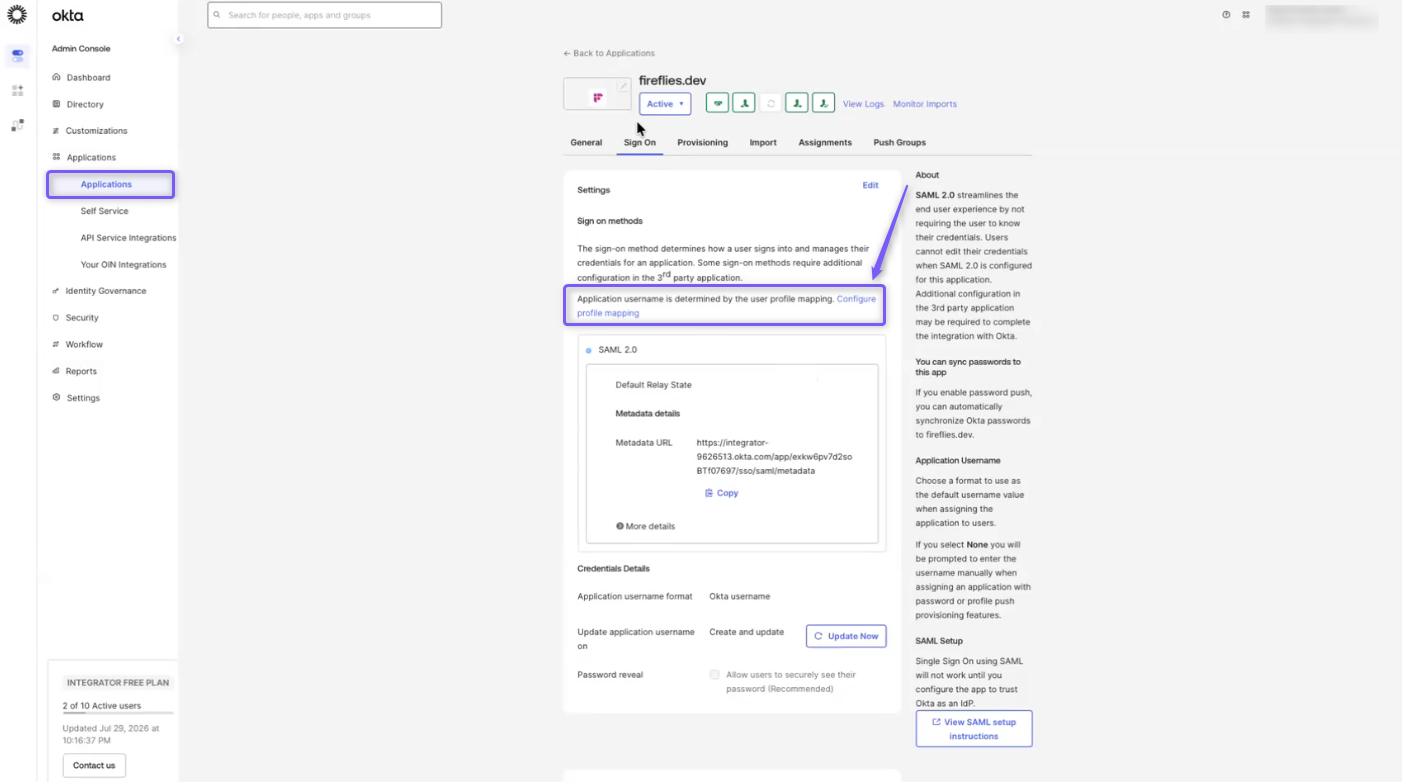
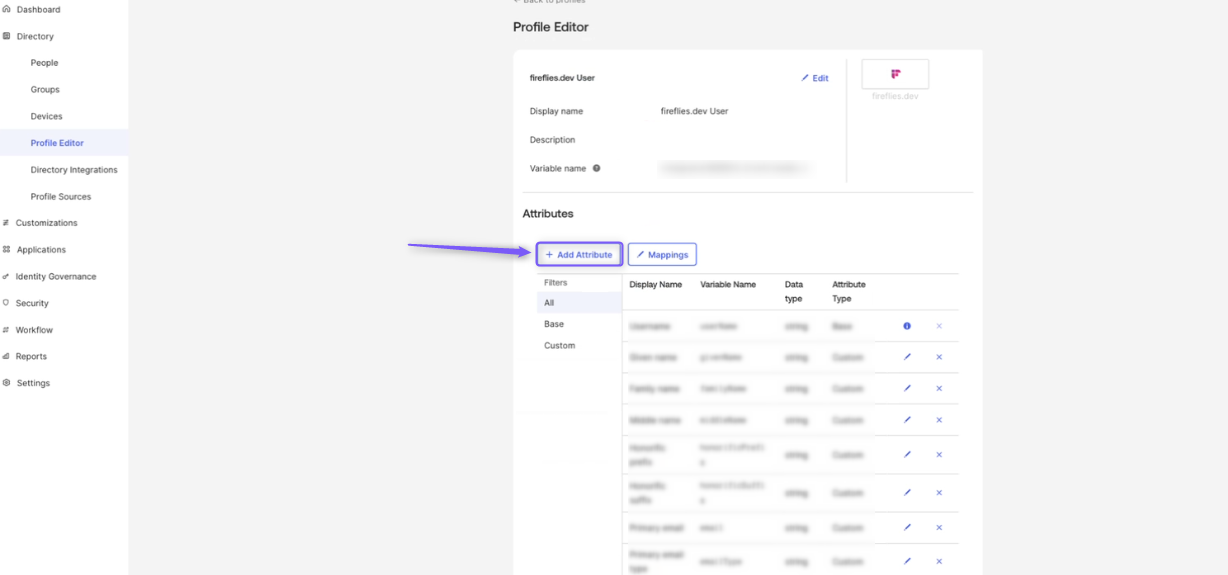
Step 3: On the Profile Editor page, click Add Attribute to create a custom attribute for managing Fireflies user roles.
Step 4: Configure the custom role attribute using the values shown in the table below.
Field | Description | Value |
|---|---|---|
Data type | Specifies the type of data the attribute stores. |
|
Display name | The label displayed for the custom attribute in Okta. |
|
Variable name | The internal name used to reference the attribute. |
|
External name | The attribute name sent to Fireflies during SCIM provisioning. |
|
External namespace | The SCIM namespace used to identify the custom attribute. |
|
Description | An optional description to help identify the purpose of the attribute. |
|
Enum | Restricts the attribute to predefined role values. | Enable Define enumerated list of values |
Attribute members | The supported Fireflies roles that users can be assigned. |
|
Attribute required | Specifies whether the attribute is mandatory. | Leave unchecked |
Attribute type | Determines the profile category where the attribute is stored. |
|
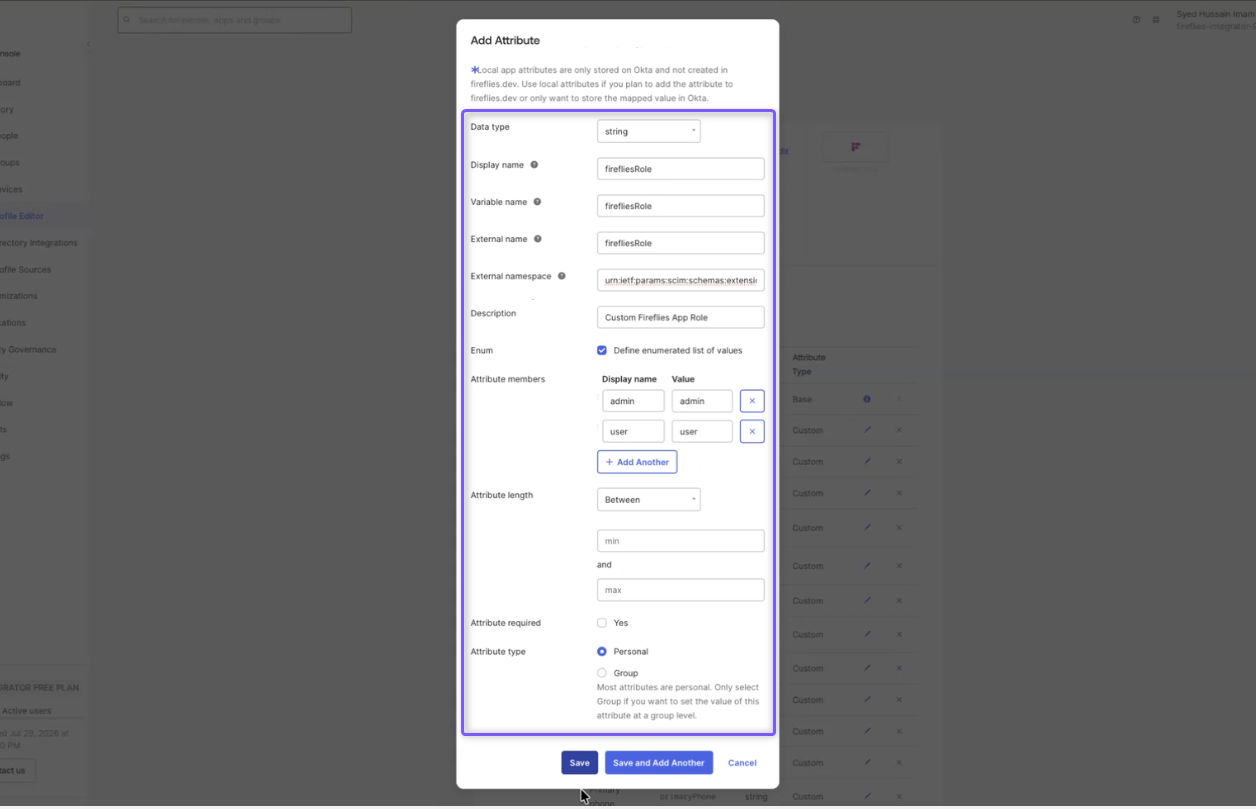
Step 5: Click Save to create the custom role attribute.
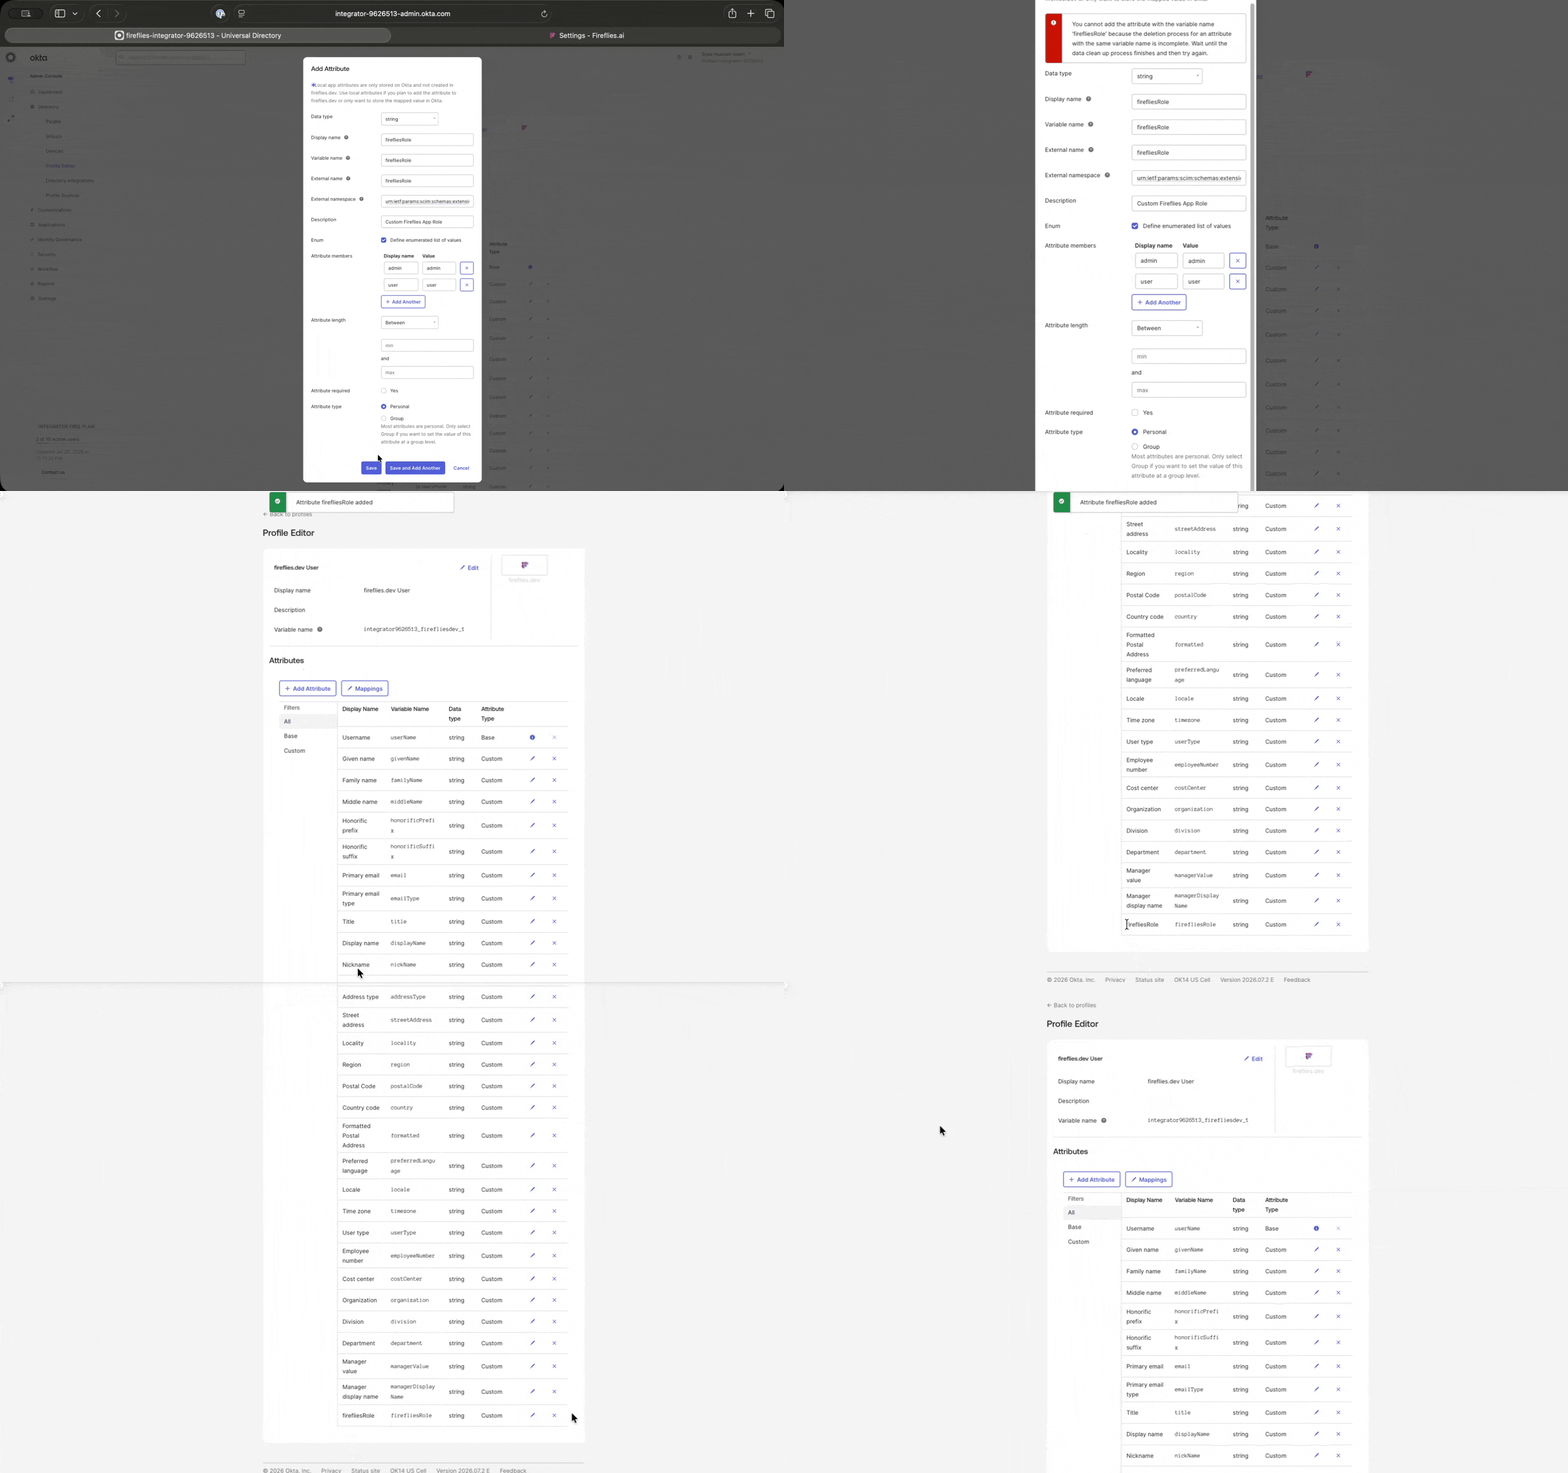
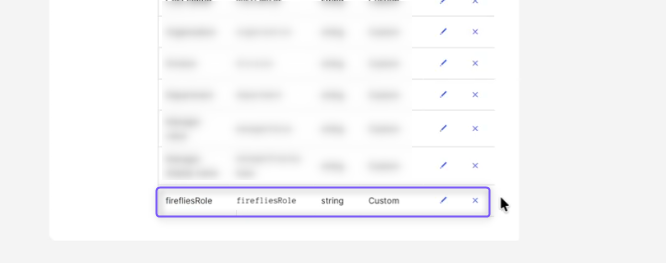
Step 6: Verify that the firefliesRole attribute appears in the Profile Editor. If the attribute is listed, the custom role attribute has been created successfully.
👤 Assign a Fireflies Role to a User
Now that the custom role attribute has been created, you can assign Fireflies roles to users through your Identity Provider. During user assignment, you'll specify the user's Fireflies role, which will be synchronized automatically through SCIM.
Step 7: Click Back to Profiles to return to the Profiles page, then go to Applications and open the Fireflies application.
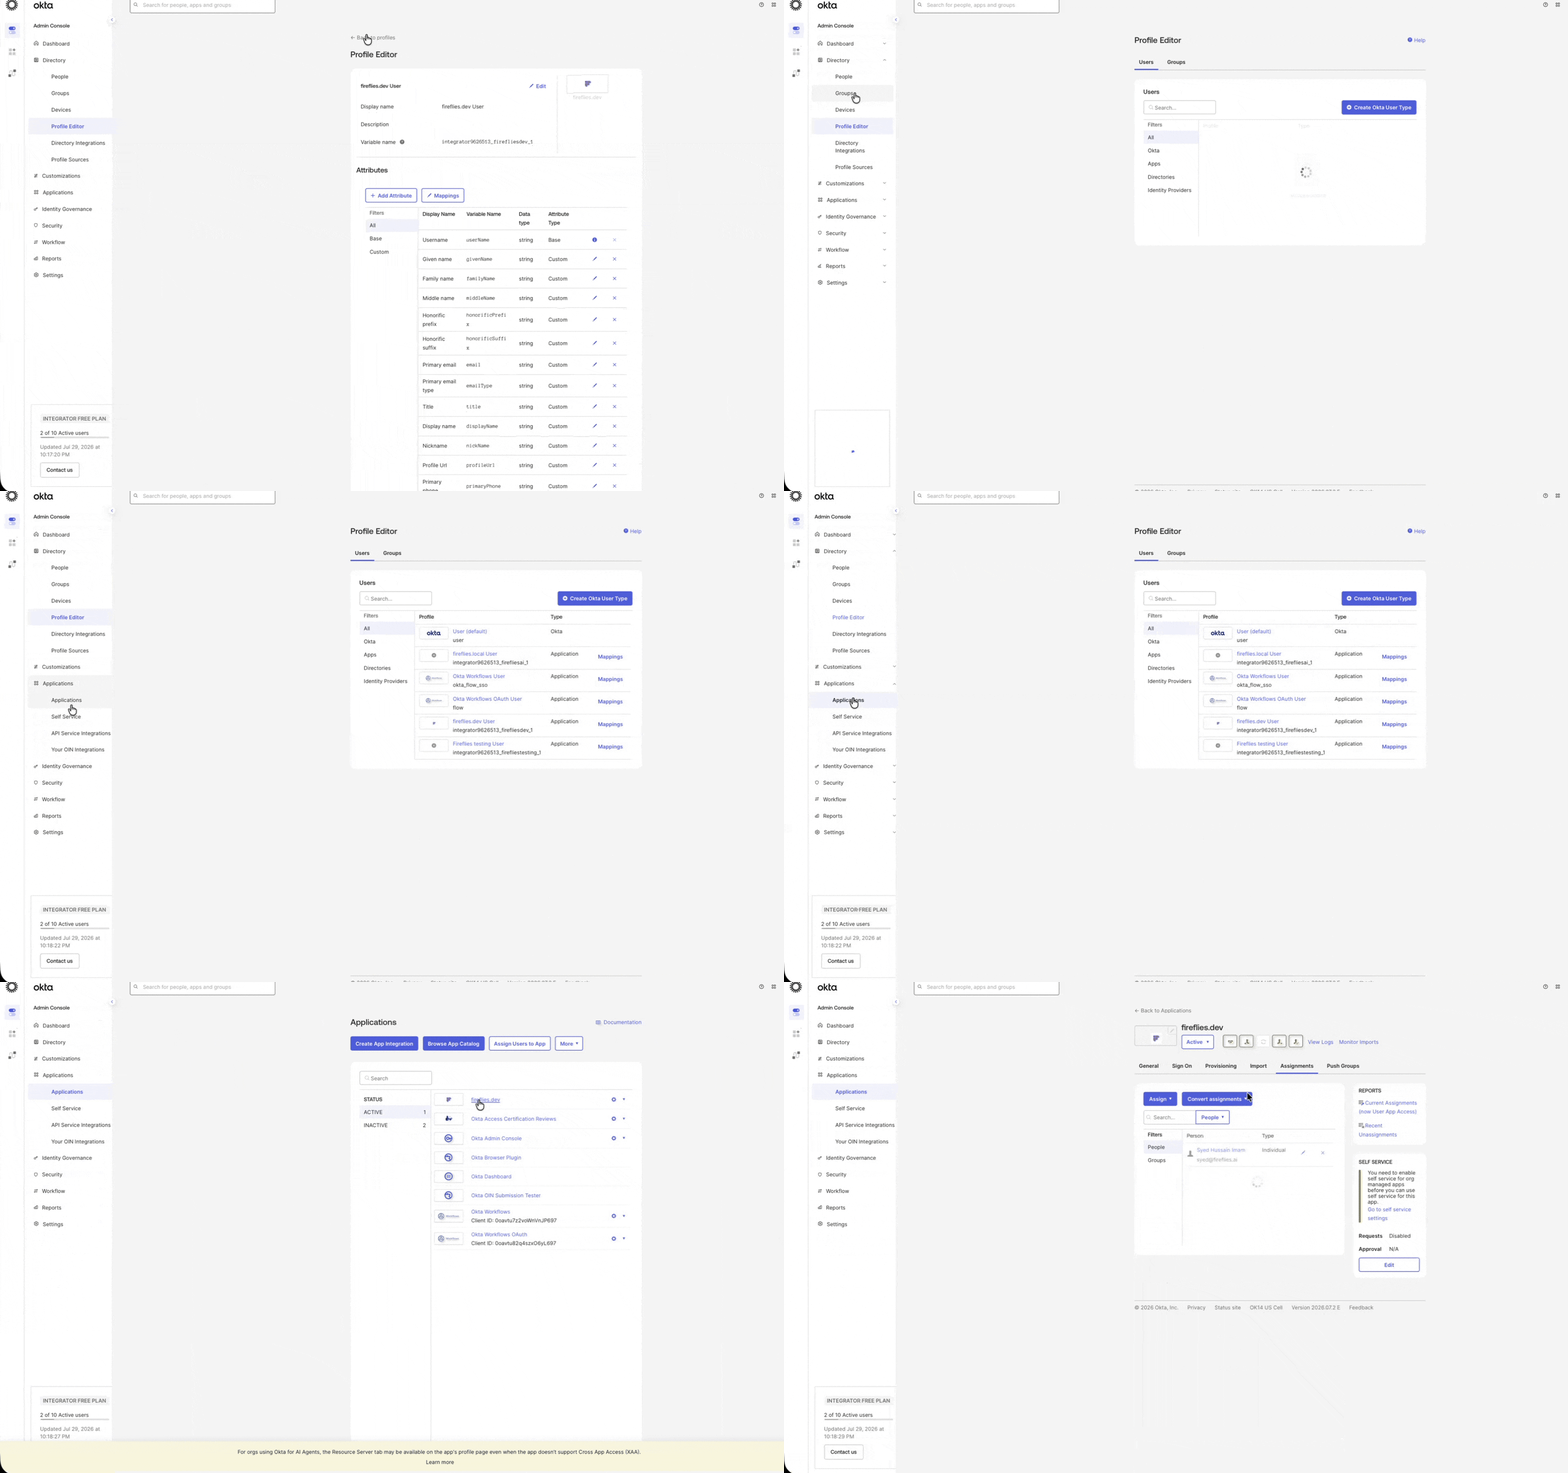
Step 8: Select the Assignments tab, click Assign, and choose Assign to People.
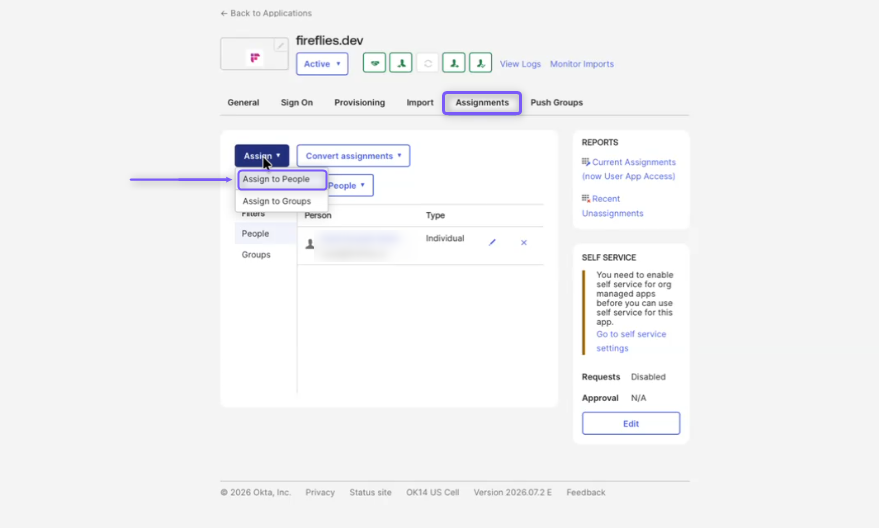
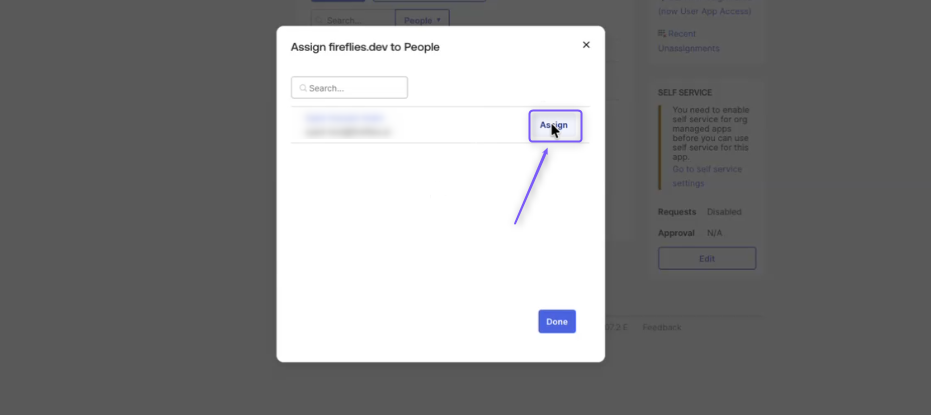
Step 9: Select the user you want to assign, then click Assign.
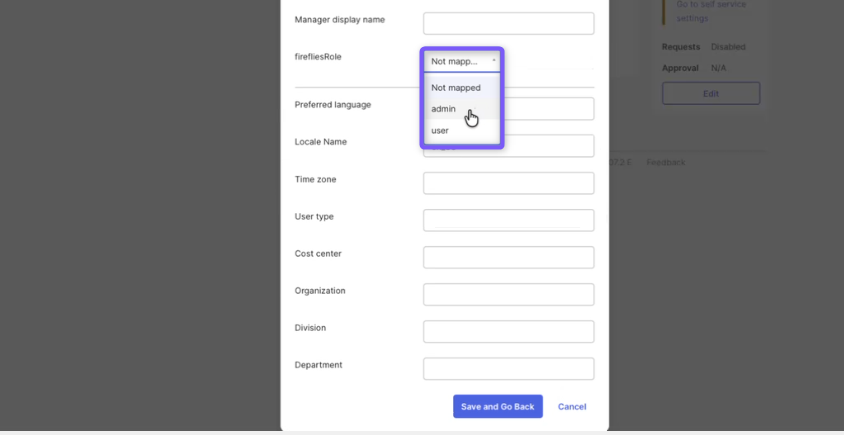
Step 10: Scroll down to the firefliesRole field, then select the appropriate Fireflies role (admin or user) from the dropdown menu.
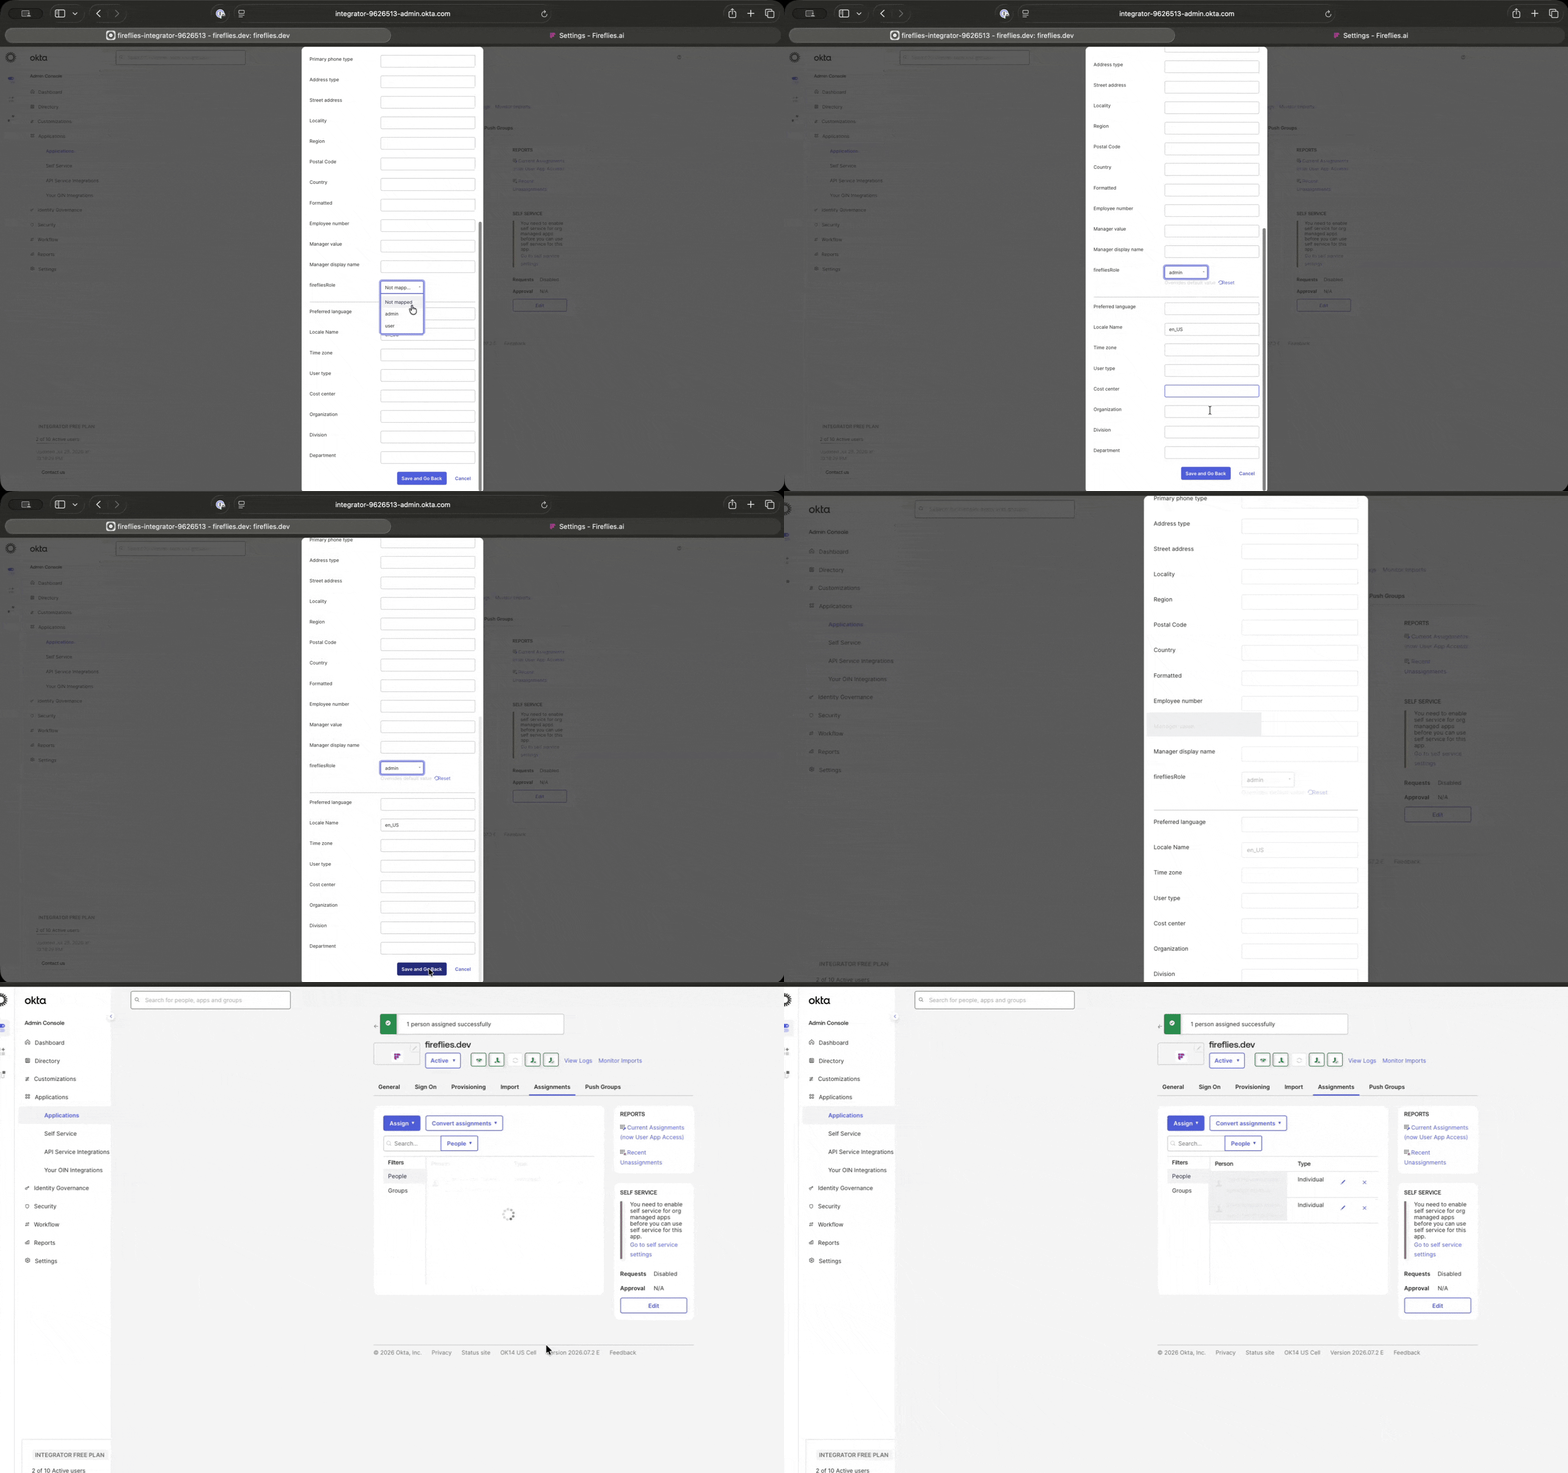
Step 11: Click Save and Go Back to save the user assignment and selected Fireflies role, then click Done to complete the user assignment.
✅ Verify the Assigned Role in Fireflies
After assigning a Fireflies role in your Identity Provider, verify that the role has been synchronized successfully with your Fireflies workspace.
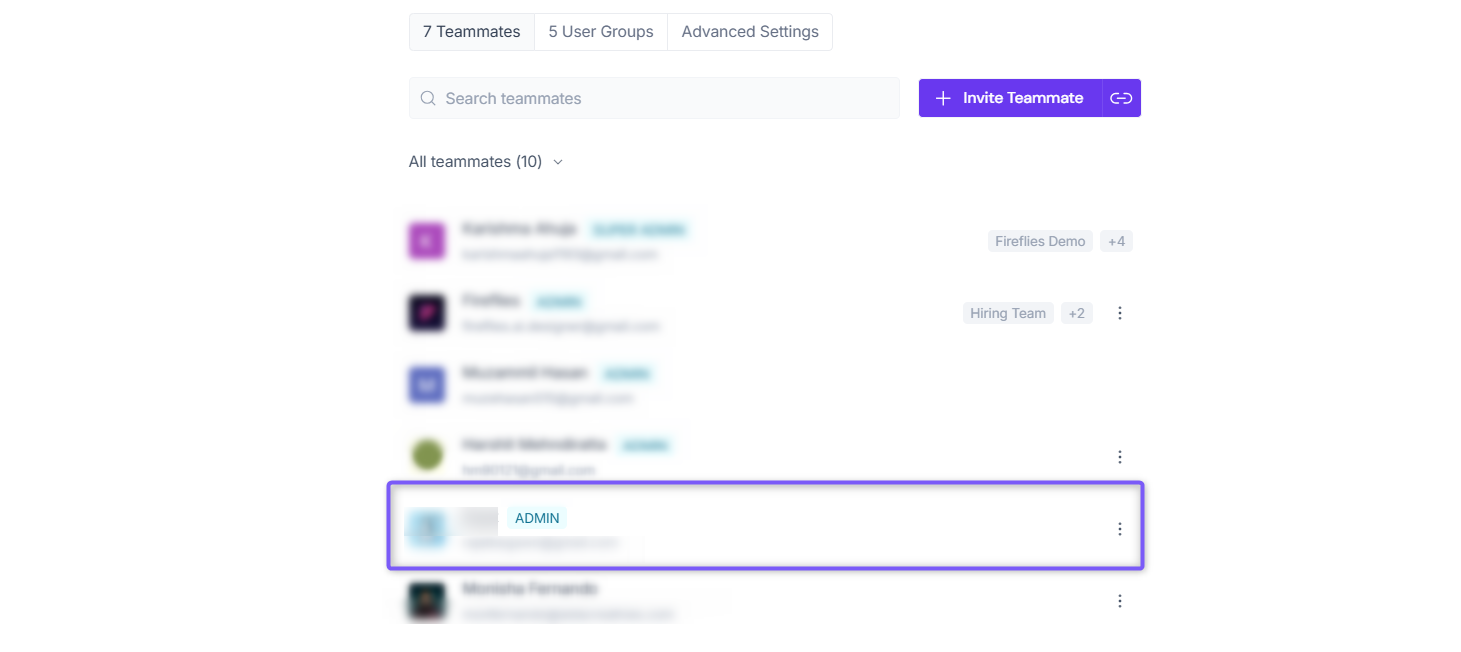
Step 12: Open your Fireflies workspace, click Settings, then select Members and groups.
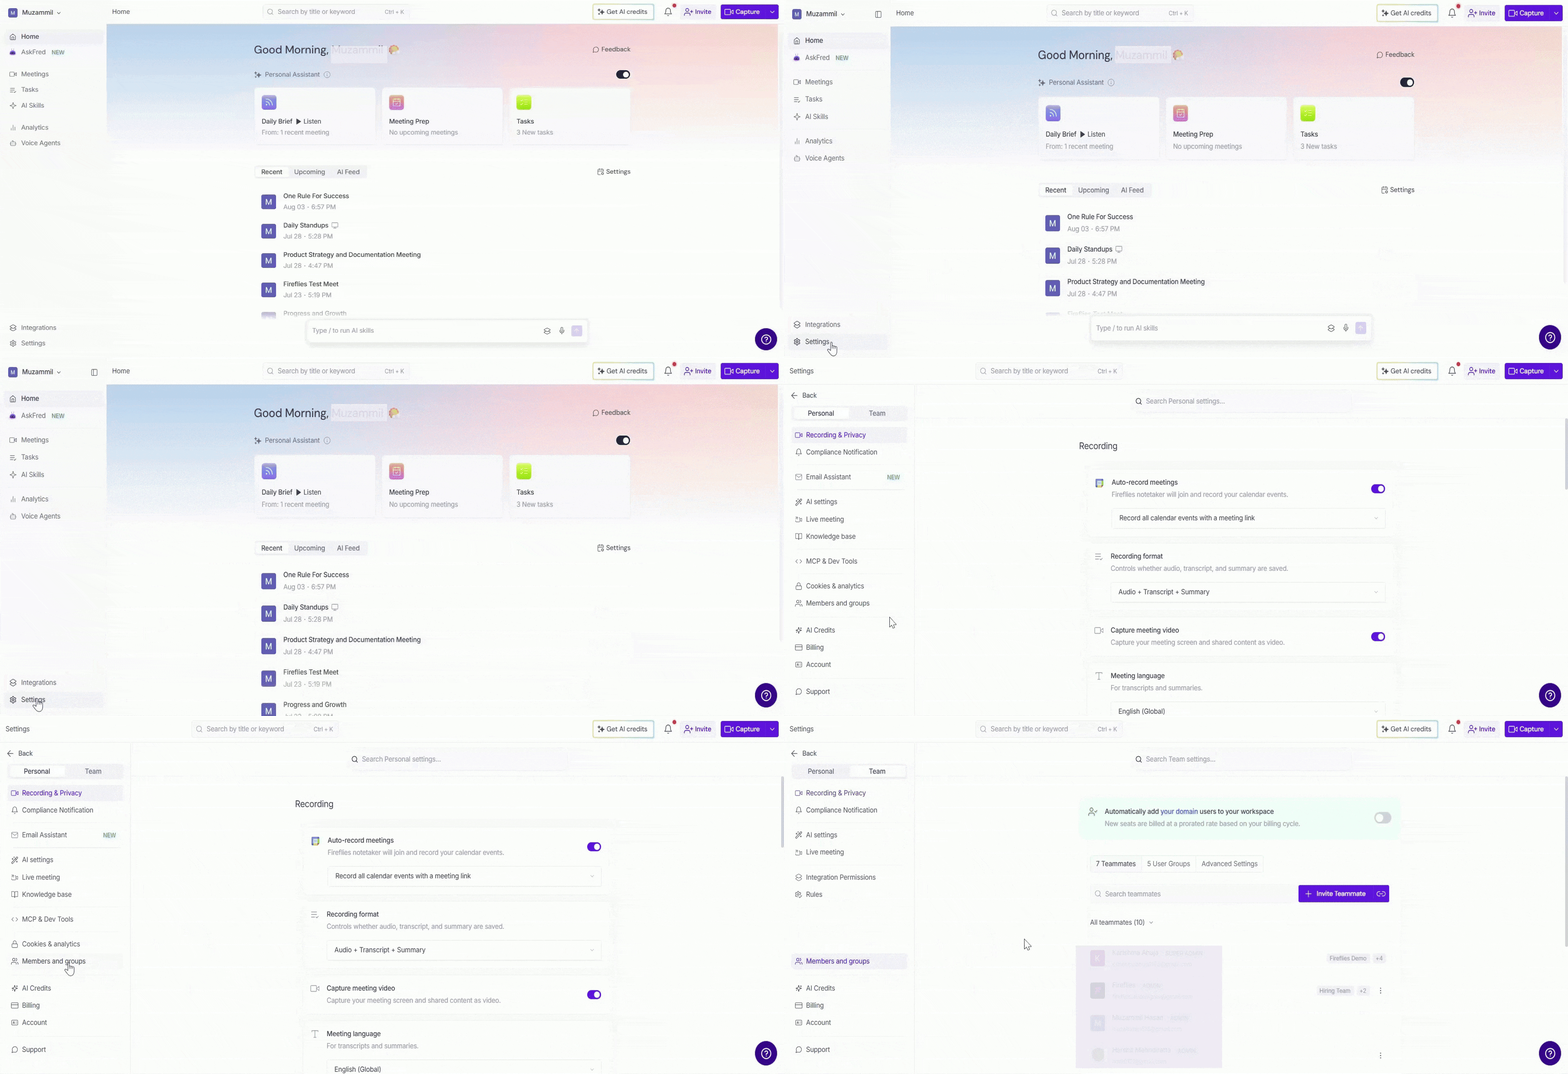
Step 13: Under All teammates, verify that the assigned user appears with the role you assigned in Step 11. For example, if you selected Admin, the user should be listed as an Admin in Fireflies.
🔄 Update an Existing User Role
If a user's responsibilities change, you can update their Fireflies role in your Identity Provider. The updated role will automatically synchronize with your Fireflies workspace through SCIM.
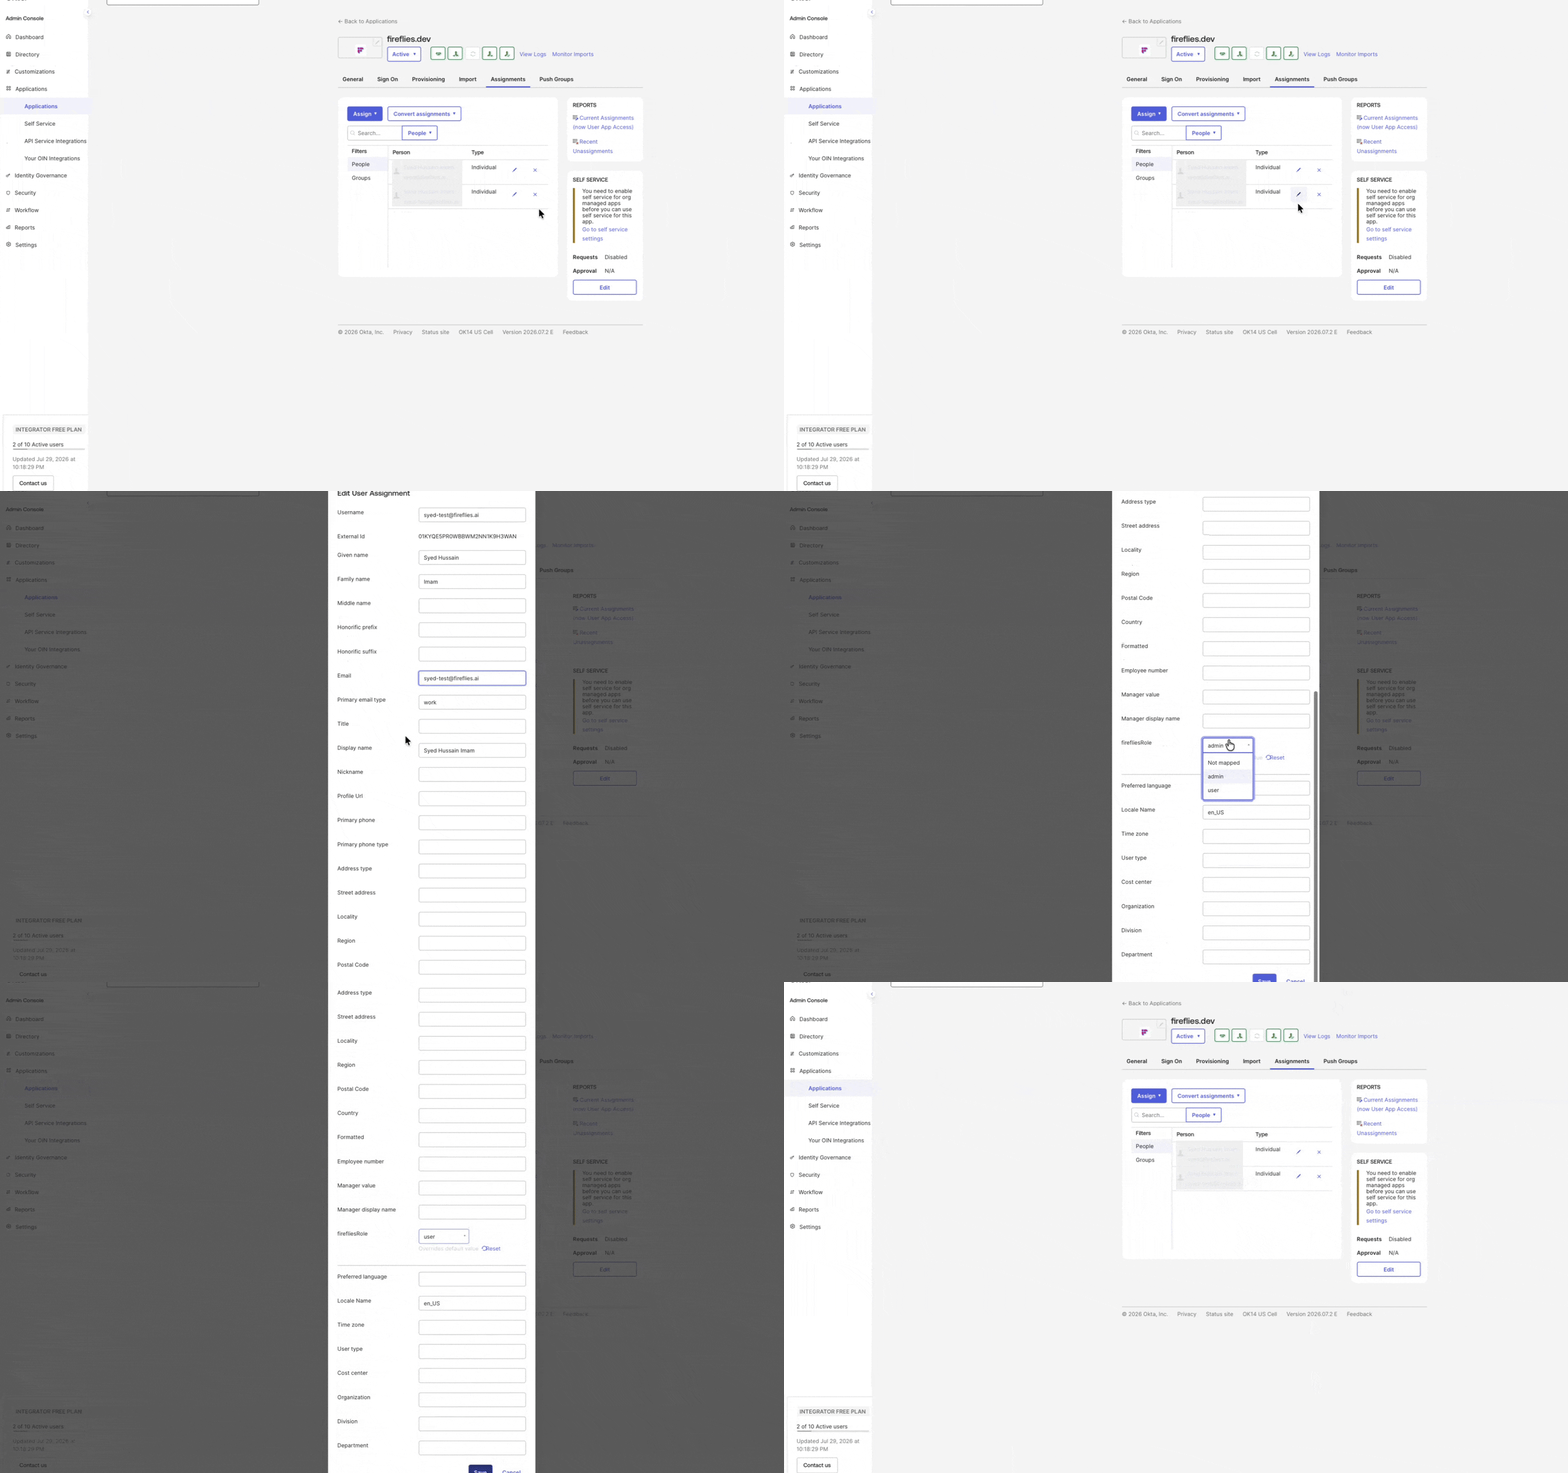
Step 14: In the Okta Admin Console, open the Fireflies application, then select the Assignments tab.
Step 15: Click the Edit (pencil) icon next to the assigned user.
Step 16: Scroll to the firefliesRole field, then select the new role (Admin or User).
Step 17: Click Save to apply the updated role.
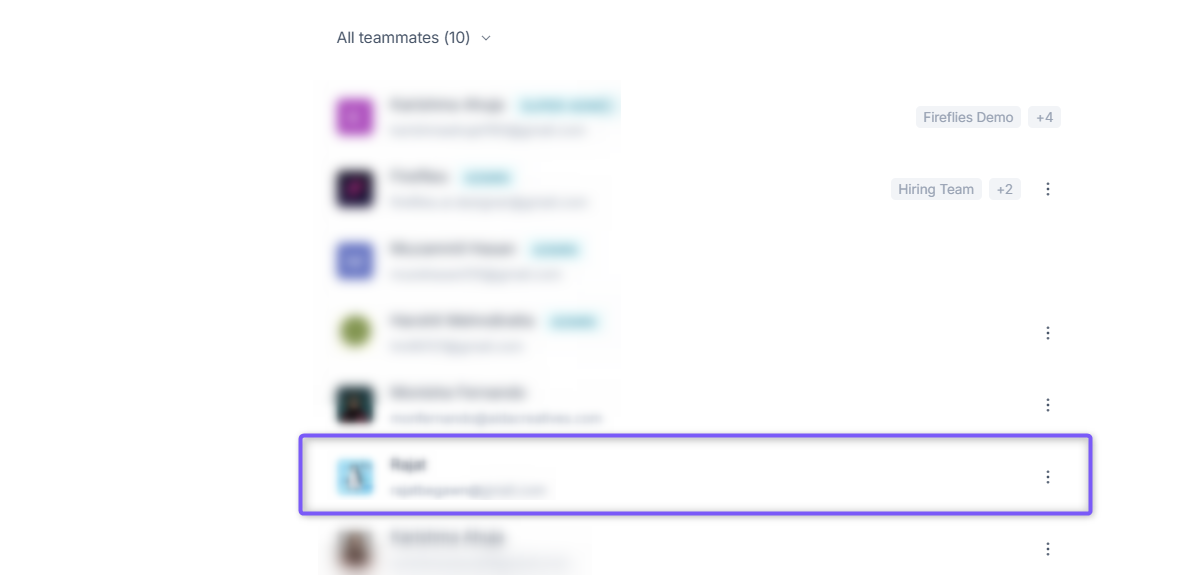
Step 18: Return to your Fireflies workspace. Under Settings > Members and groups, verify that the user's role has been updated to match the role you selected in Step 16.
For example, if you changed the user's role from Admin to User, the user should now appear as a User in Fireflies, and vice versa.
🎉 You're All Set!
You've successfully configured SCIM-based role management for Fireflies. Going forward, any role changes you make in your Identity Provider will automatically synchronize with your Fireflies workspace, helping you manage user access without making manual updates.
📌 Related Guides
How to Set Up Automatic User Provisioning with SCIM – Configure SCIM provisioning before managing user roles.
Manage User Groups via SCIM – Create and manage Fireflies user groups directly from your Identity Provider.
How to Set Up SSO for Okta – Use Okta's SSO in Fireflies for a streamlined access.
Set Up SAML SSO for Azure AD – Enable SAML SSO with Azure ADD to enhance security and simplify user access.
Set Up SAML SSO for Google Workspace – Enable secure single sign-on with Google Workspace to centralize authentication and simplify user access.