Manage User Groups via SCIM with Microsoft Entra ID
Last updated: September 25, 2026
Manage Fireflies user groups directly from Microsoft Entra ID using SCIM provisioning. Once configured, you can create a group in Microsoft Entra ID, add users to the group, assign the group to Fireflies, and synchronize the group with your Fireflies workspace.
In this guide, you'll learn how to:
Create a user group in Microsoft Entra ID.
Add users to the group.
Assign the group to the Fireflies application.
Provision the group to Fireflies.
Verify the synchronized group in Fireflies.
🔑 Prerequisites
Before you begin, make sure you have:
Completed How to Set Up SCIM User Provisioning with Microsoft Entra ID. This guide assumes SCIM provisioning is already configured.
Administrator access to Microsoft Entra ID and your Fireflies workspace.
👥 Create a User Group in Microsoft Entra ID
First, create the group you want to synchronize with Fireflies.
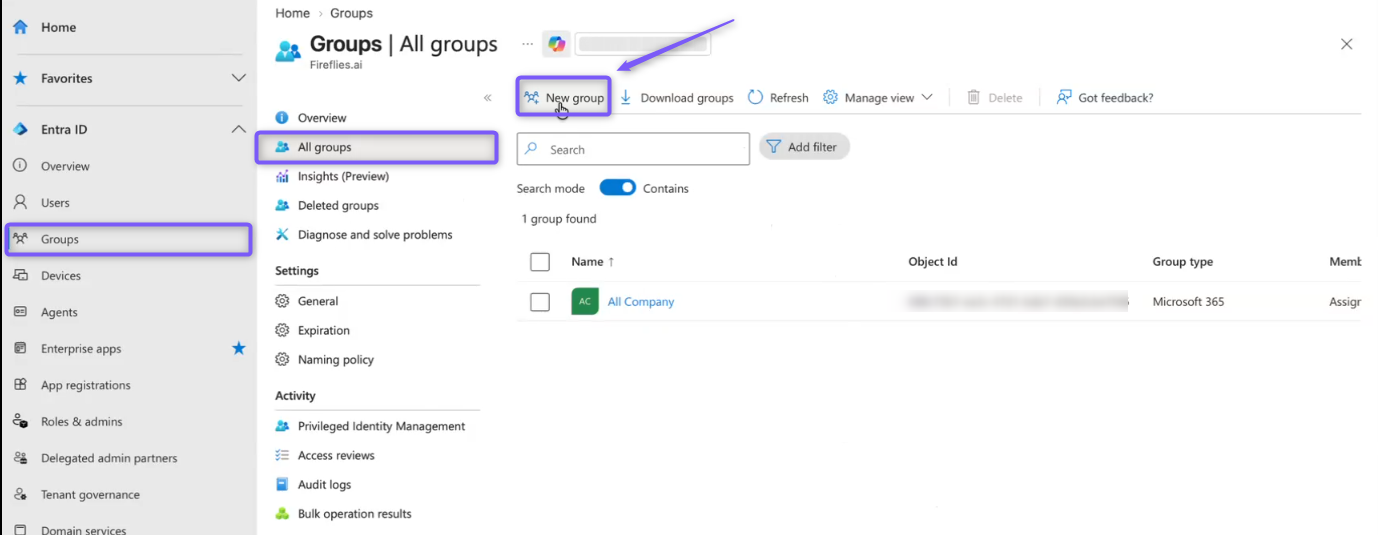
Step 1: In the Microsoft Entra admin center, go to Groups and select All groups.
Step 2: Click New group.
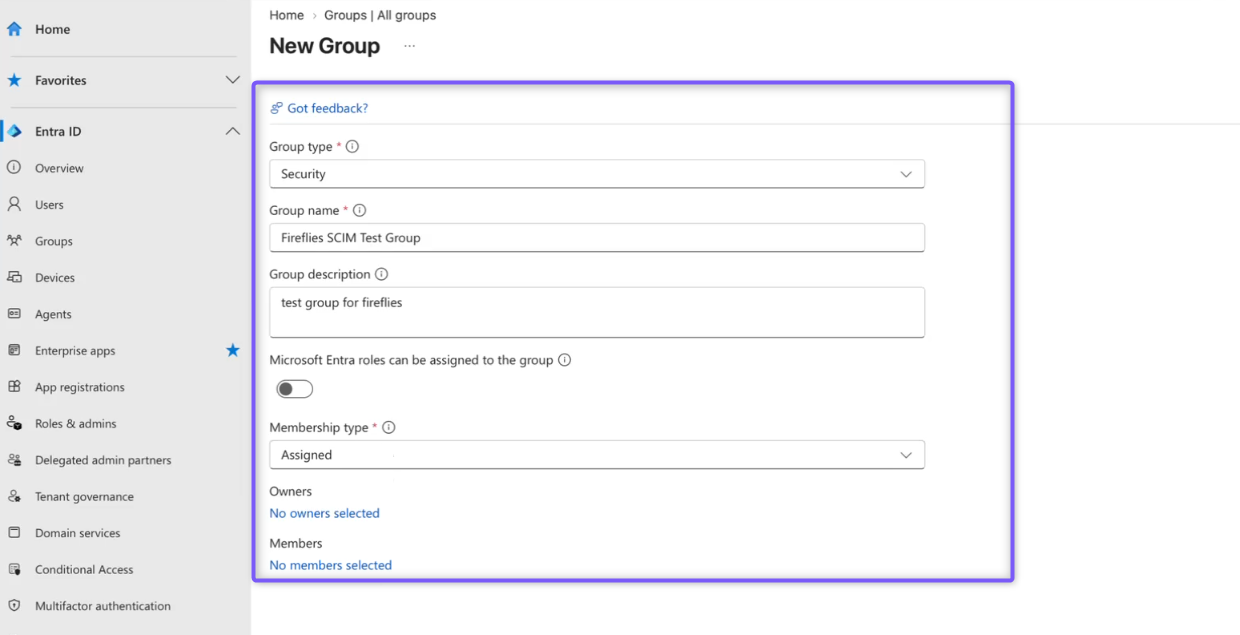
Step 3: Configure the following fields:
Field | Description | Value |
|---|---|---|
Group type | Defines the type of group you want to create. | Security |
Group name | Enter a name for the group. | For example, |
Group description | Add a description for the group. | For example, |
Microsoft Entra roles can be assigned to the group | Determines whether Microsoft Entra roles can be assigned to the group. | Leave turned off. |
Membership type | Determines how members are added to the group. | Assigned |
Owners | Select the users who will manage the group. | Optional |
Members | Select the users you want to add to the group. | Select the users you want to provision to Fireflies. |
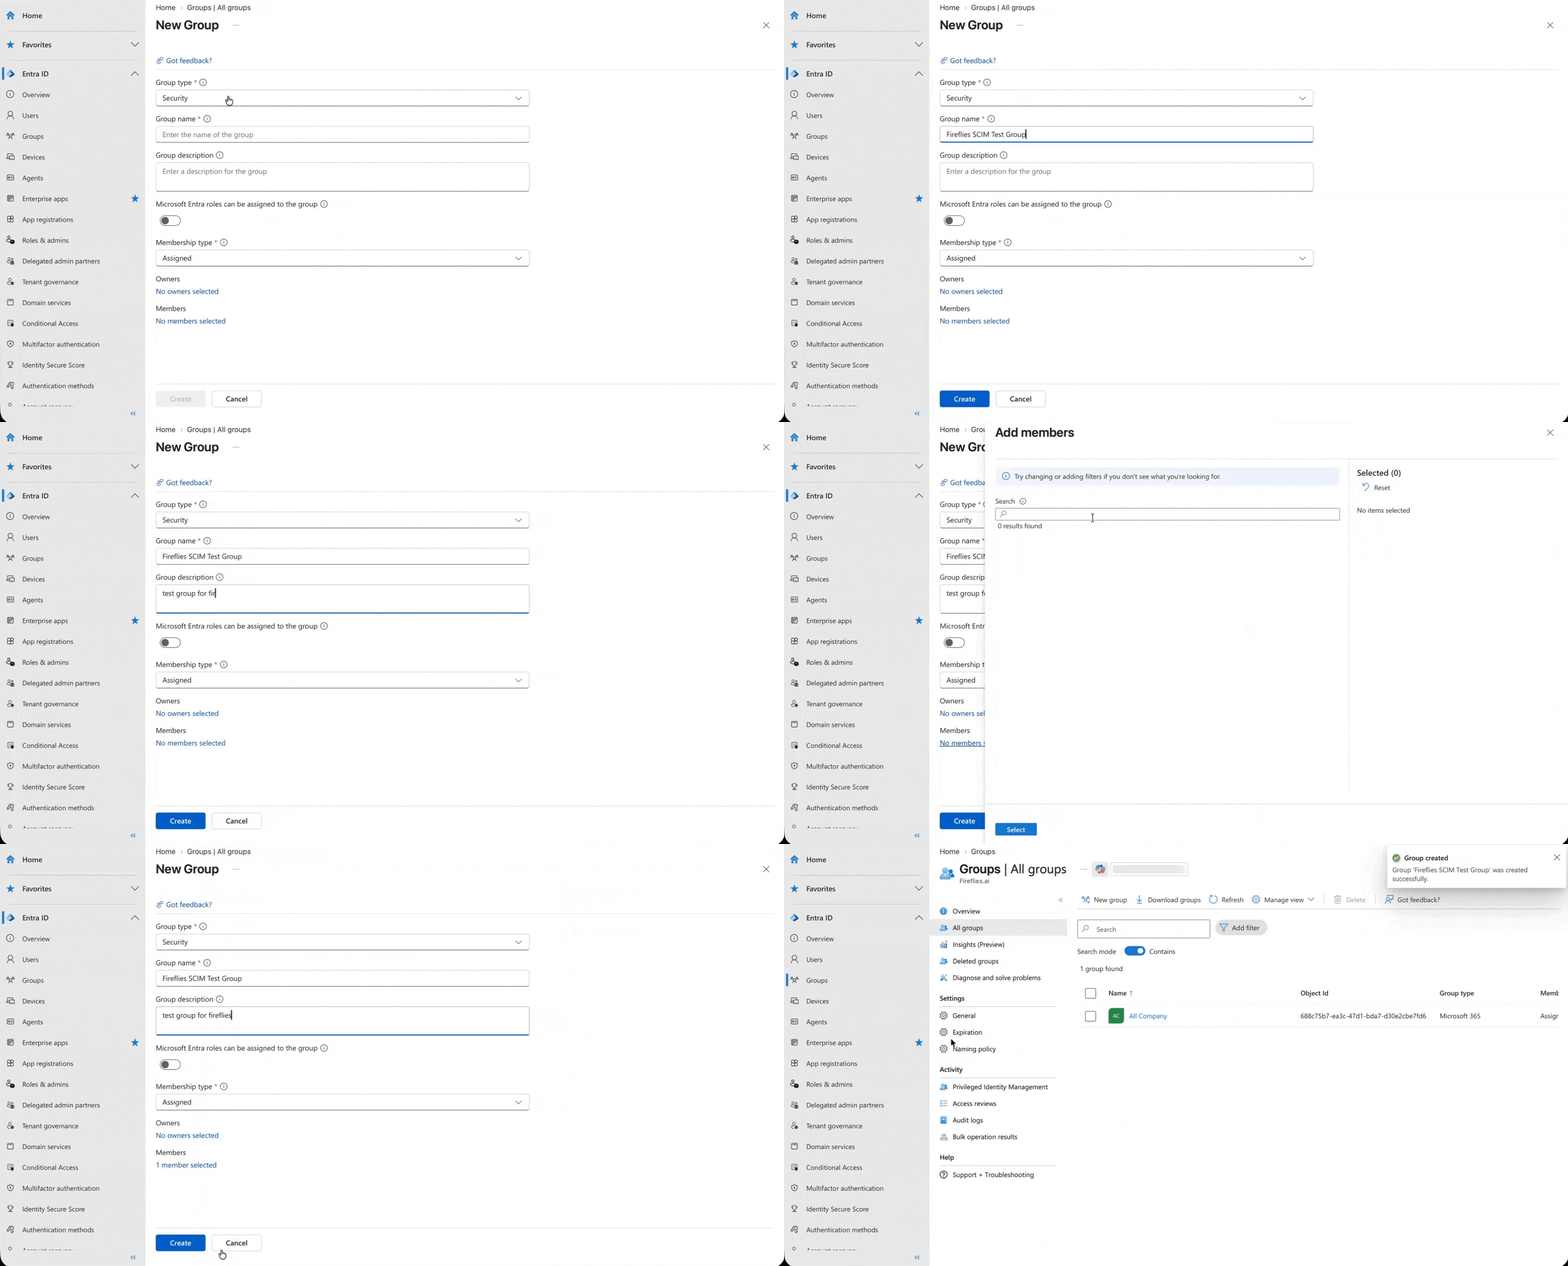
Step 4: click Create.
Microsoft Entra creates the group with the selected user as a member.
🔗 Assign the Group to Fireflies
After creating the group, assign it to the Fireflies enterprise application so it can be provisioned through SCIM.
Step 5: In the Microsoft Entra admin center, go to Enterprise applications and open the Fireflies.ai application.
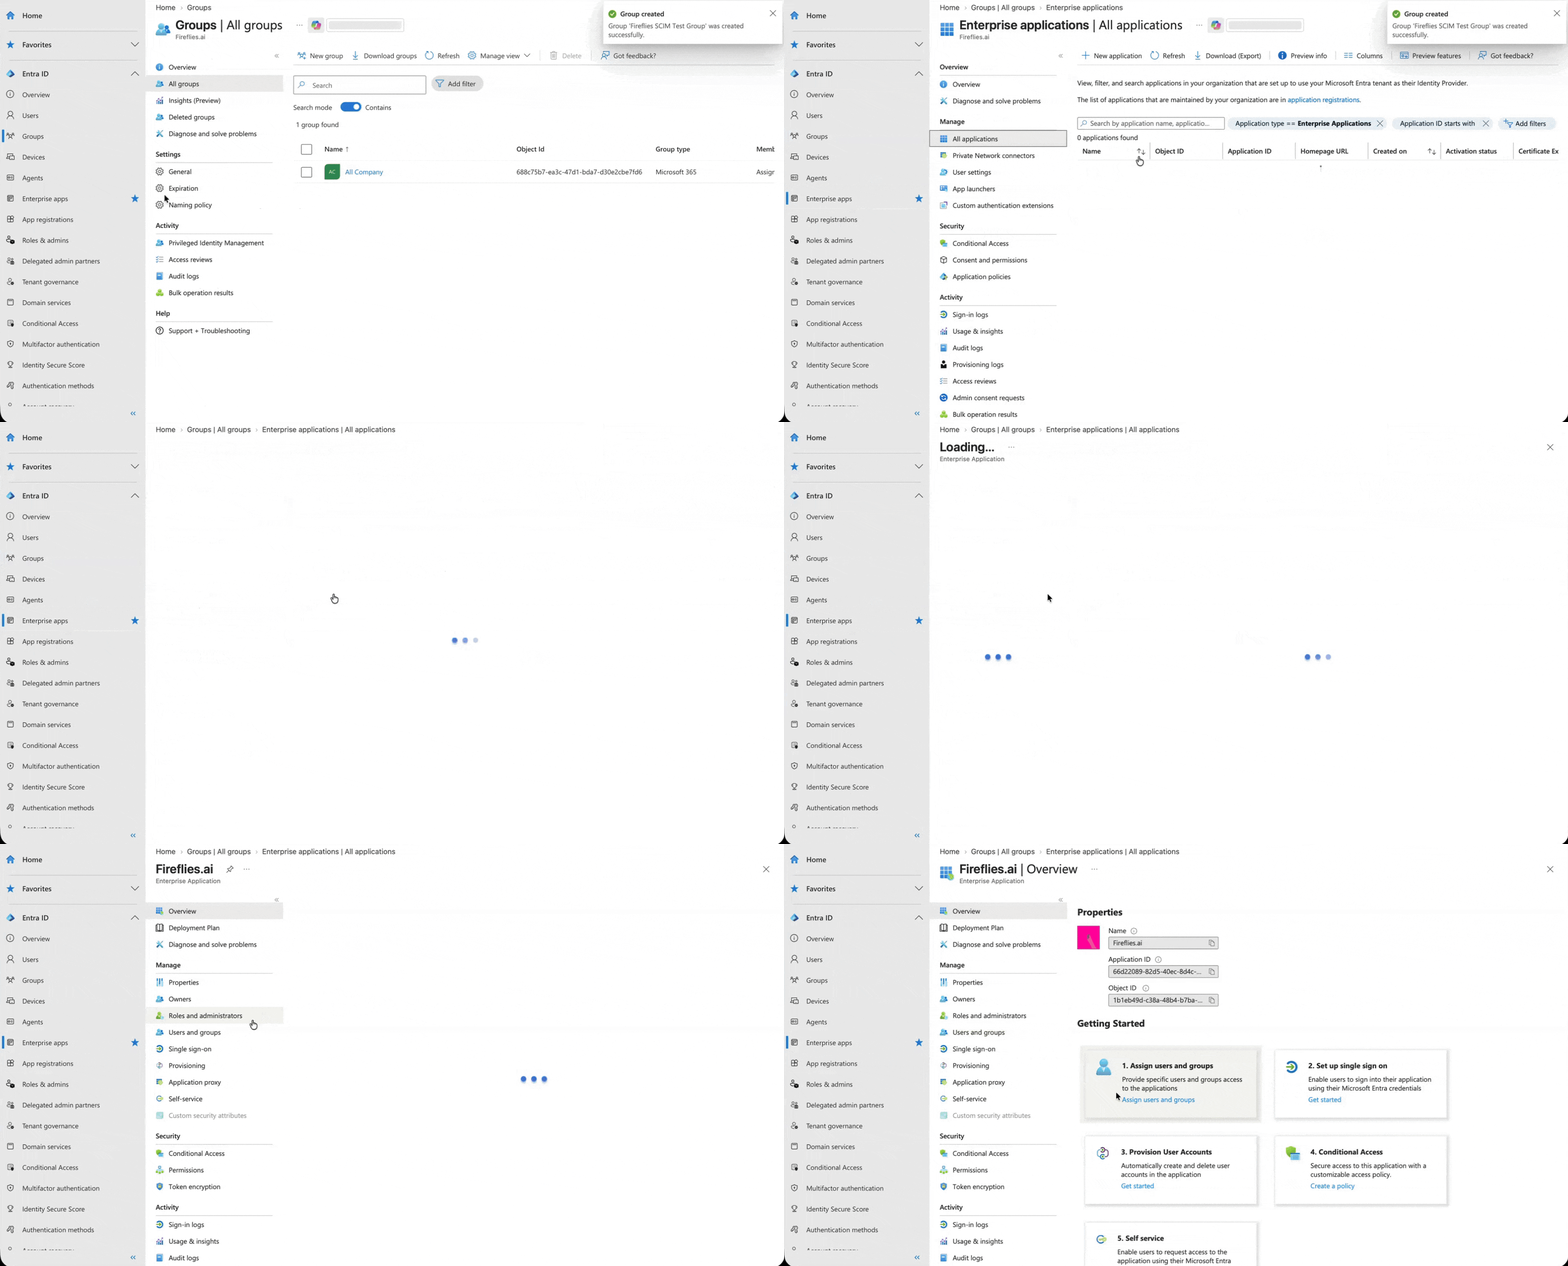
Step 6: Select Users and groups, then click Add user/group.
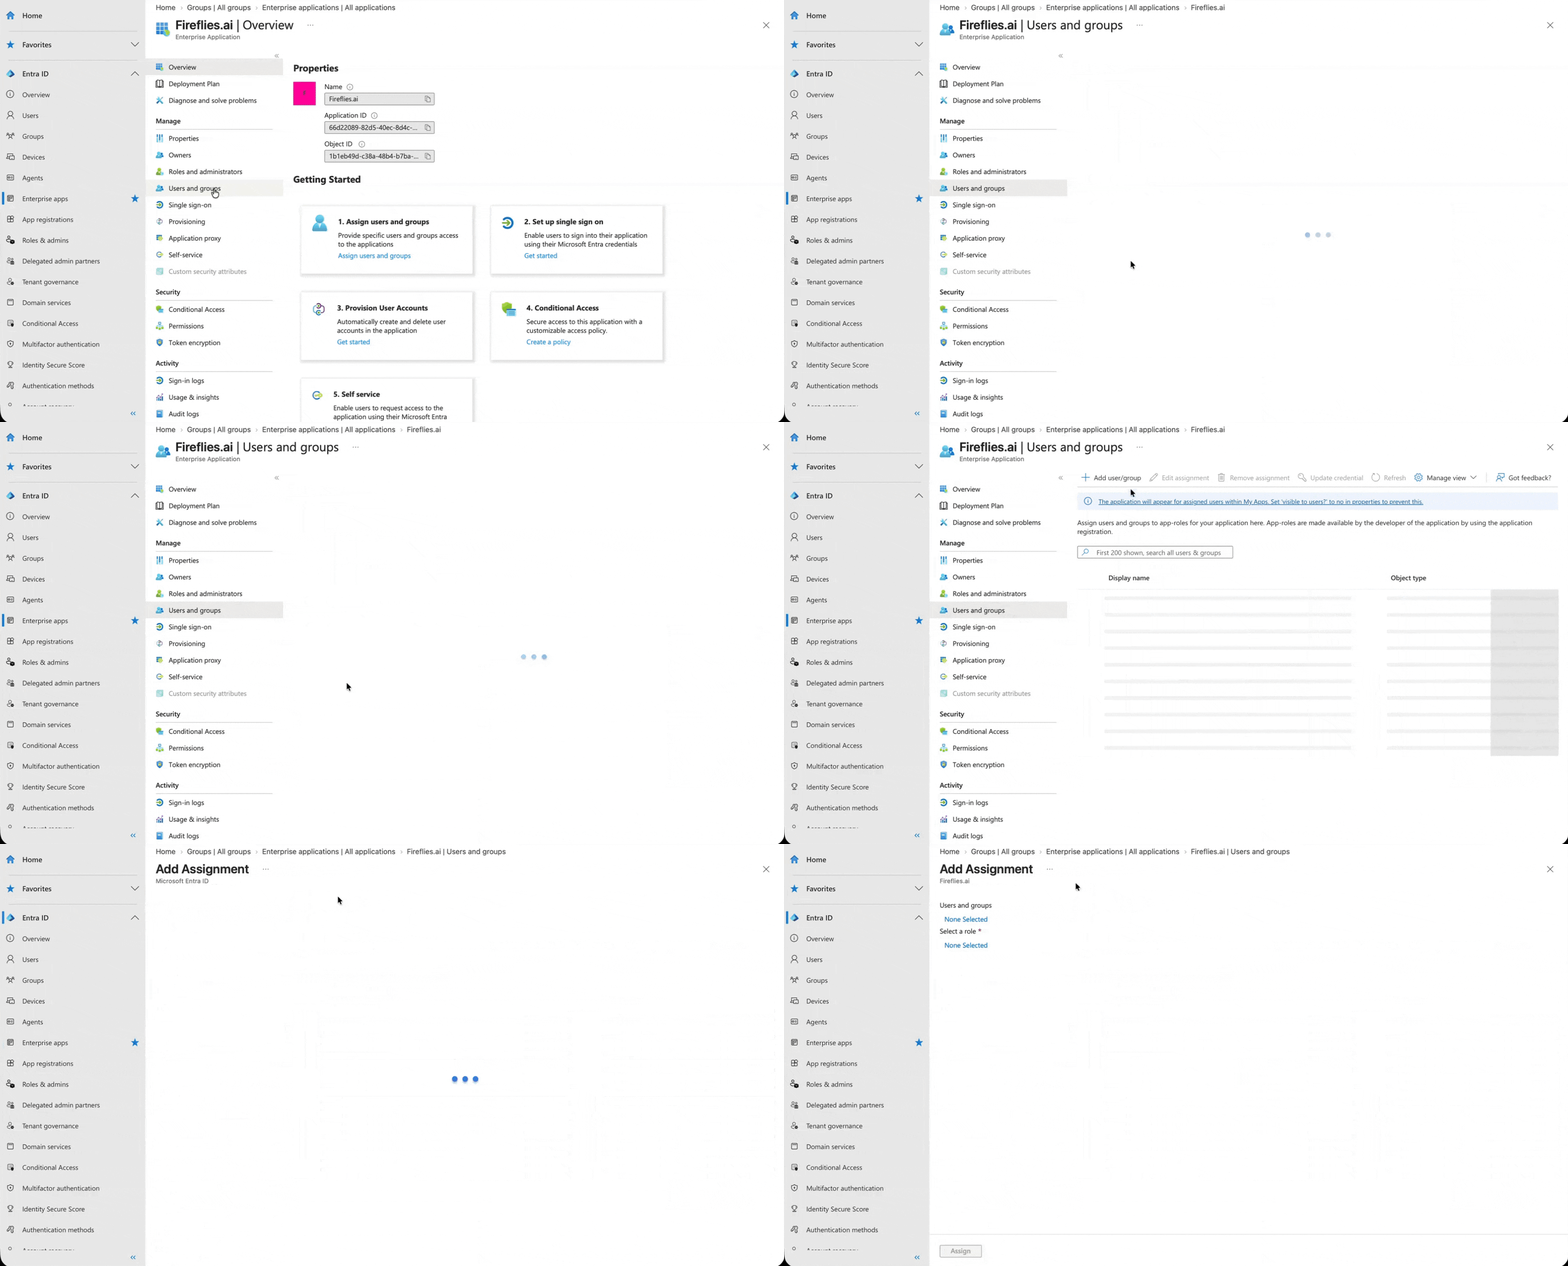
Step 7: Under Users and groups, click None Selected.
Step 8: Search for and select the group you created, then click Select.
Step 9: Under Select a role, click None Selected.
Step 10: Select User, then click Select.
Step 11: Click Assign.
The group is now assigned to the Fireflies application.
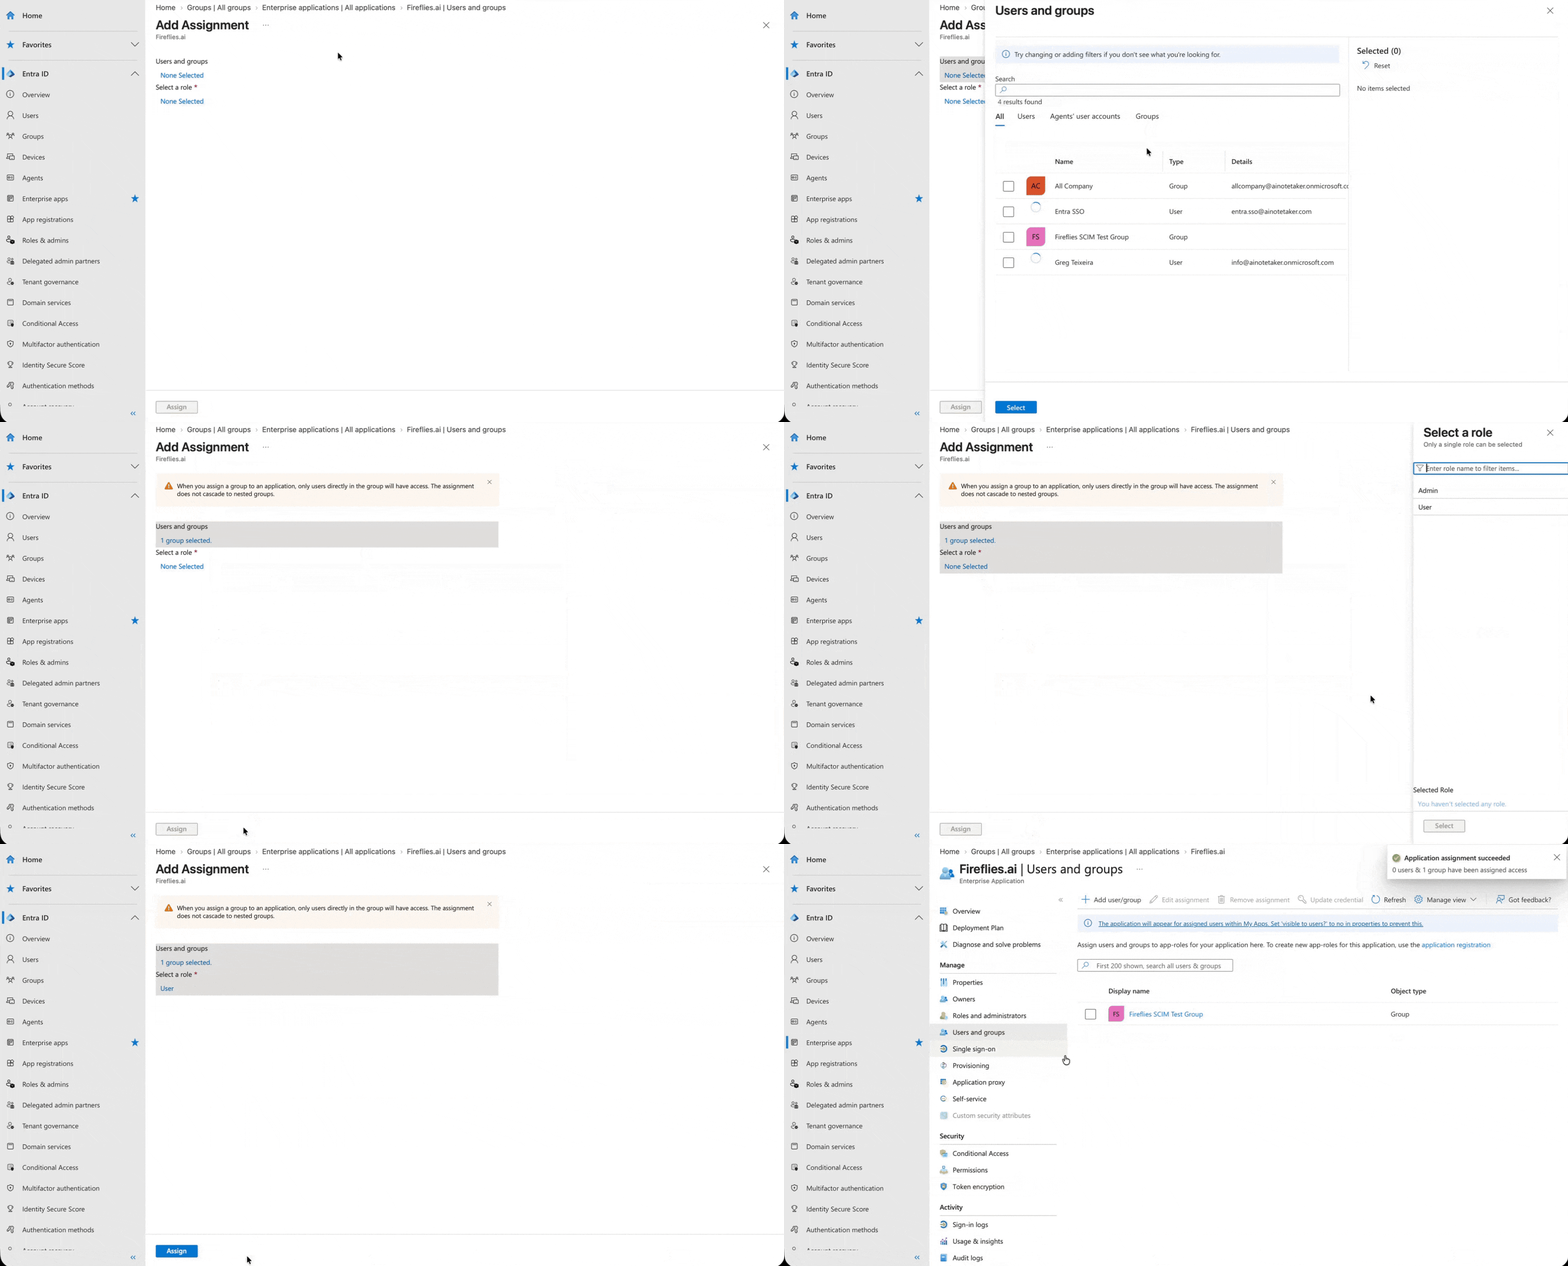
Note: When you assign a group to an application, only users directly in the group are assigned access. Nested groups aren't included.
🚀 Provision the Group to Fireflies
Use Provision on demand to provision the group and verify the SCIM synchronization.
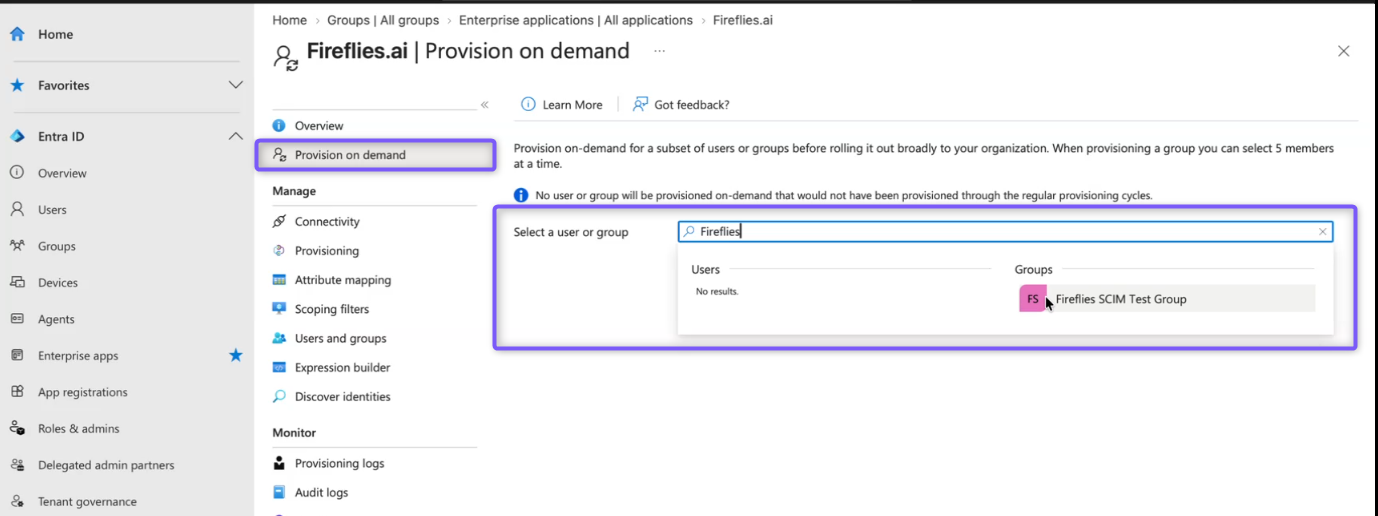
Step 12: In the Fireflies.ai enterprise application, select Provision on demand.
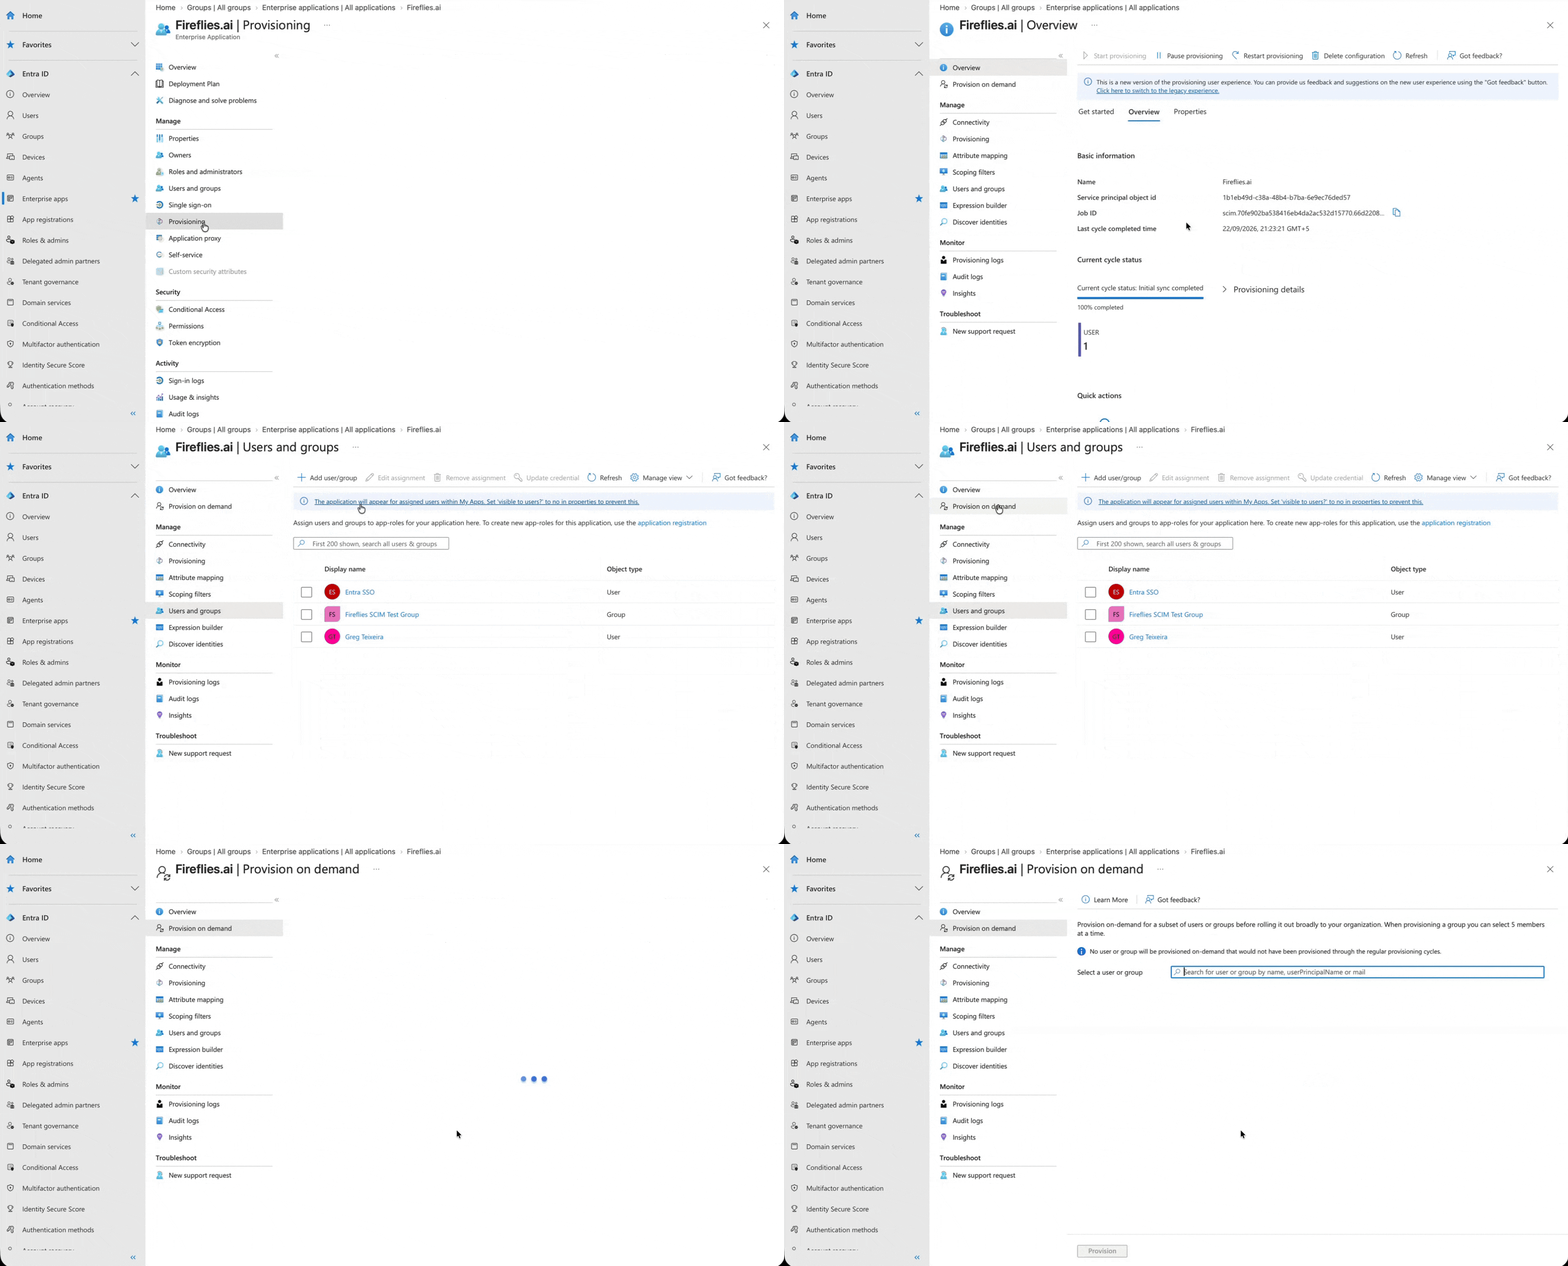
Step 13: Under Select a user or group, search for the group you created and select it.
Step 14: Under Selected users, select View members only.
Step 15: From the member list, select the user you want to provision.
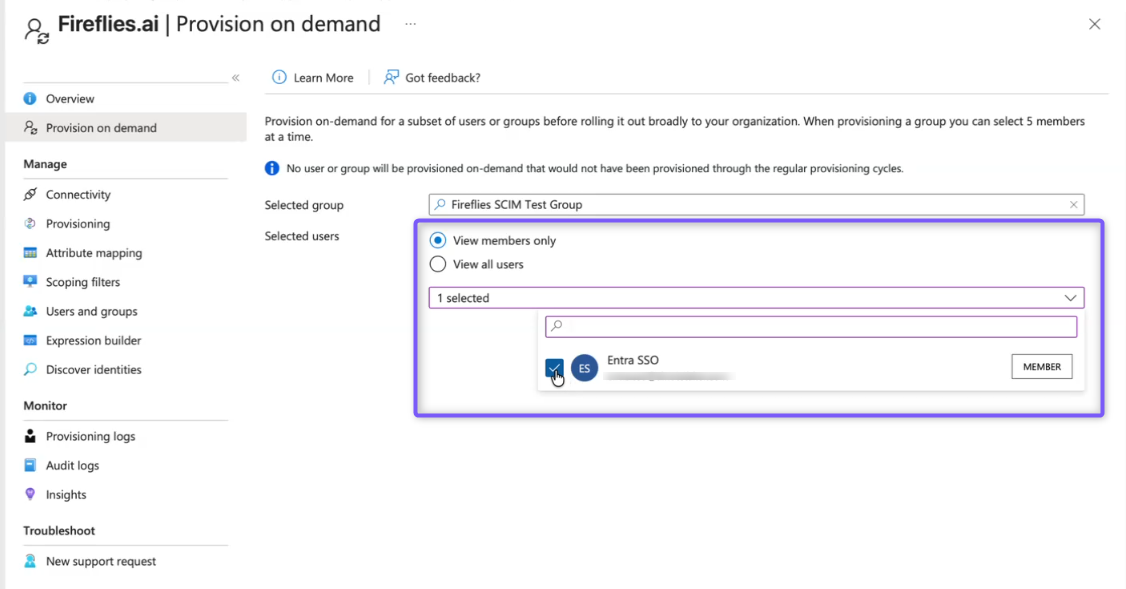
Step 16 Click Provision.
Microsoft Entra starts the provisioning process and validates the selected group and member.
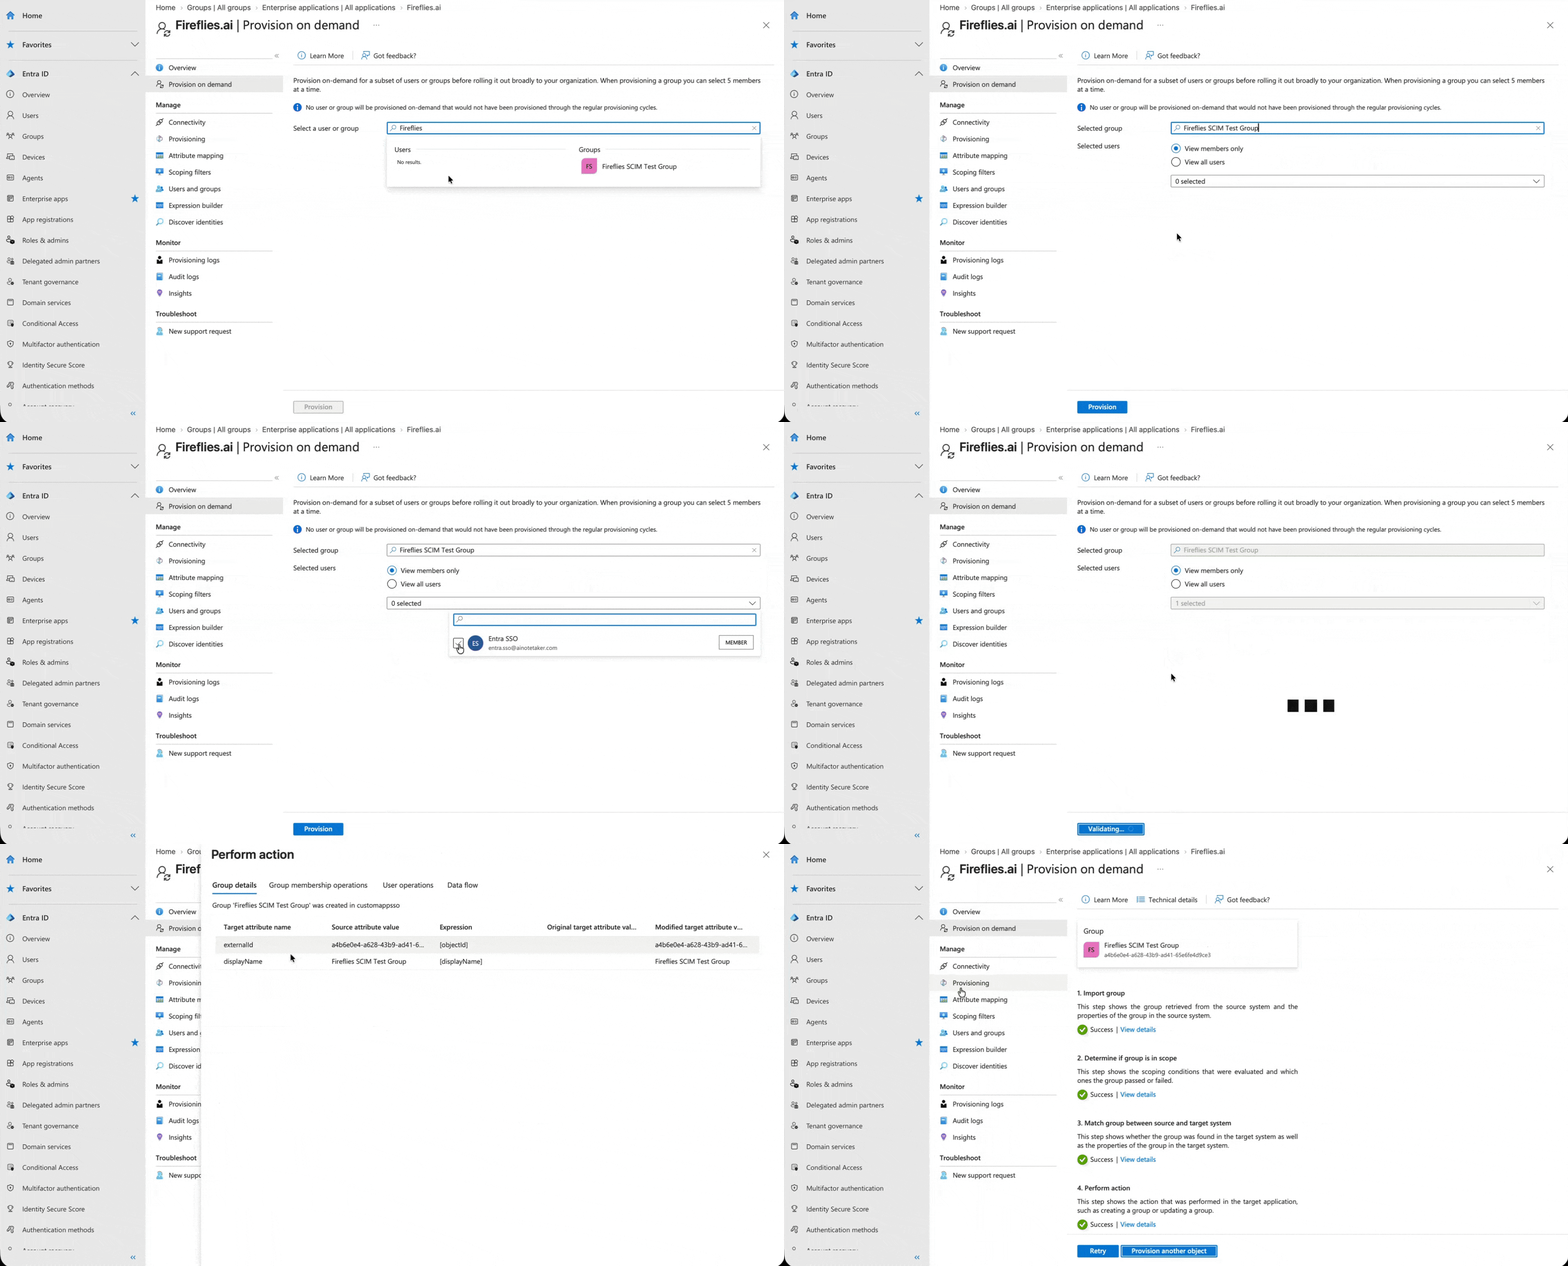
Tip: You can review the Group details, Group membership operations, User operations, and Data flow tabs to see the provisioning results.
✅ Verify the User Group in Fireflies
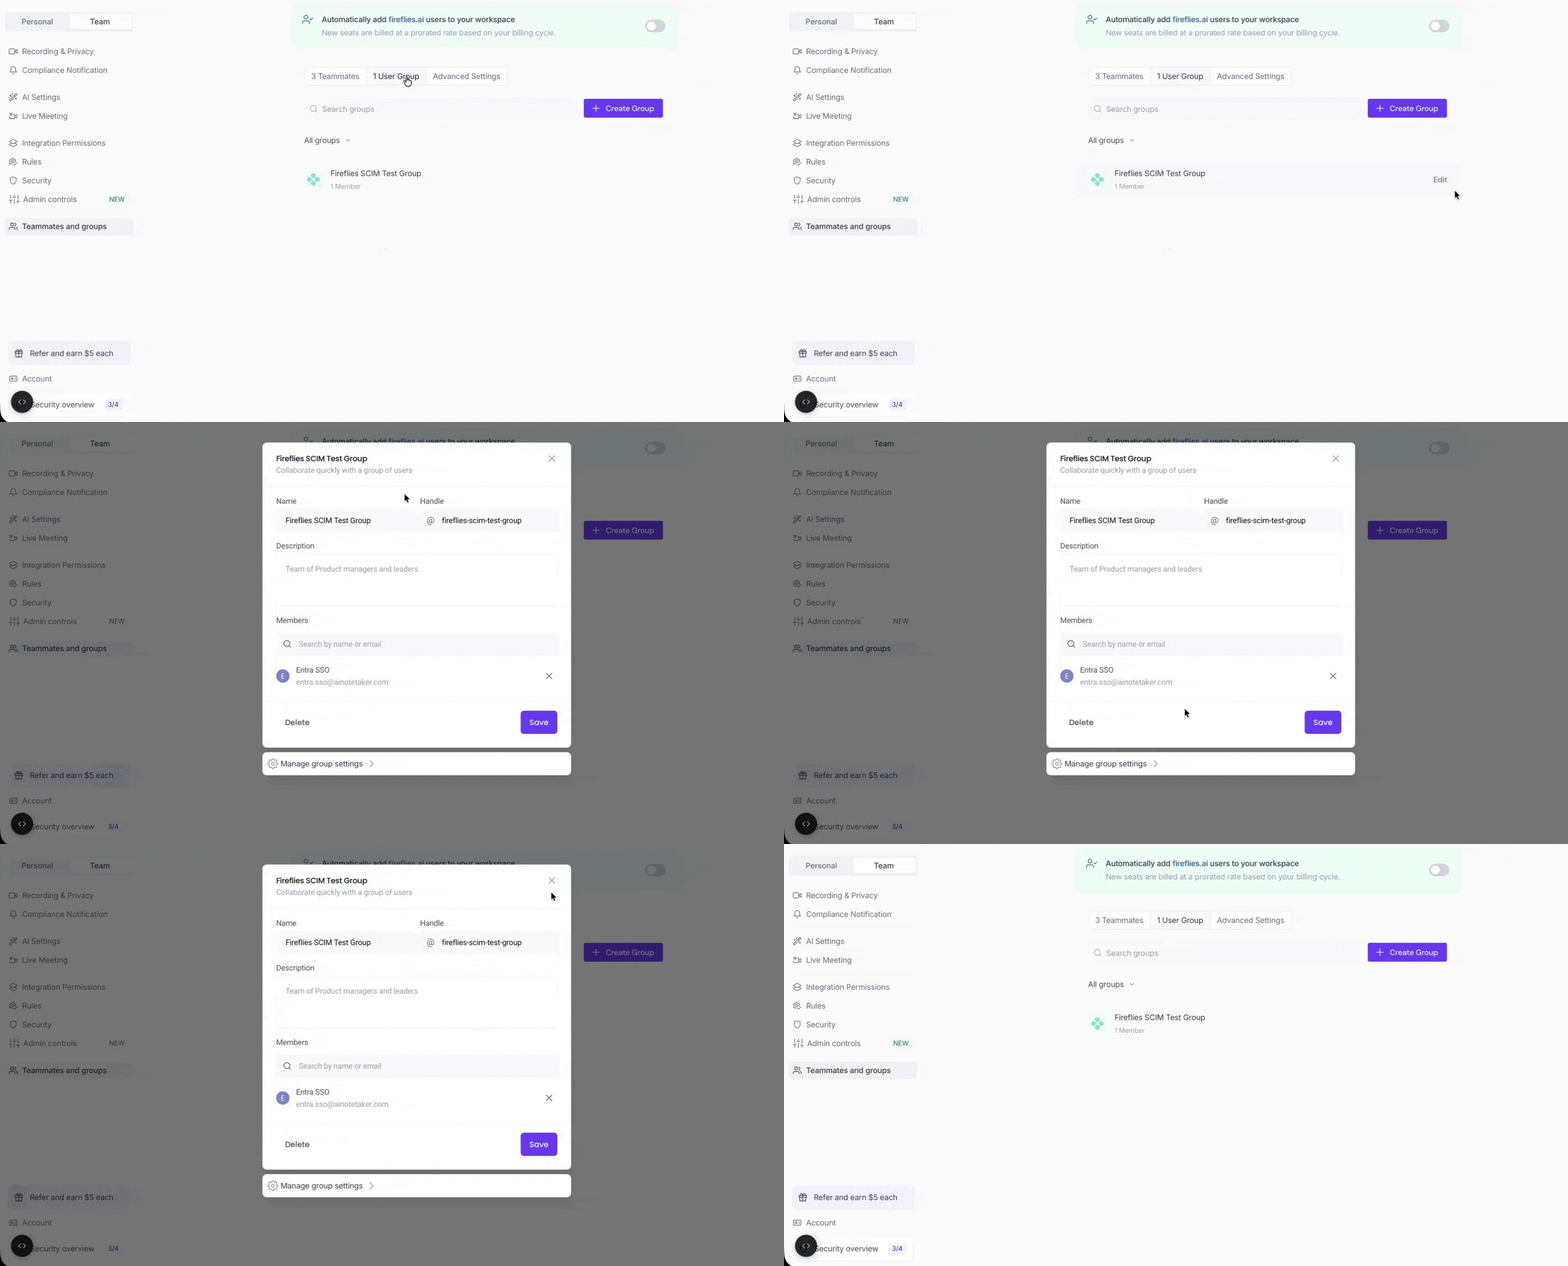
After provisioning completes, verify that the group and its member appear in your Fireflies workspace.
Step 17: Open your Fireflies workspace and click Settings.
Step 18: Switch to the Team tab, then select Teammates and groups.
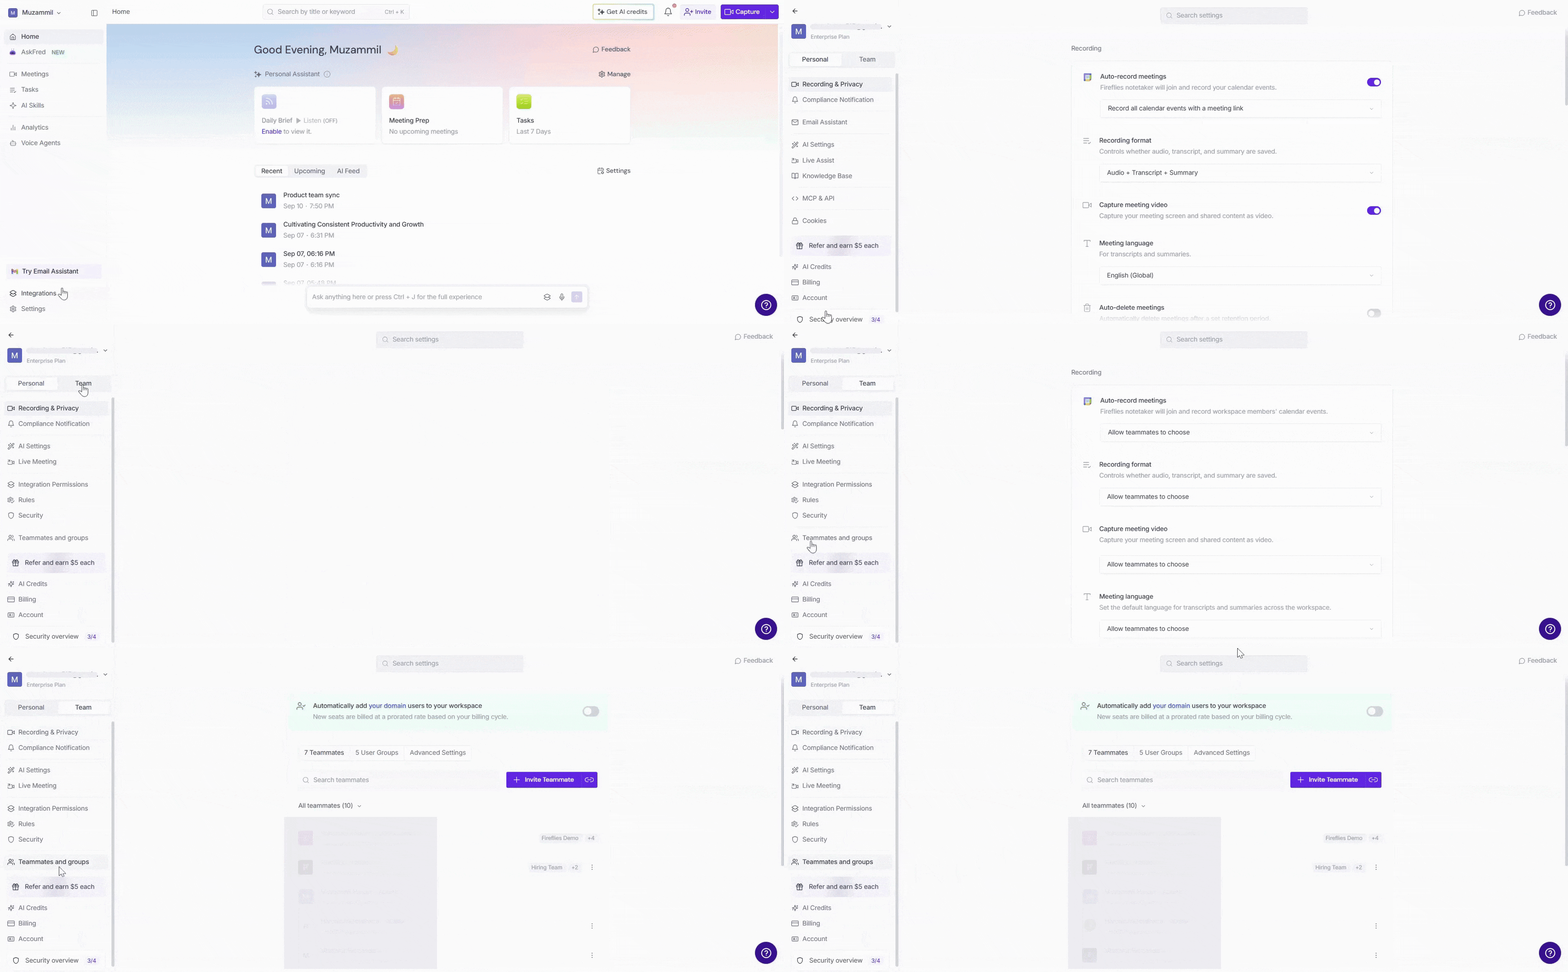
Step 19: Select User Groups.
Step 20: Under All groups, verify that the provisioned group appears in the list.
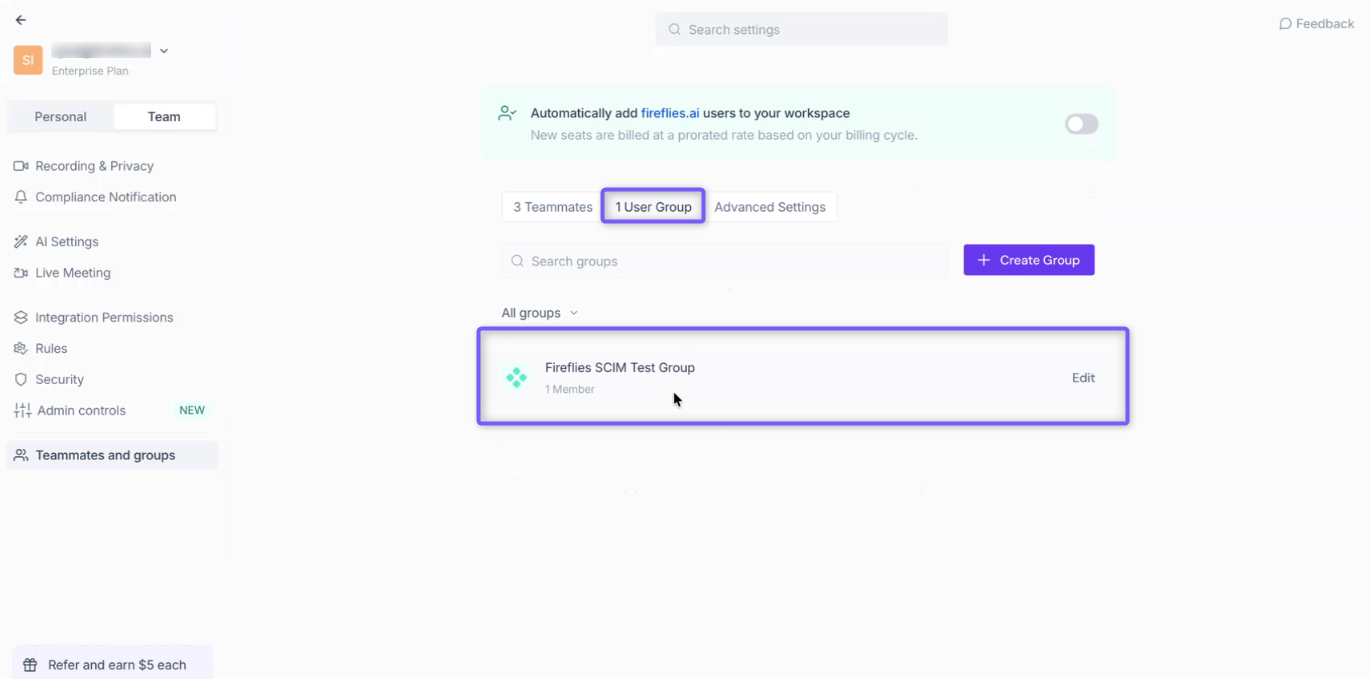
Open the group to verify that the provisioned user appears as a member.
🎉 You're All Set!
You've successfully created and synchronized a Fireflies user group using Microsoft Entra ID and SCIM. The group and its members are now available in your Fireflies workspace.