How to Set Up SCIM User Provisioning with Microsoft Entra ID
Last updated: September 25, 2026
Setting up SCIM (System for Cross-domain Identity Management) with Microsoft Entra ID gives your IT team automatic, reliable account lifecycle management for Fireflies.
It's the perfect partner to SAML SSO. While SSO creates users "Just-In-Time" (JIT) when they first sign in, adding SCIM 2.0 lets you pre-create accounts and automatically deactivate users from Fireflies when they're removed from Microsoft Entra ID.
🔍 What Does SCIM Provisioning Do?
This setup connects Microsoft Entra ID to Fireflies using the SCIM 2.0 standard. Once configured, Microsoft Entra ID can:
Automatically provision (create) new user accounts in Fireflies.
Automatically update user profile details.
Automatically de-provision (deactivate) user accounts in Fireflies when they are removed from Microsoft Entra ID.
🔑 Prerequisites
Before you can enable SCIM provisioning, you must first have Single Sign-On (SSO) set up for your Fireflies account.
🔗 Get Your SCIM Credentials from Fireflies
To connect your IdP, you'll first need to get two pieces of information from your Fireflies account.
SCIM Connector Base URL:
https://user-service-rest.fireflies.ai/scim/v2
SCIM Access Token
Step 1: Generate your token
Note: Only the Admin Account that set up SSO will be able to create SCIM Tokens.
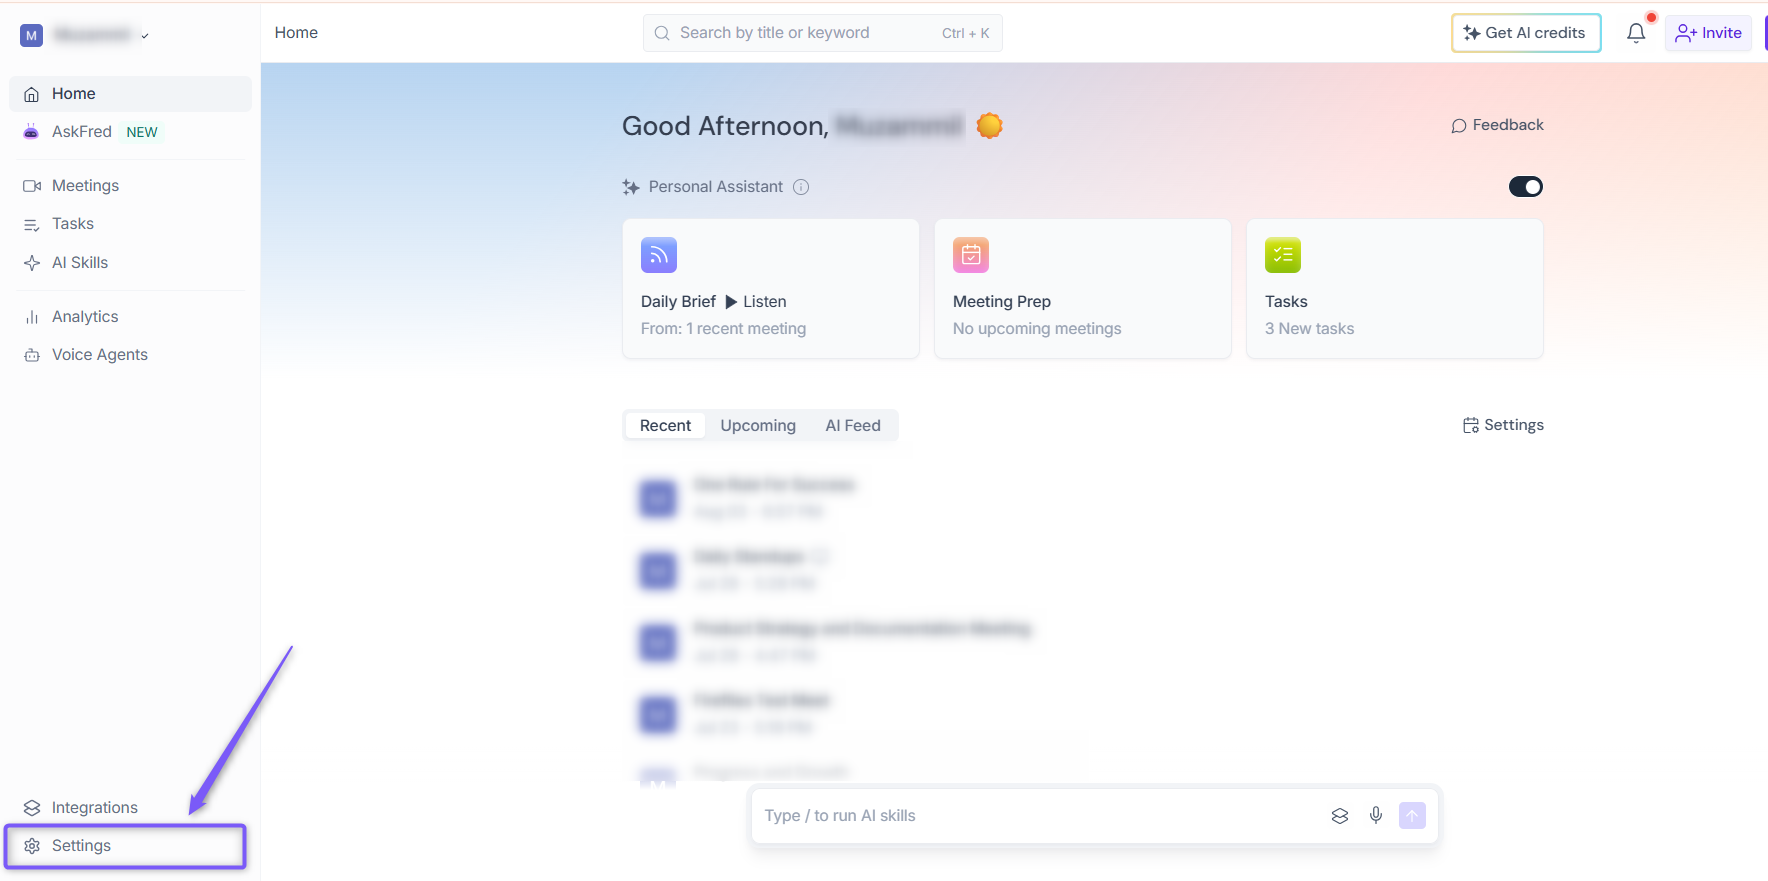
1. Open your Fireflies web app and click on Settings in the main navigation menu.
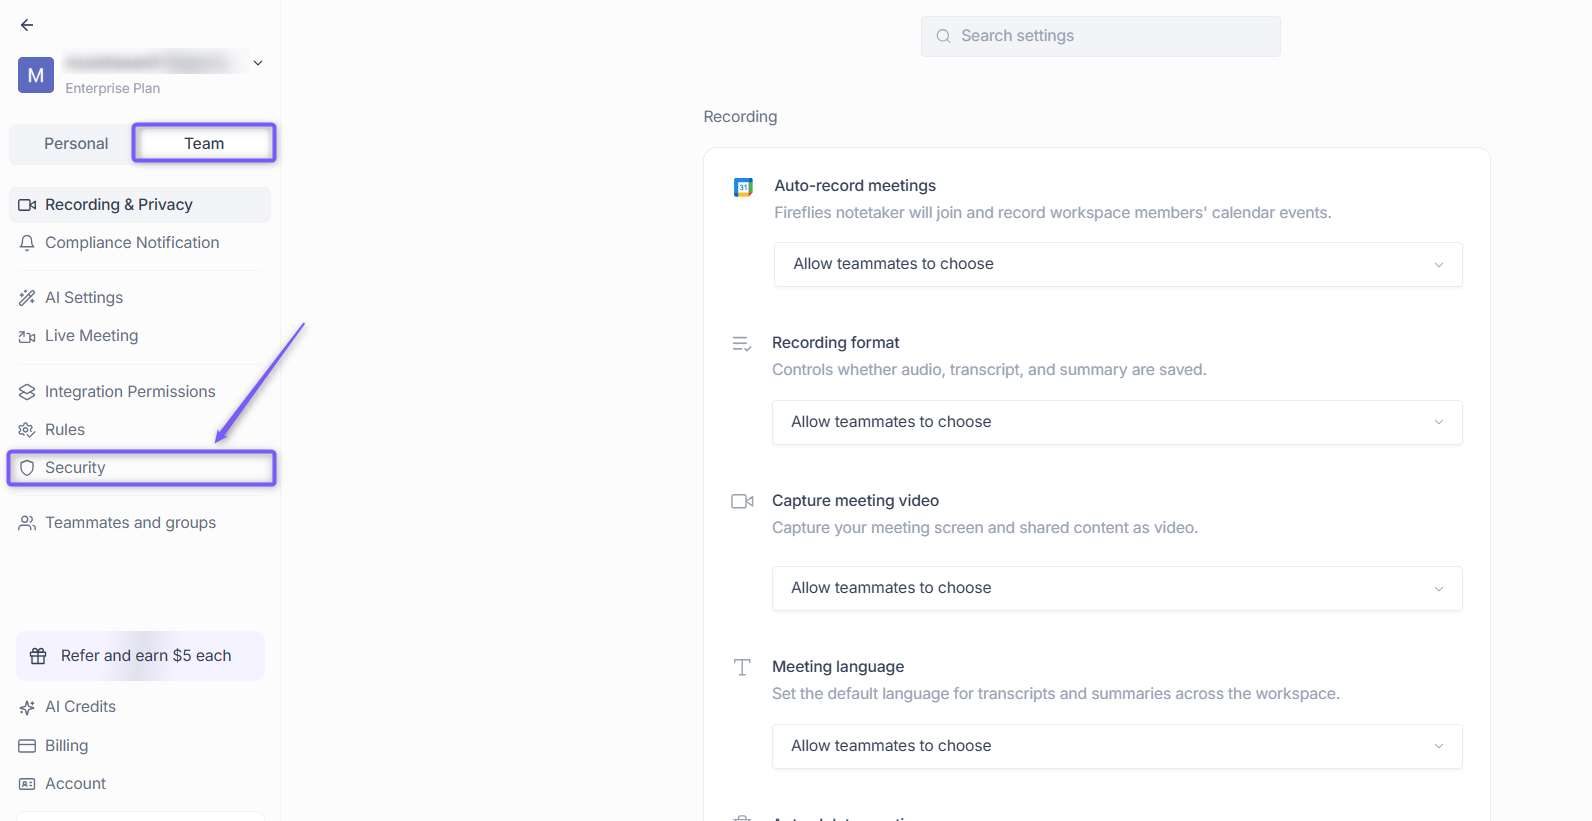
2. Switch to the Team tab, then click Security.
3. Scroll down to the Secure your workplace section and locate the SCIM Access Token.
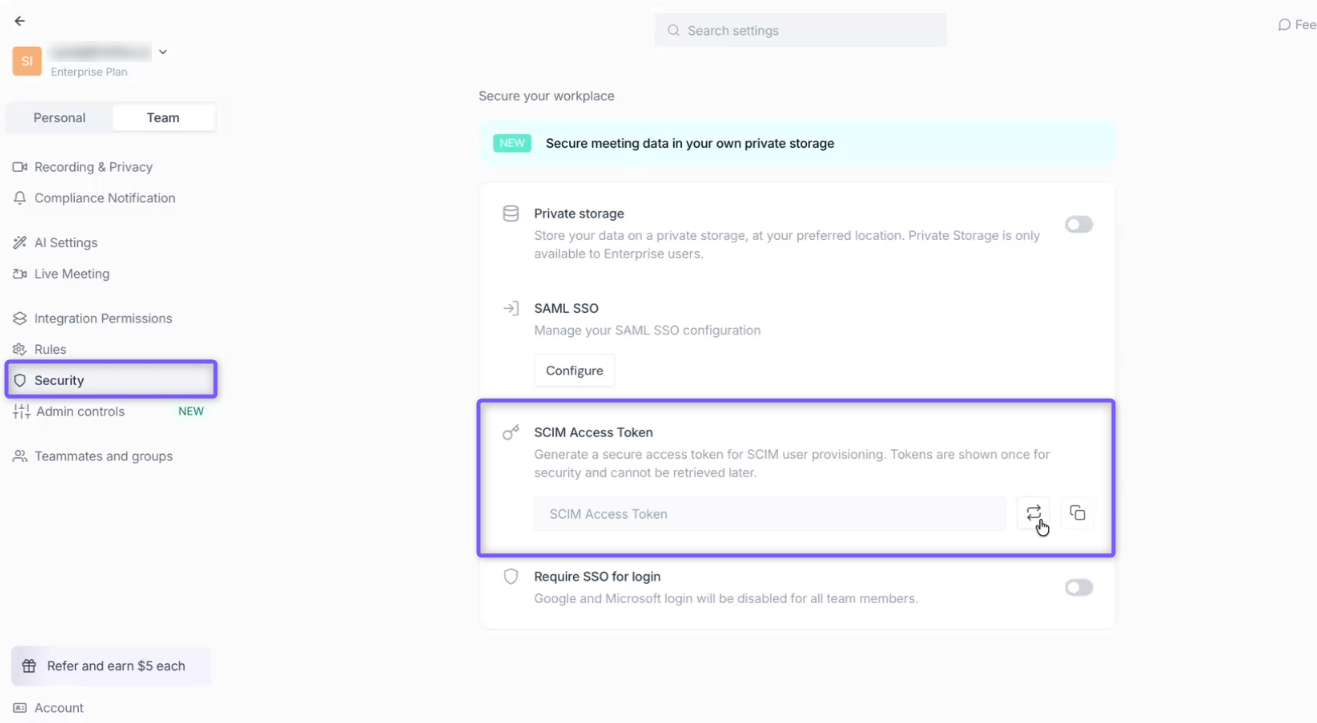
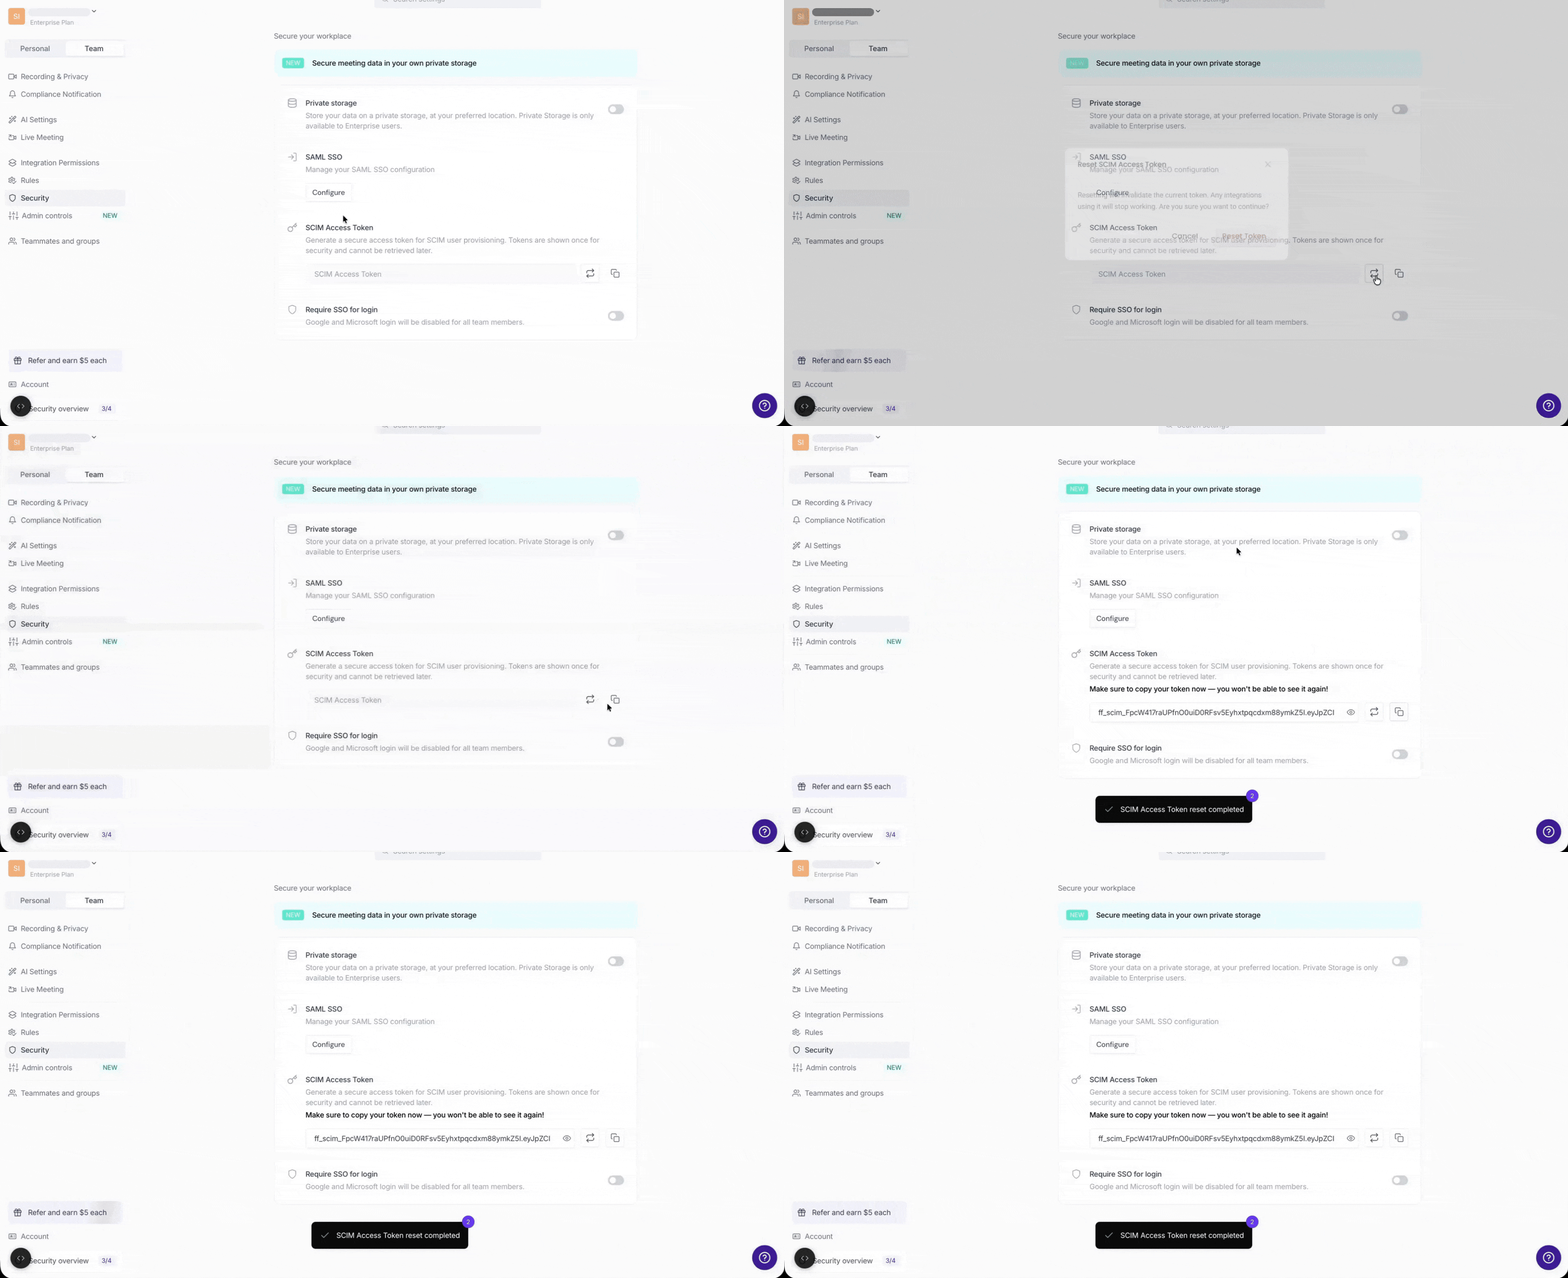
4. Click the rotate icon (↻) to generate your token, then click the copy icon to copy it immediately, as you won't be able to see it again.
Note: To revoke or rotate this token, generate a new token to automatically invalidate the previous one.
⚙ Create a Provisioning Configuration in Microsoft Entra ID
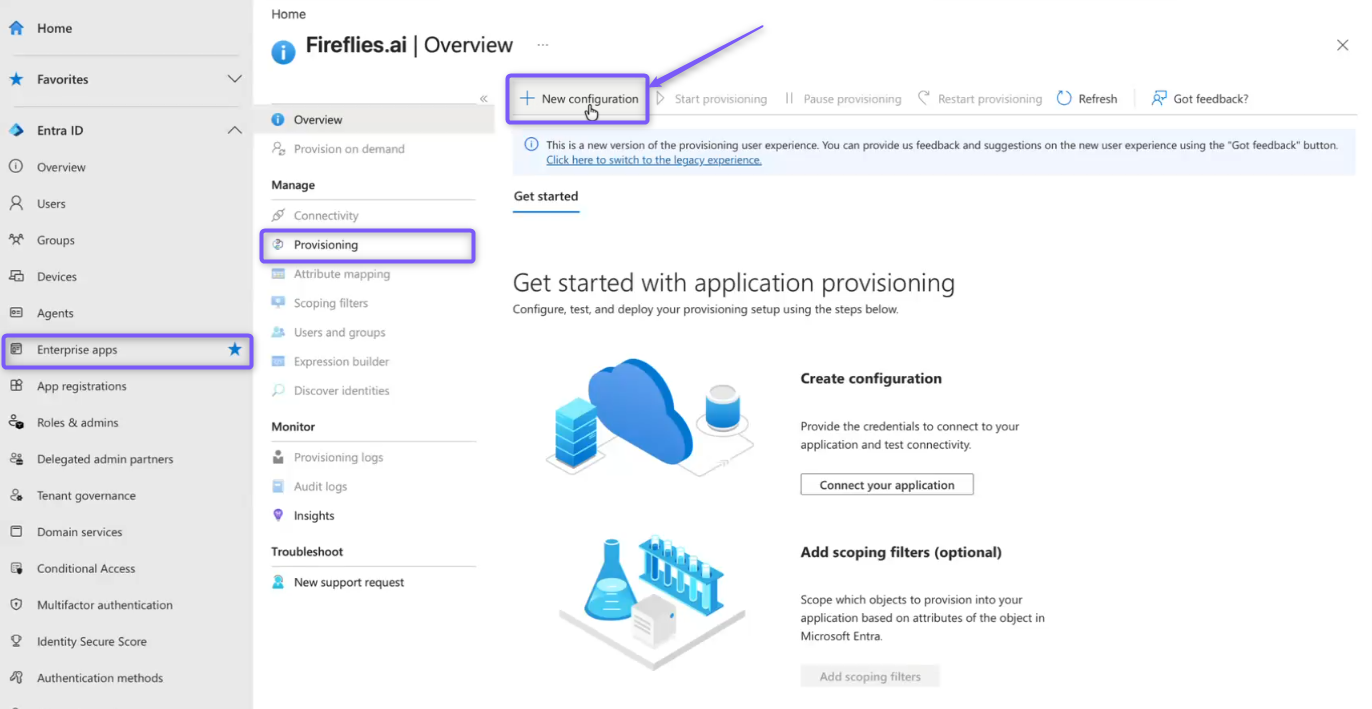
Step 6: In the Microsoft Entra admin center, open the Fireflies.ai enterprise application, select Provisioning, and click New configuration.
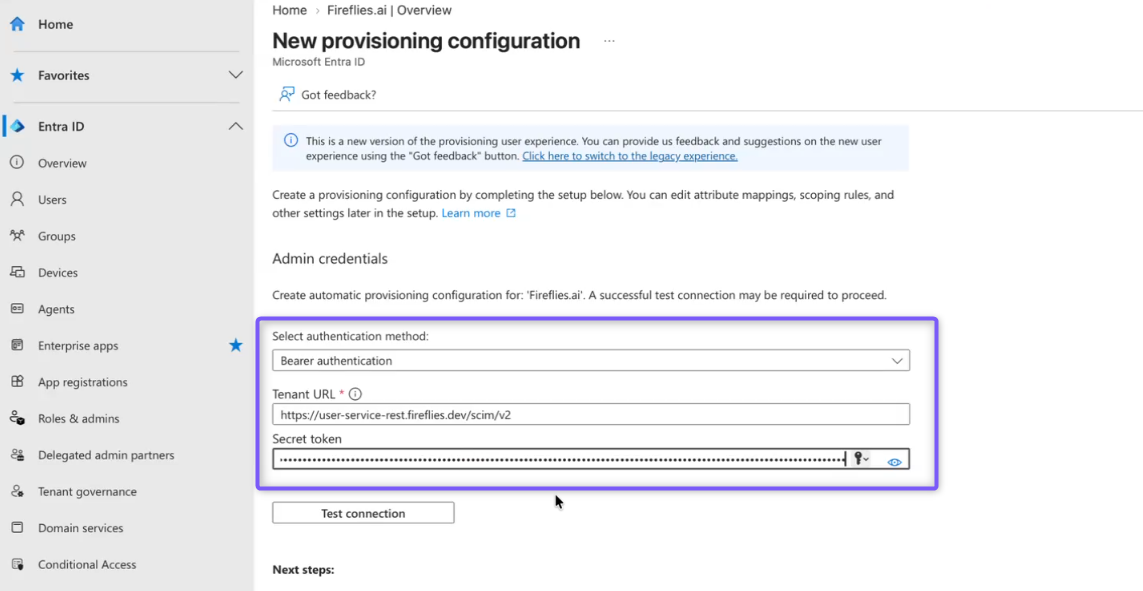
Step 8: Under Admin credentials, configure the provisioning connection using the following values:
Field | Description | Value |
|---|---|---|
Authentication method | The authentication method used to connect to Fireflies. | Bearer authentication |
Tenant URL | The SCIM endpoint used for provisioning. |
|
Secret token | The token used to authenticate the SCIM connection. | Enter the SCIM Access Token generated in Fireflies. |
Step 9: Click Test connection to verify the connection.
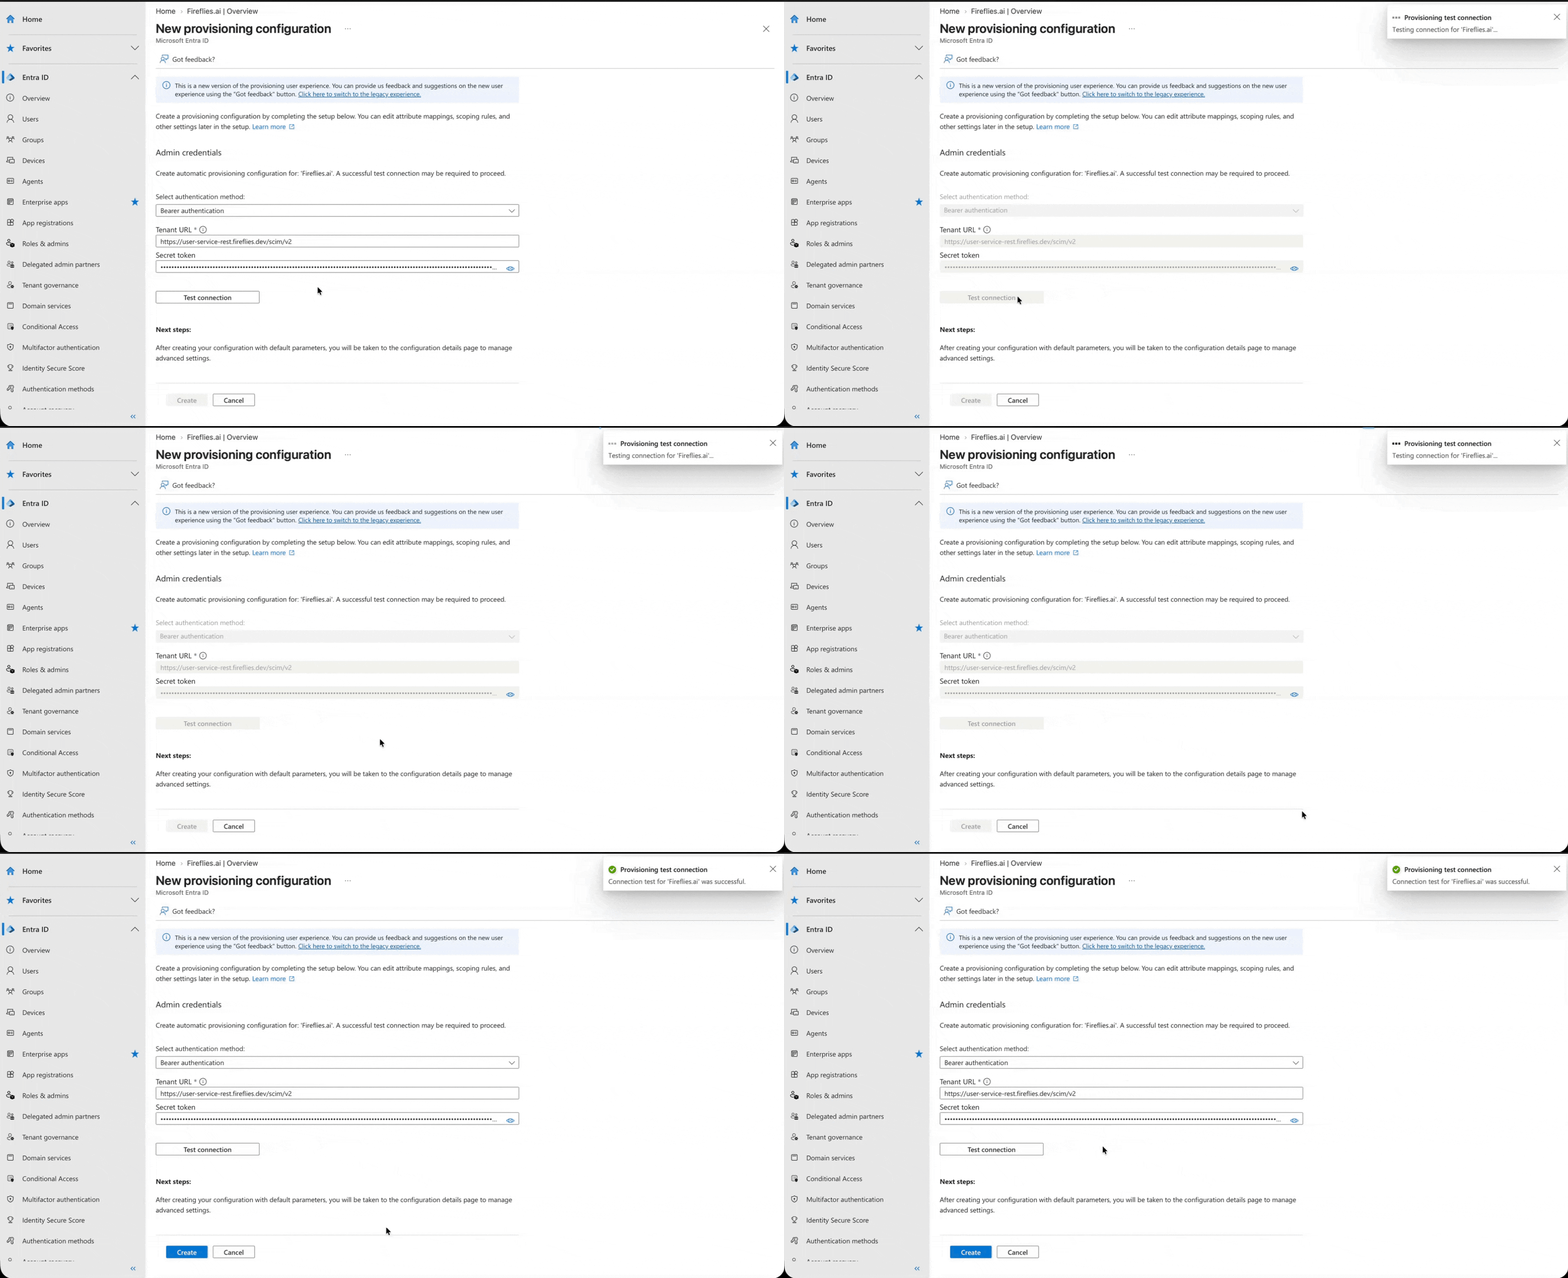
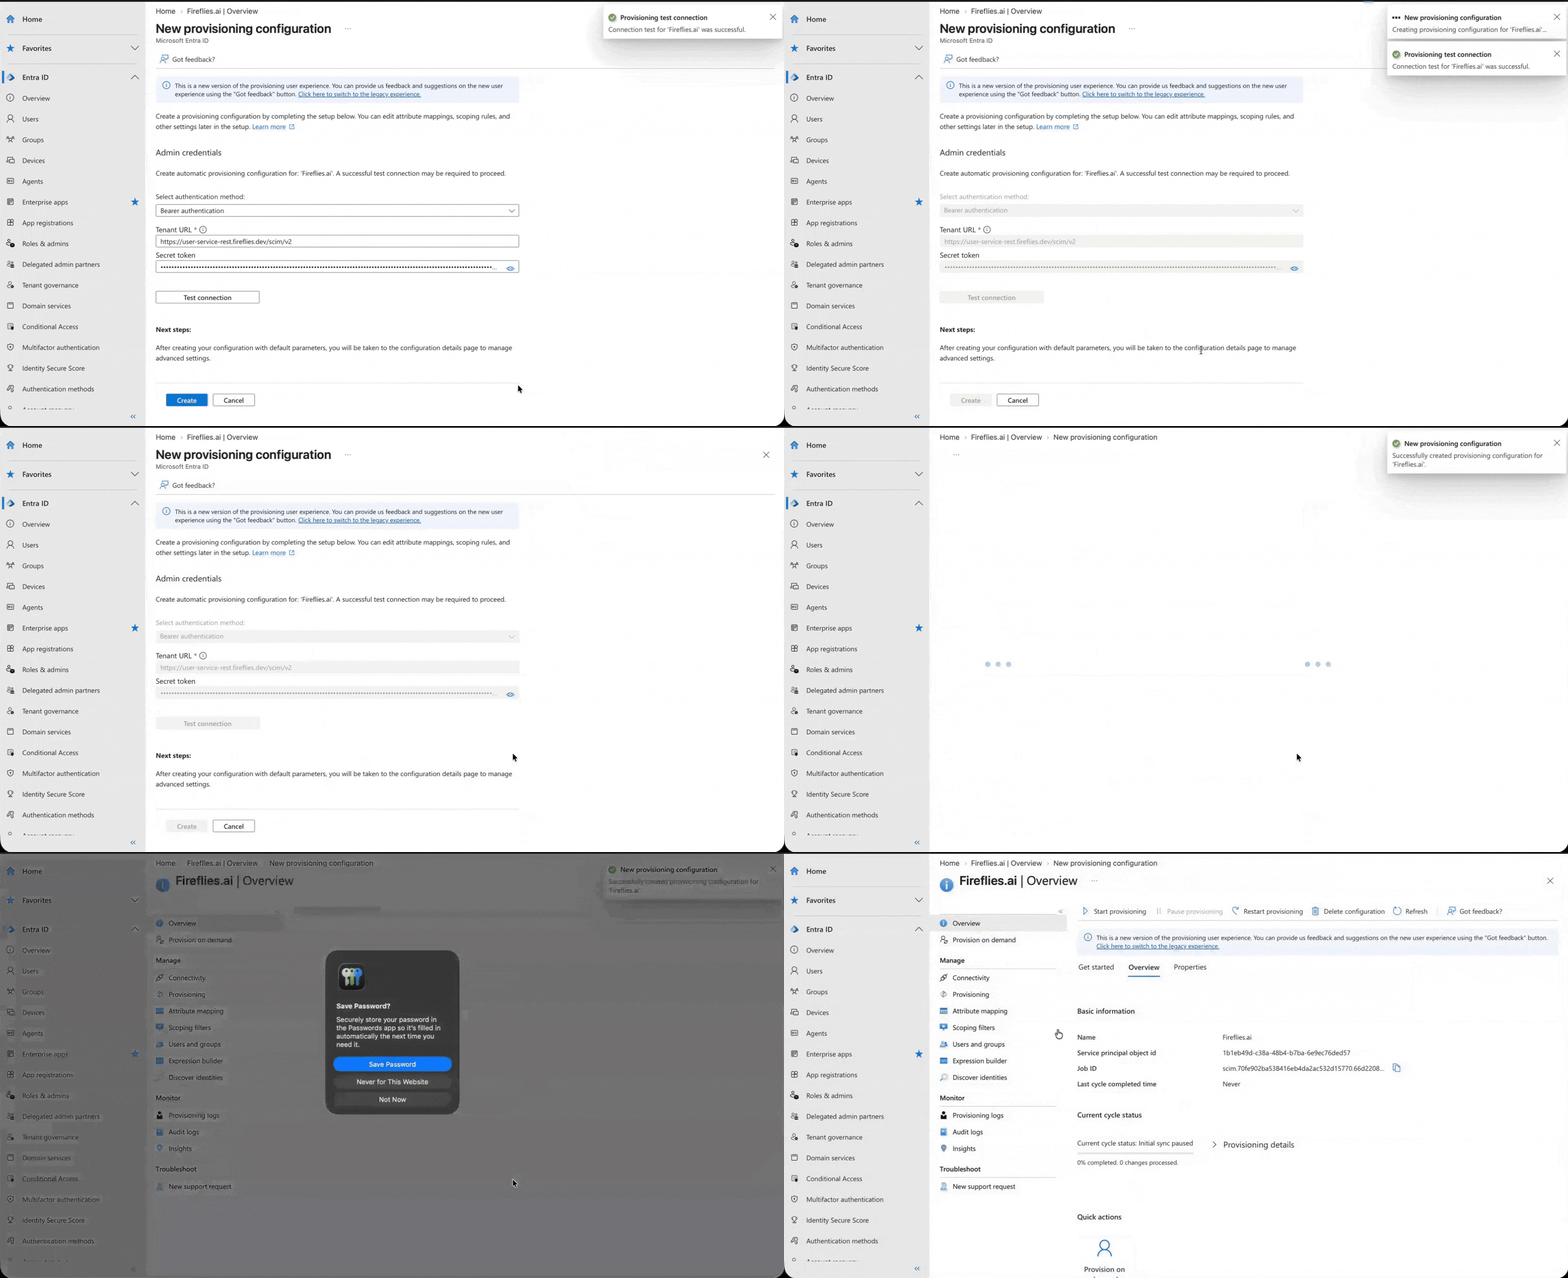
Step 10: After the connection is successfully tested, click Create to create the provisioning configuration.
Microsoft Entra creates the provisioning configuration and opens the configuration details page.
▶ Turn On Provisioning
After creating the configuration, Microsoft Entra opens the Fireflies.ai | Overview page.
Step 11: Open Provisioning.
Step 12: Under Settings, open the provisioning settings.
Step 13: Turn Provisioning Status to On.
Step 14: Click Save.
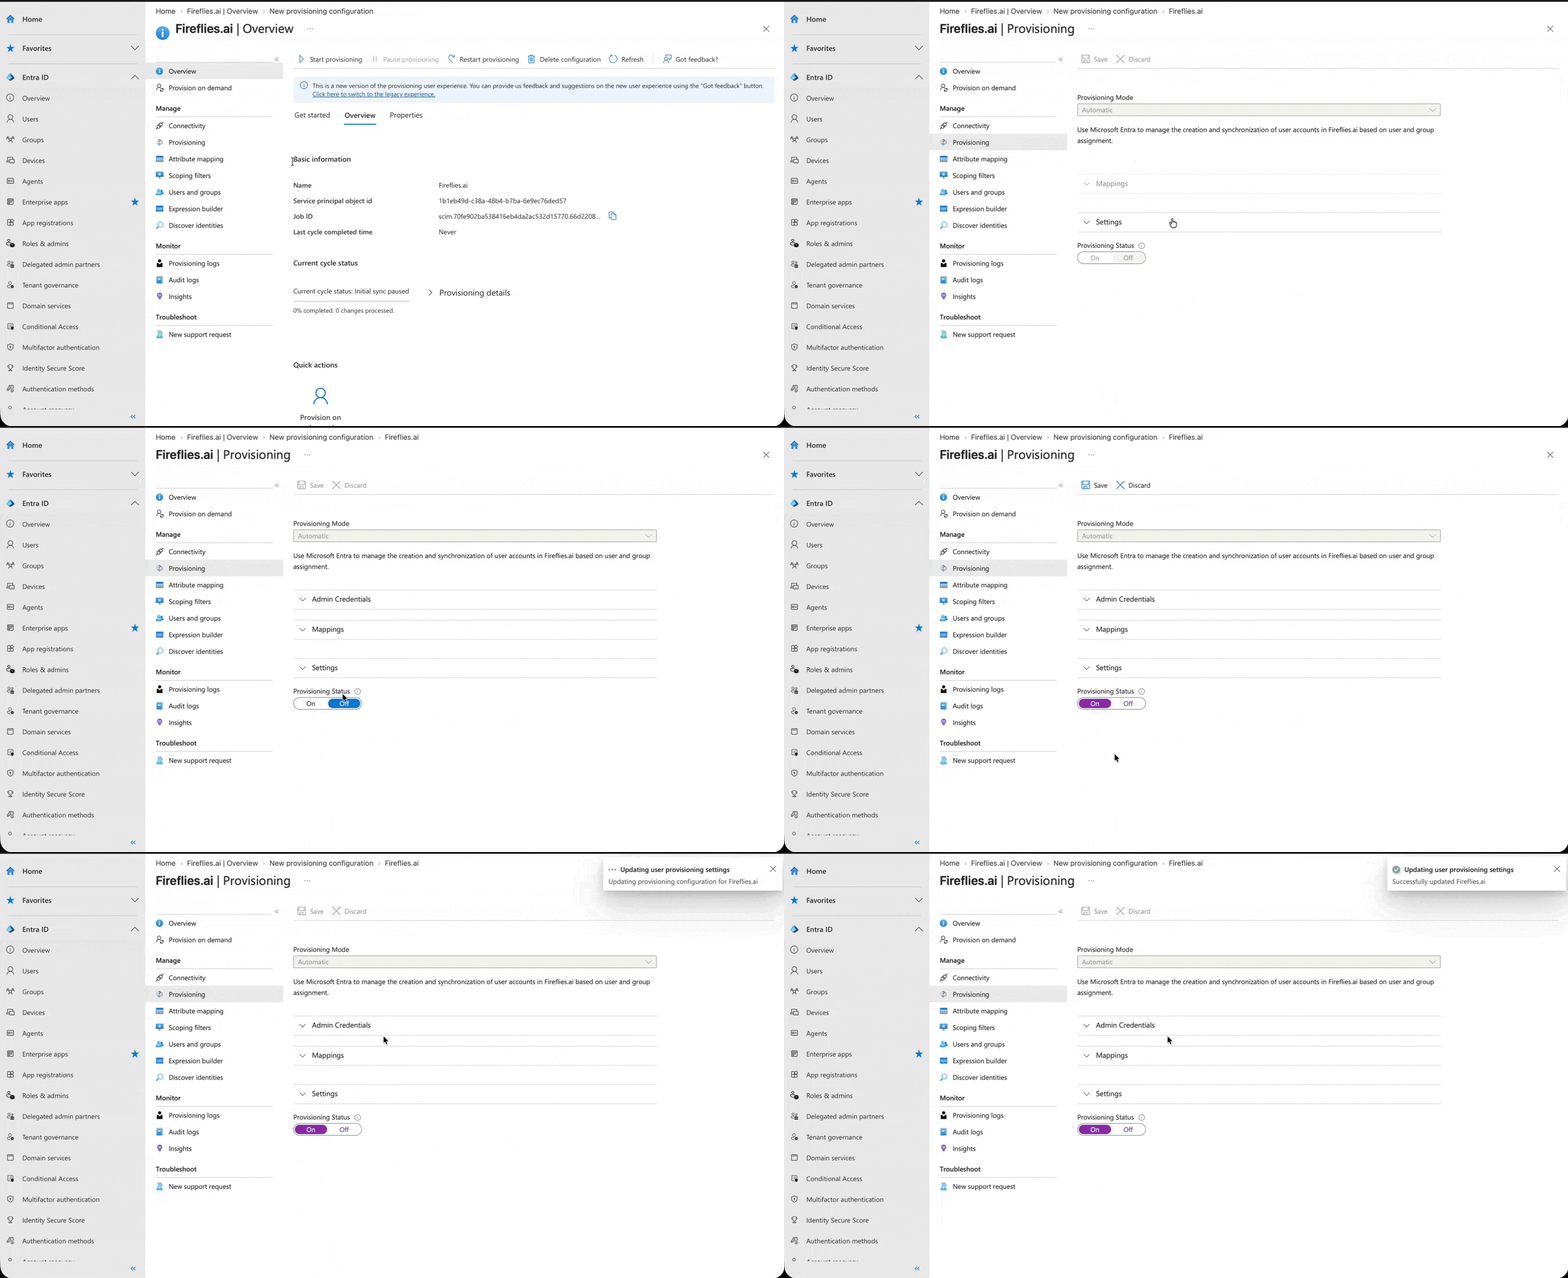
Note: Microsoft Entra uses the provisioning configuration to manage the creation and synchronization of user accounts in Fireflies based on user and group assignment.
👤 Assign Users to the Fireflies Application
Users must be assigned to the Fireflies enterprise application before Microsoft Entra can provision them.
Step 15: In the Fireflies.ai enterprise application, select Users and groups.
Step 16: Click Add user/group.
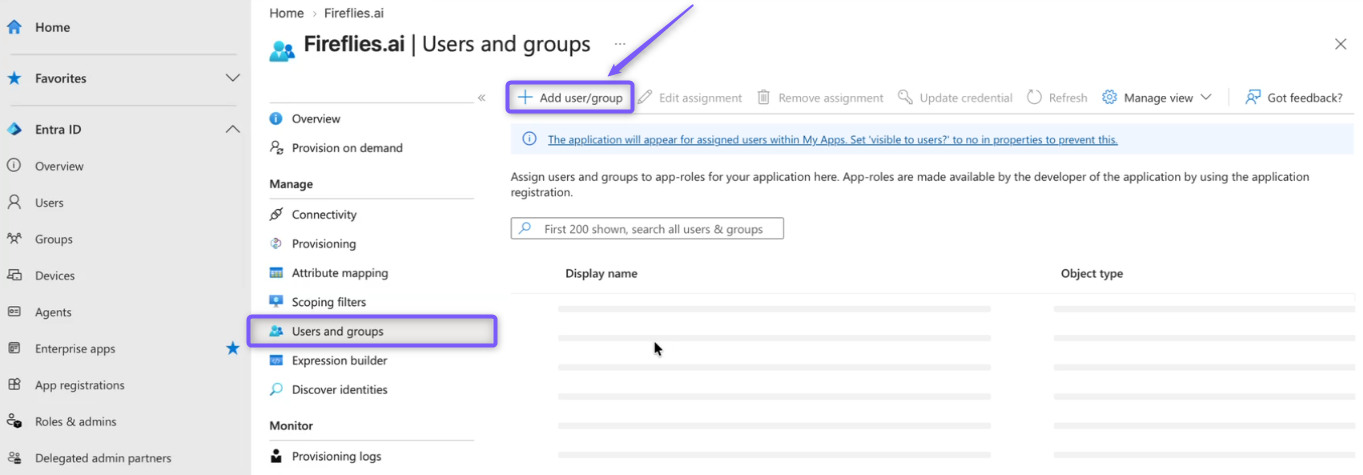
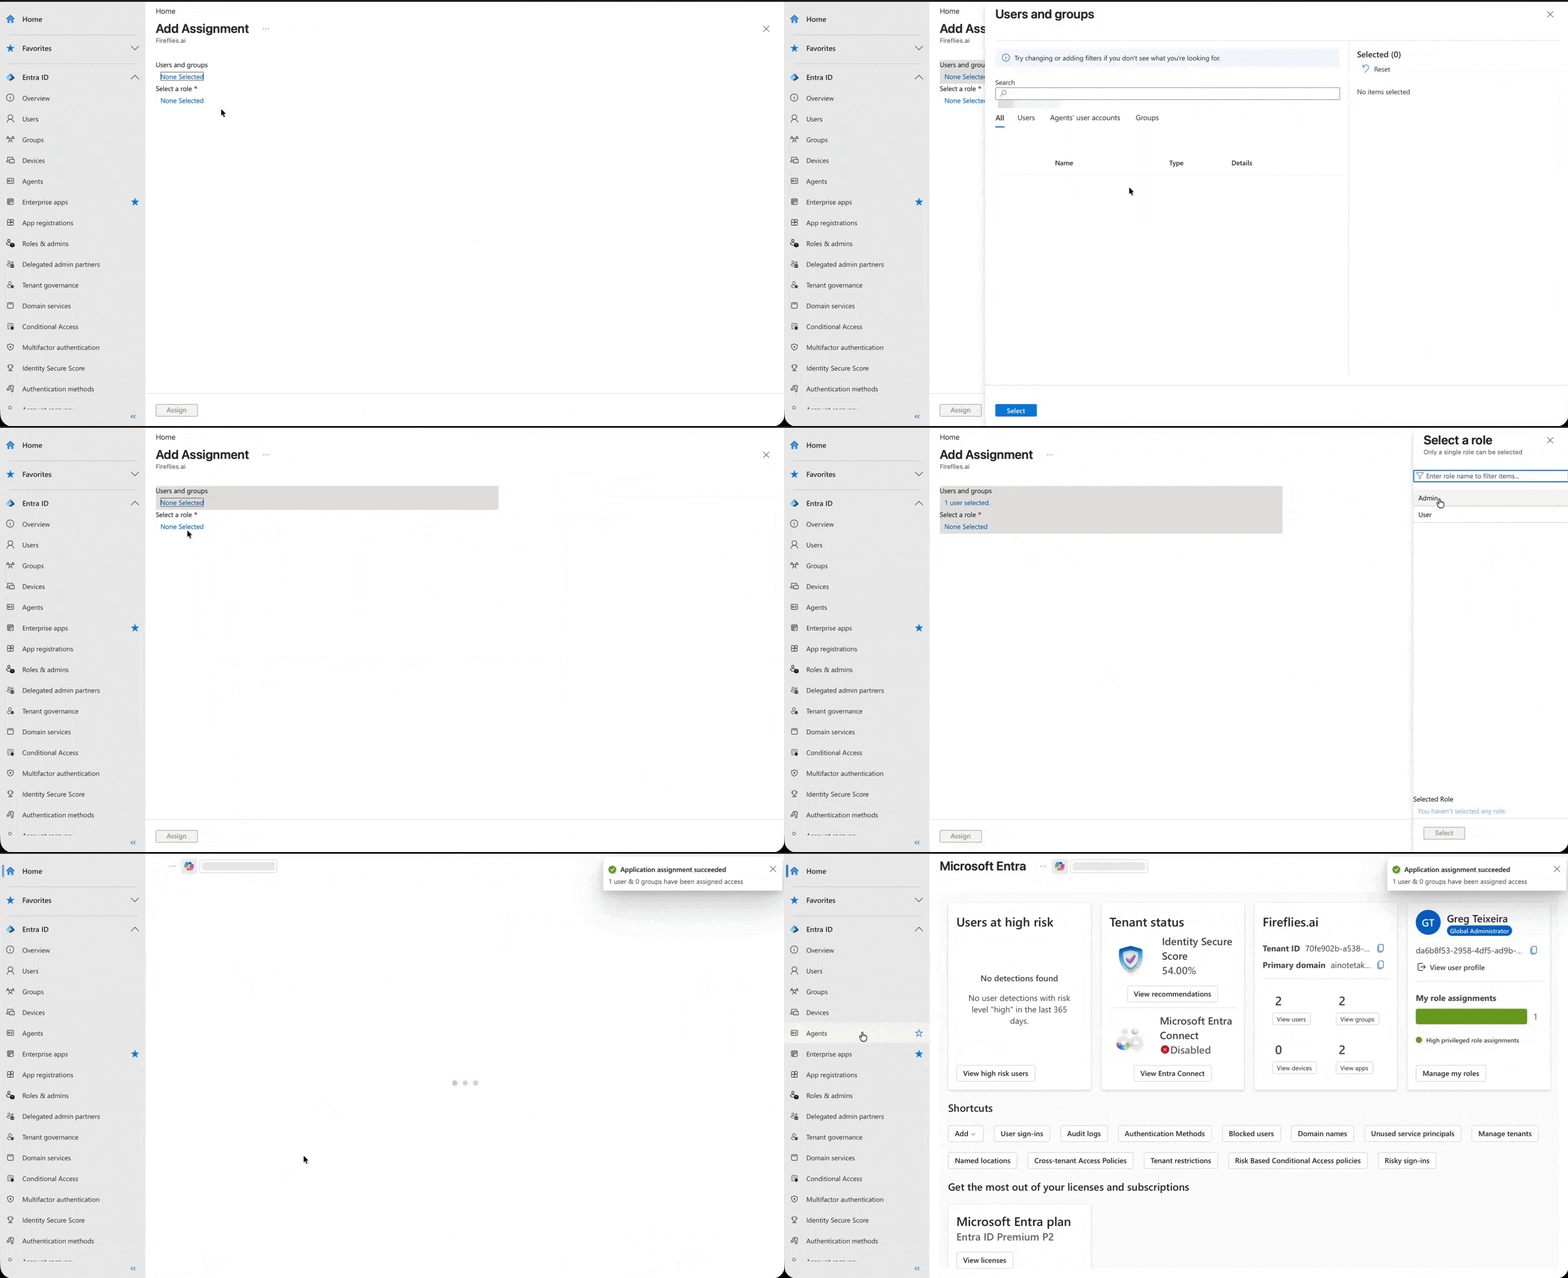
Step 17: Under Users and groups, select the users you want to provision to Fireflies.
Step 18: Under Select a role, select User.
Step 19: Click Assign.
Microsoft Entra confirms that the application assignment was successful.
🔄 Provision a User on Demand
You can use Provision on demand to test provisioning for an individual user before relying on the regular provisioning cycle.
Step 20: In the Fireflies.ai enterprise application, open Provisioning.
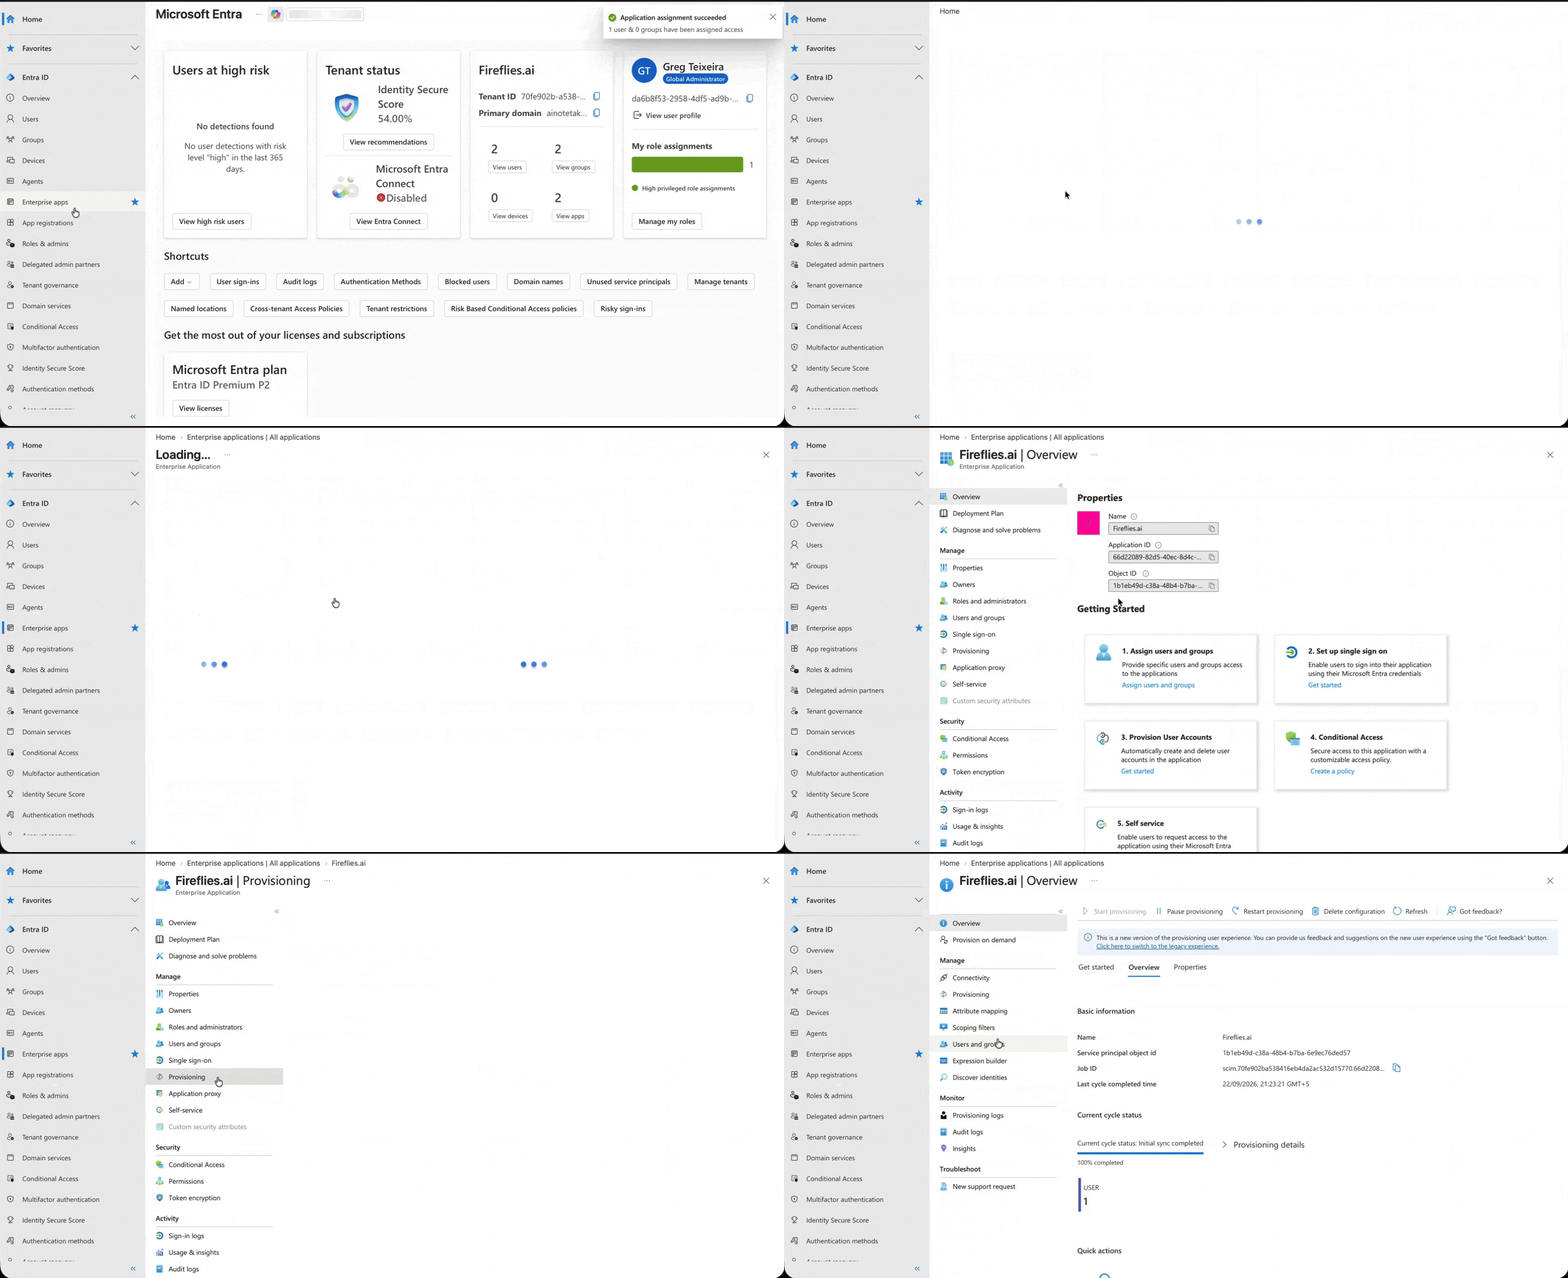
Step 21: Select Provision on demand.
Step 22: Under Select a user or group, search for the user you assigned to the Fireflies application.
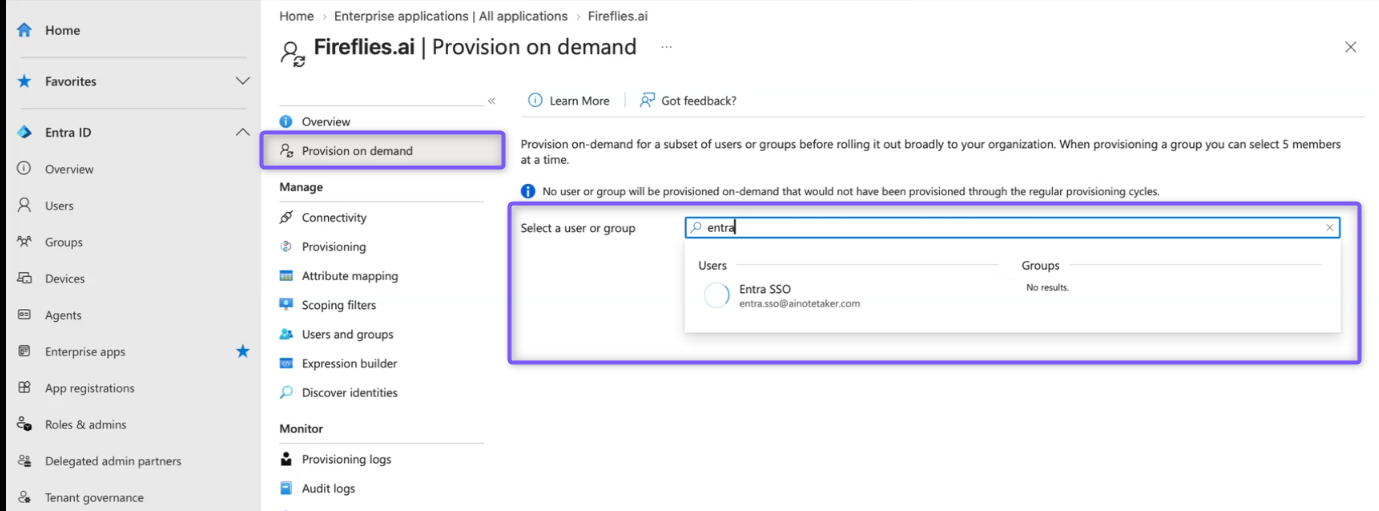
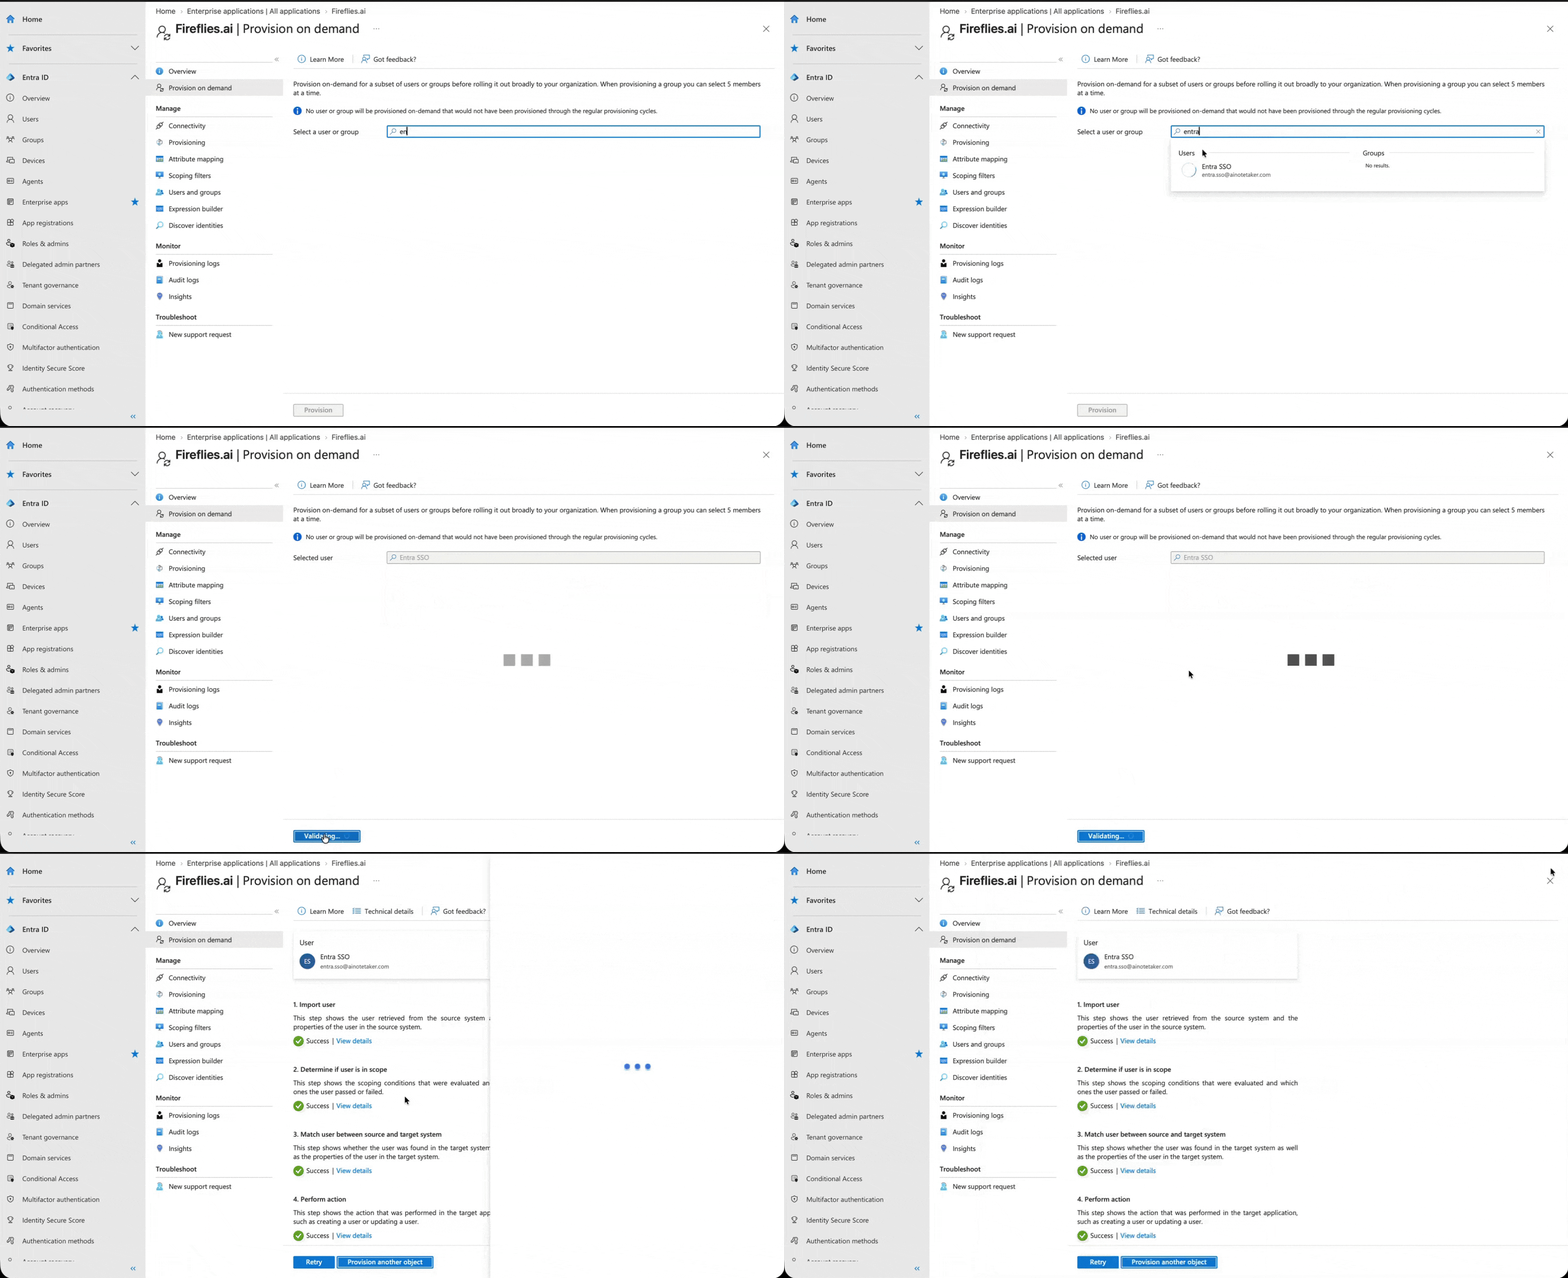
Step 23: Select the user.
Step 24: Click Provision to run the provisioning action.
Microsoft Entra displays the provisioning steps and the result of each action.
✅ Verify the User in Fireflies
After the provisioning action completes, open your Fireflies workspace.
Step 25: Open your Fireflies workspace, then click Settings.
Step 26: Switch to the Team tab, then select Teammates and groups.
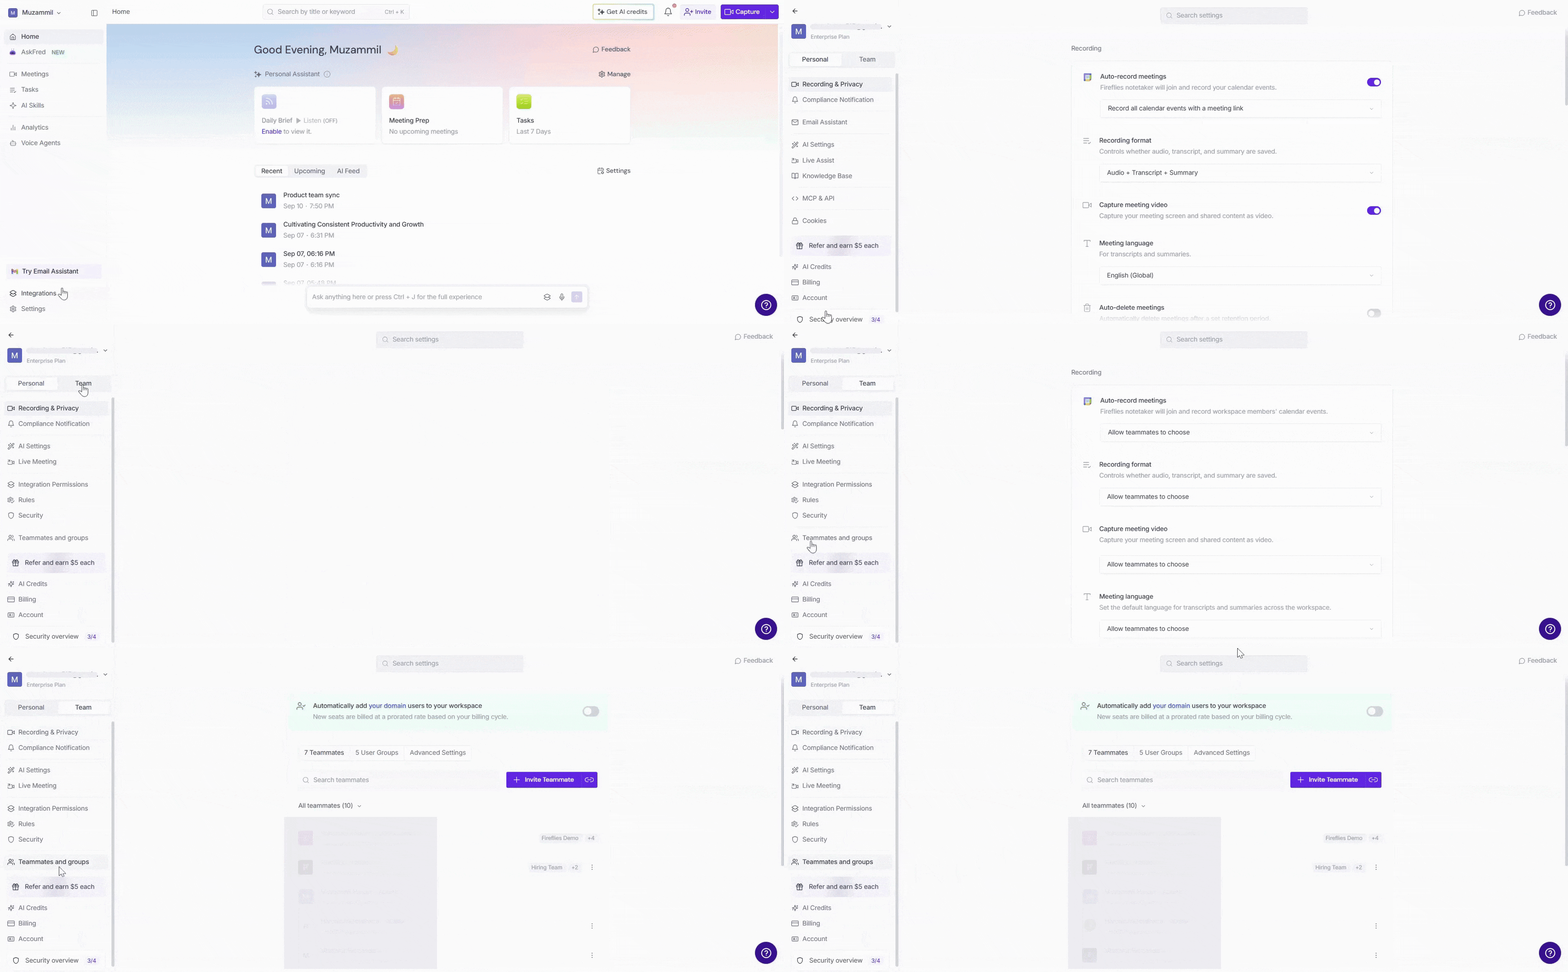
Step 27: Under All teammates, verify that the assigned user appears in the list. The provisioned user should appear in your Fireflies workspace.
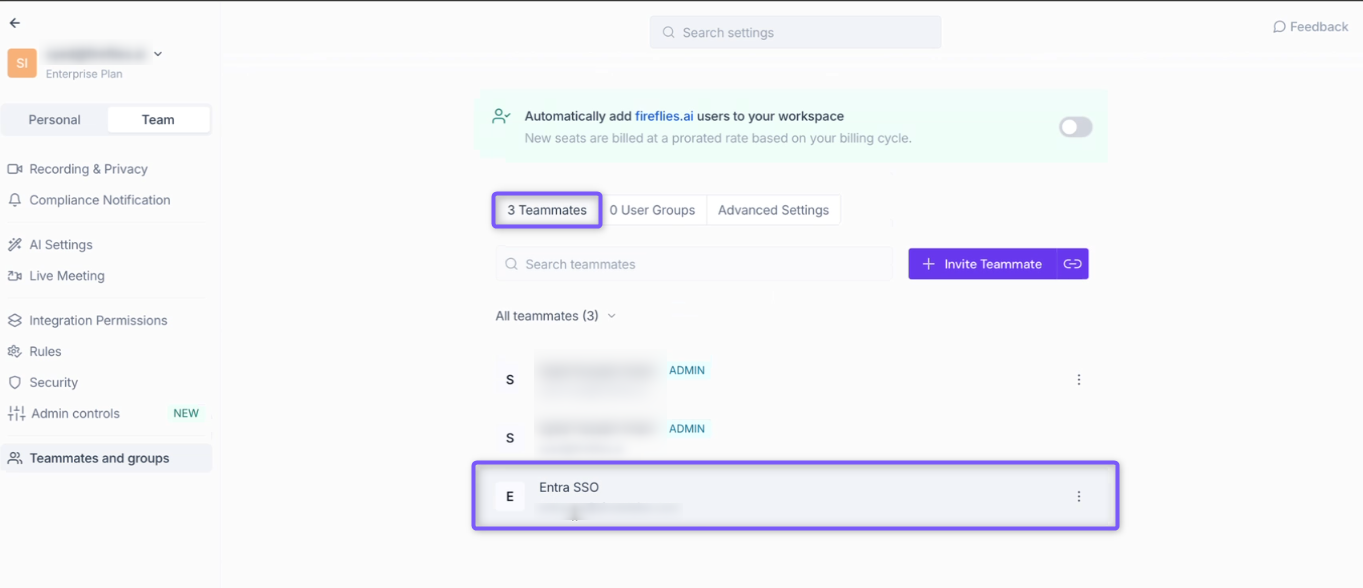
You can also return to Microsoft Entra ID and review the provisioning result under Provision on demand or the provisioning logs.
🎉 You're All Set!
SCIM provisioning is now configured between Microsoft Entra ID and Fireflies. Users assigned to the Fireflies application can be provisioned automatically, while Microsoft Entra ID manages their account lifecycle.
📌 Related Guides
Manage User Groups via SCIM with Microsoft Entra ID — Manage Fireflies user groups through Microsoft Entra ID.
Manage User Roles via SCIM with Microsoft Entra ID — Manage Fireflies user roles through Microsoft Entra ID.
How to Set Up Automatic User Provisioning with SCIM — Learn how SCIM works with Fireflies and configure the connection with your Identity Provider.