How to setup SSO for OneLogin
Last updated: March 17, 2026
This guide covers the steps to setup SSO for OneLogin.
Before you begin
Setting up SSO involves configuring both your identity provider and Fireflies. Here's what you need to know before starting:
What you'll need
Admin access to both your identity provider (Azure AD/Okta/JumpCloud/OneLogin) and your Fireflies account
About 10-15 minutes to complete the full setup process
Two browser tabs - one for your identity provider, one for Fireflies
Important setup requirement
⚠ Critical step: Before you start the SSO configuration process, you must either:
Log out of your current Fireflies session, OR
Open the SSO setup link in an incognito/private browser window
This prevents session conflicts that can cause setup issues.
How the process works
Configure your identity provider - Set up the basic SAML application and get the necessary URLs and certificates
Configure Fireflies - Use the information from step 1 to set up SSO at app.fireflies.ai/auth/sso
Complete the connection - Return to your identity provider with the final details from Fireflies
Ready to start?
Once you have admin access and have logged out of Fireflies (or opened an incognito window), you can begin the configuration process below.
Setup SSO for OneLogin
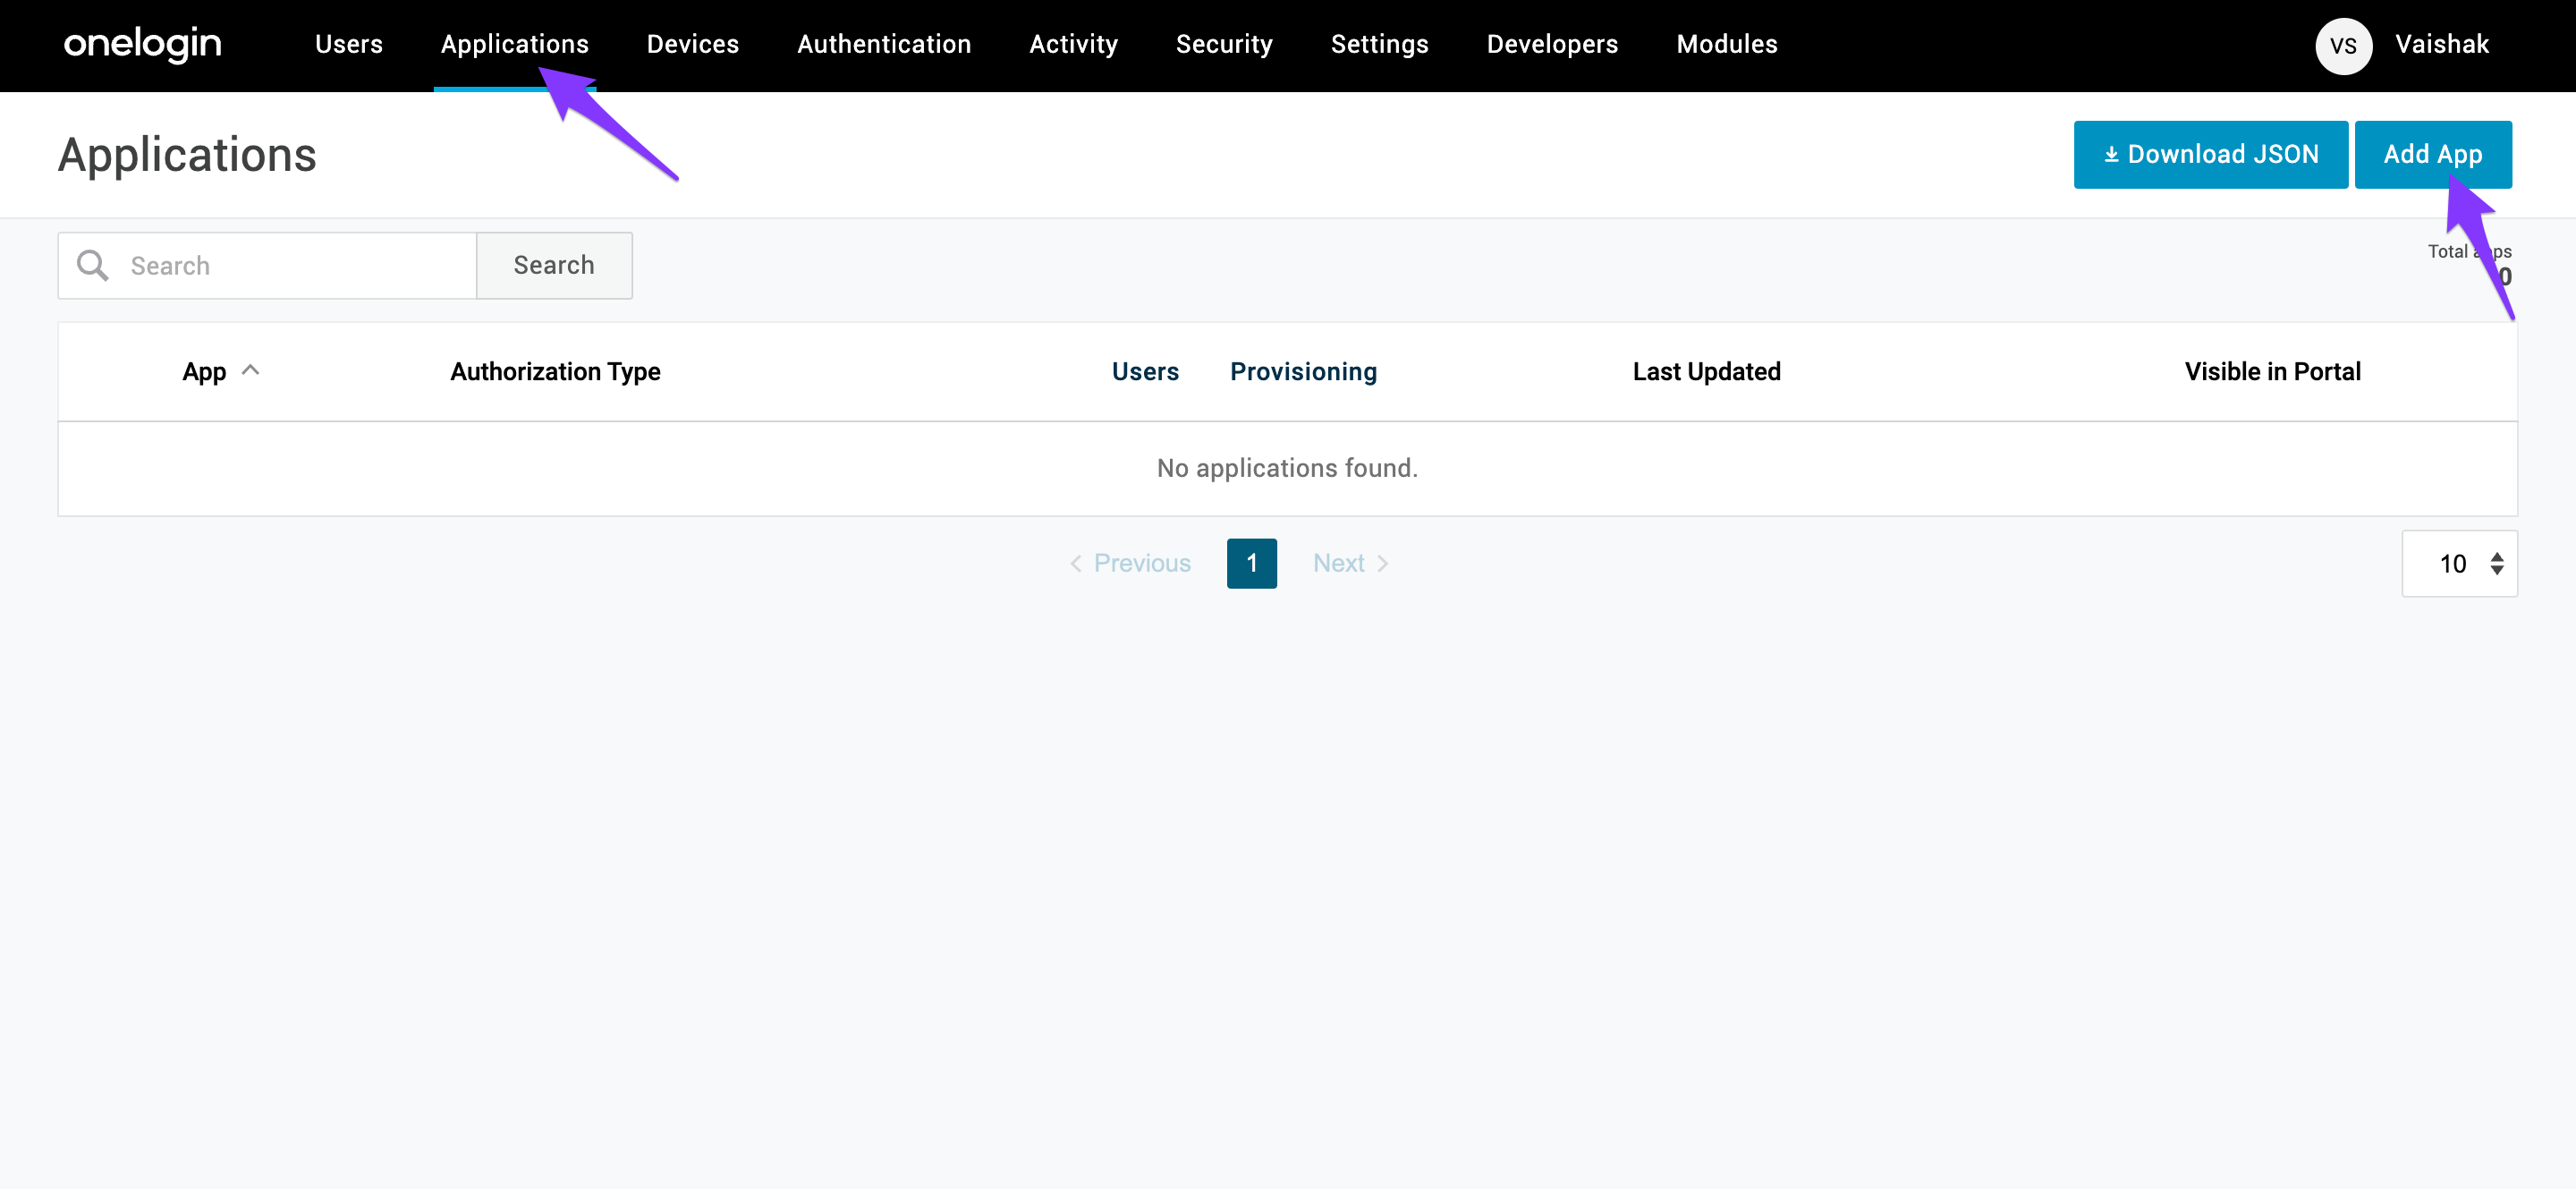
Login to Onelogin.
Click Applications and click Add App.
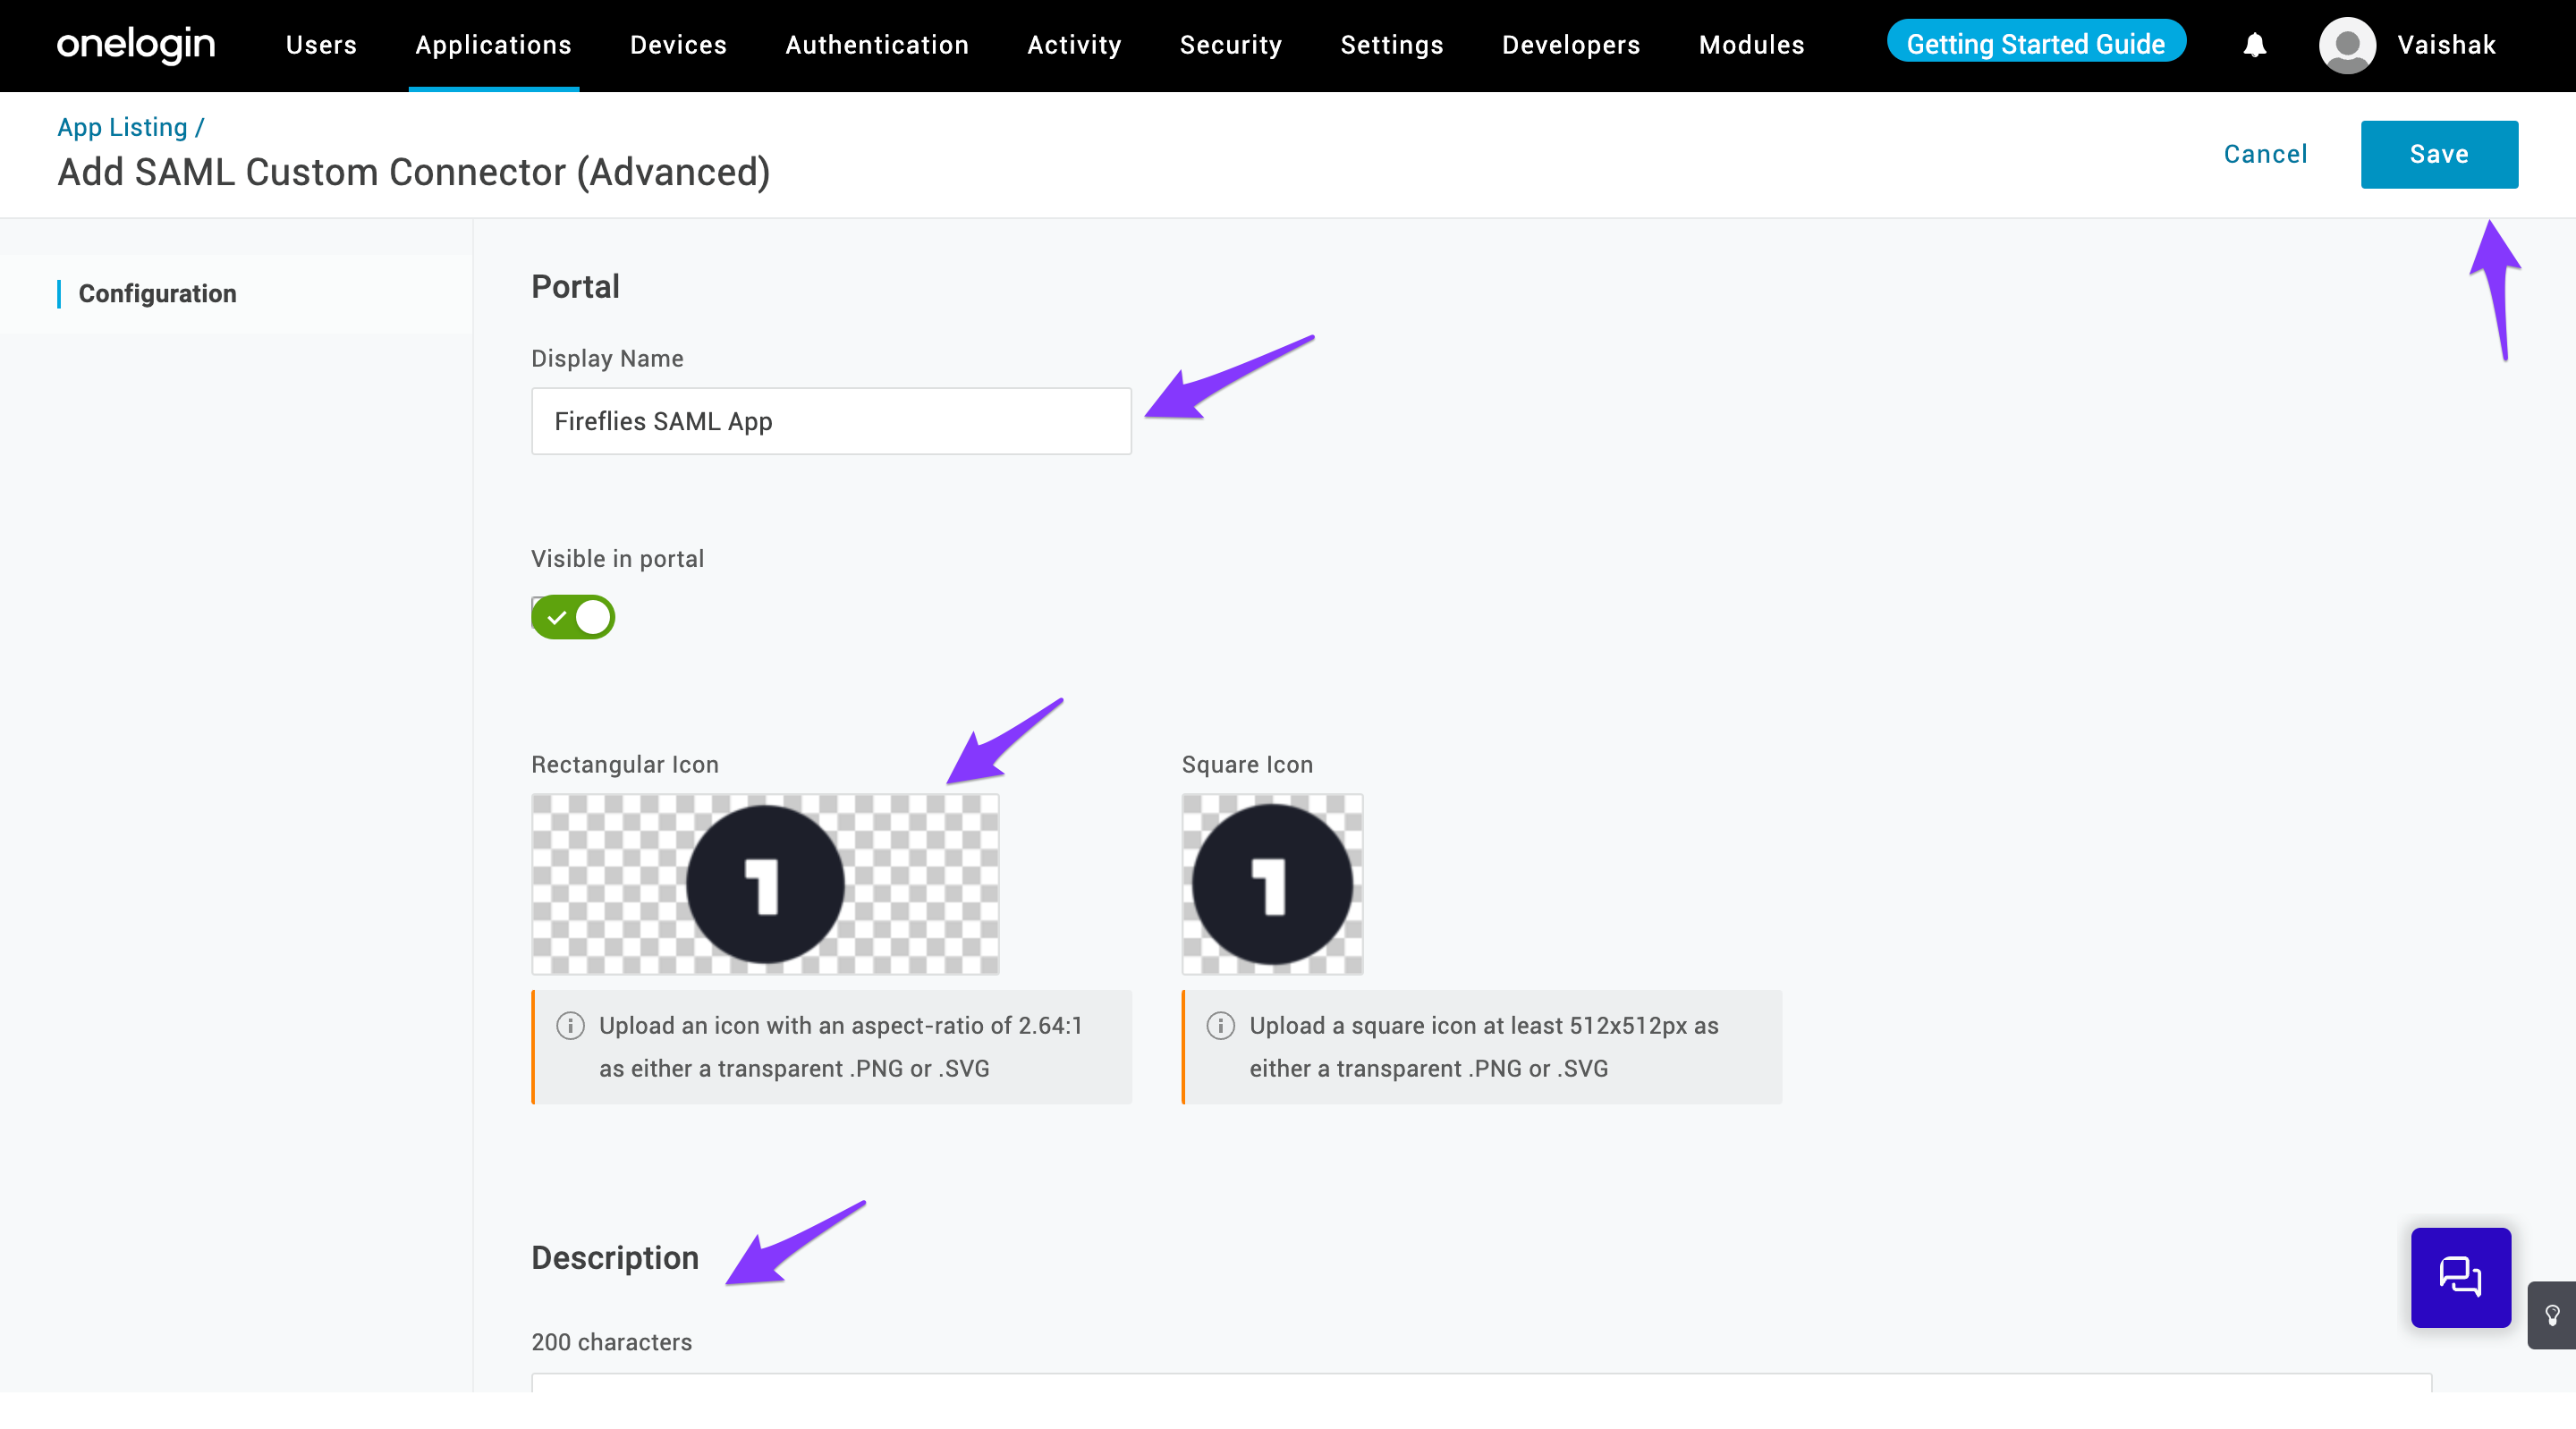
Search for SAML Custom and select SAML Custom Connector (Advanced).
If you would like to use SCIM for automatic user provisioning in the future, select SCIM Provisioner with SAML (SCIM v2 Core) instead of SAML Custom Connector (Advanced).

Create the application with a name for example: "Fireflies SAML app". Upload the logo and description. Now, click Save.
Click the SSO tab.
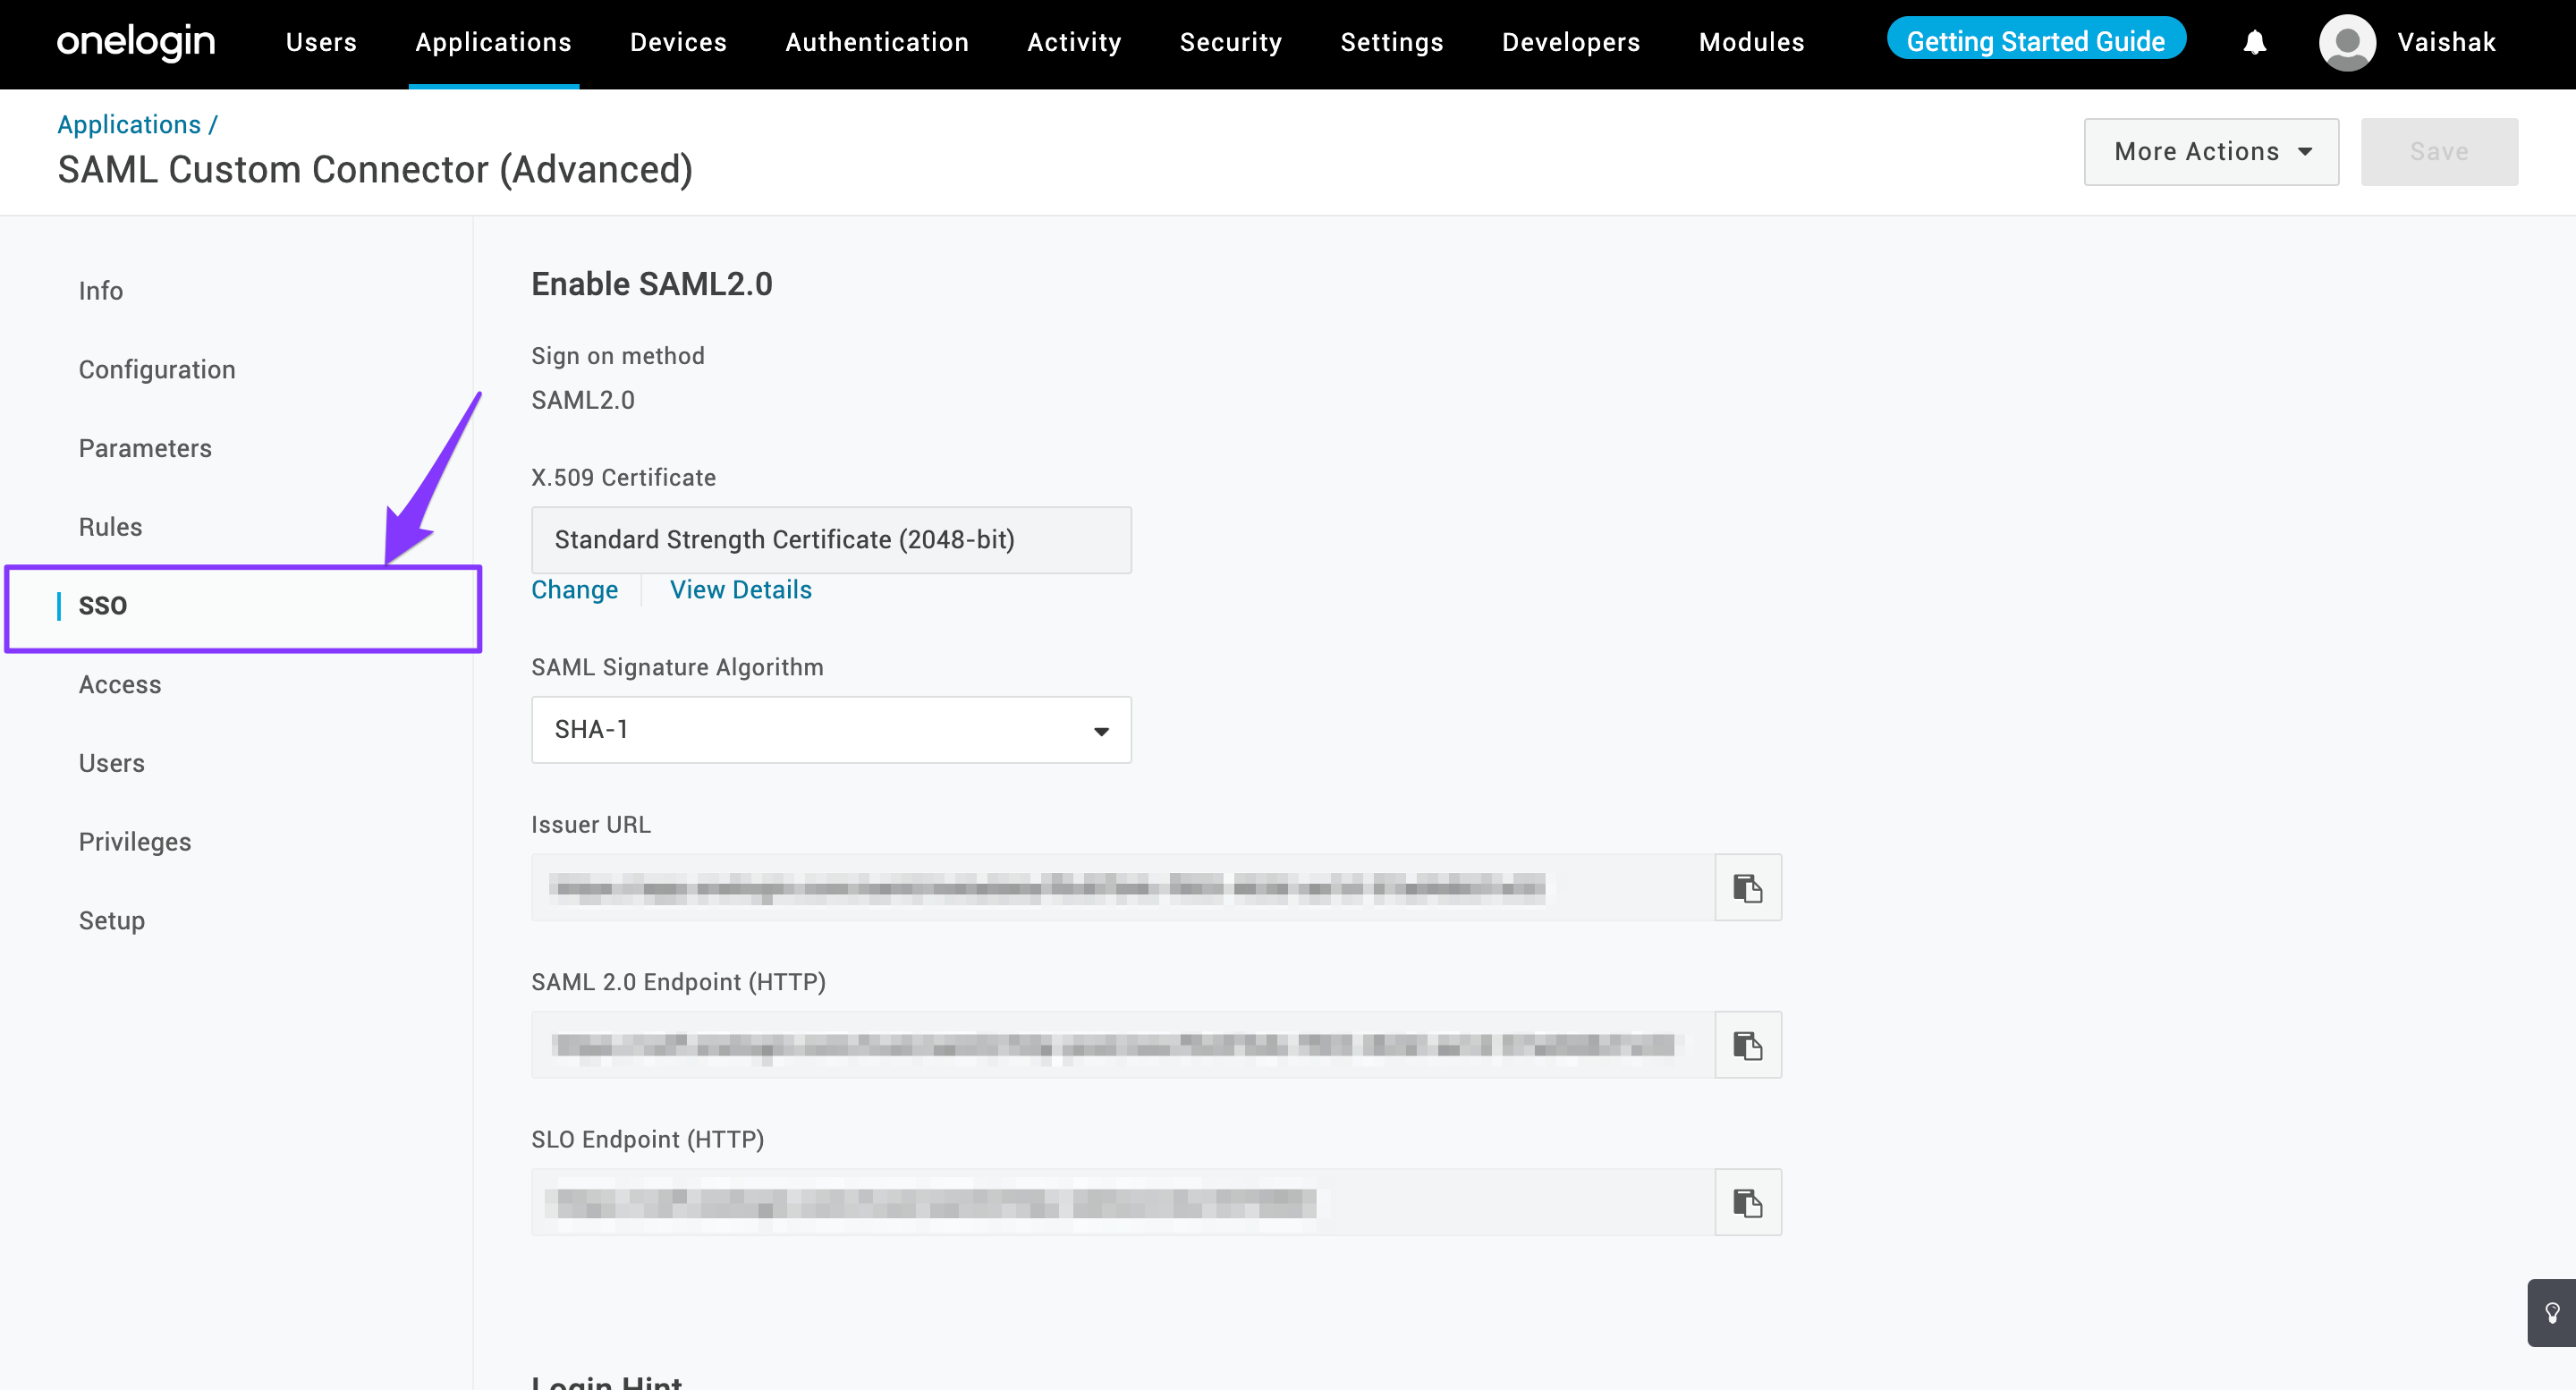
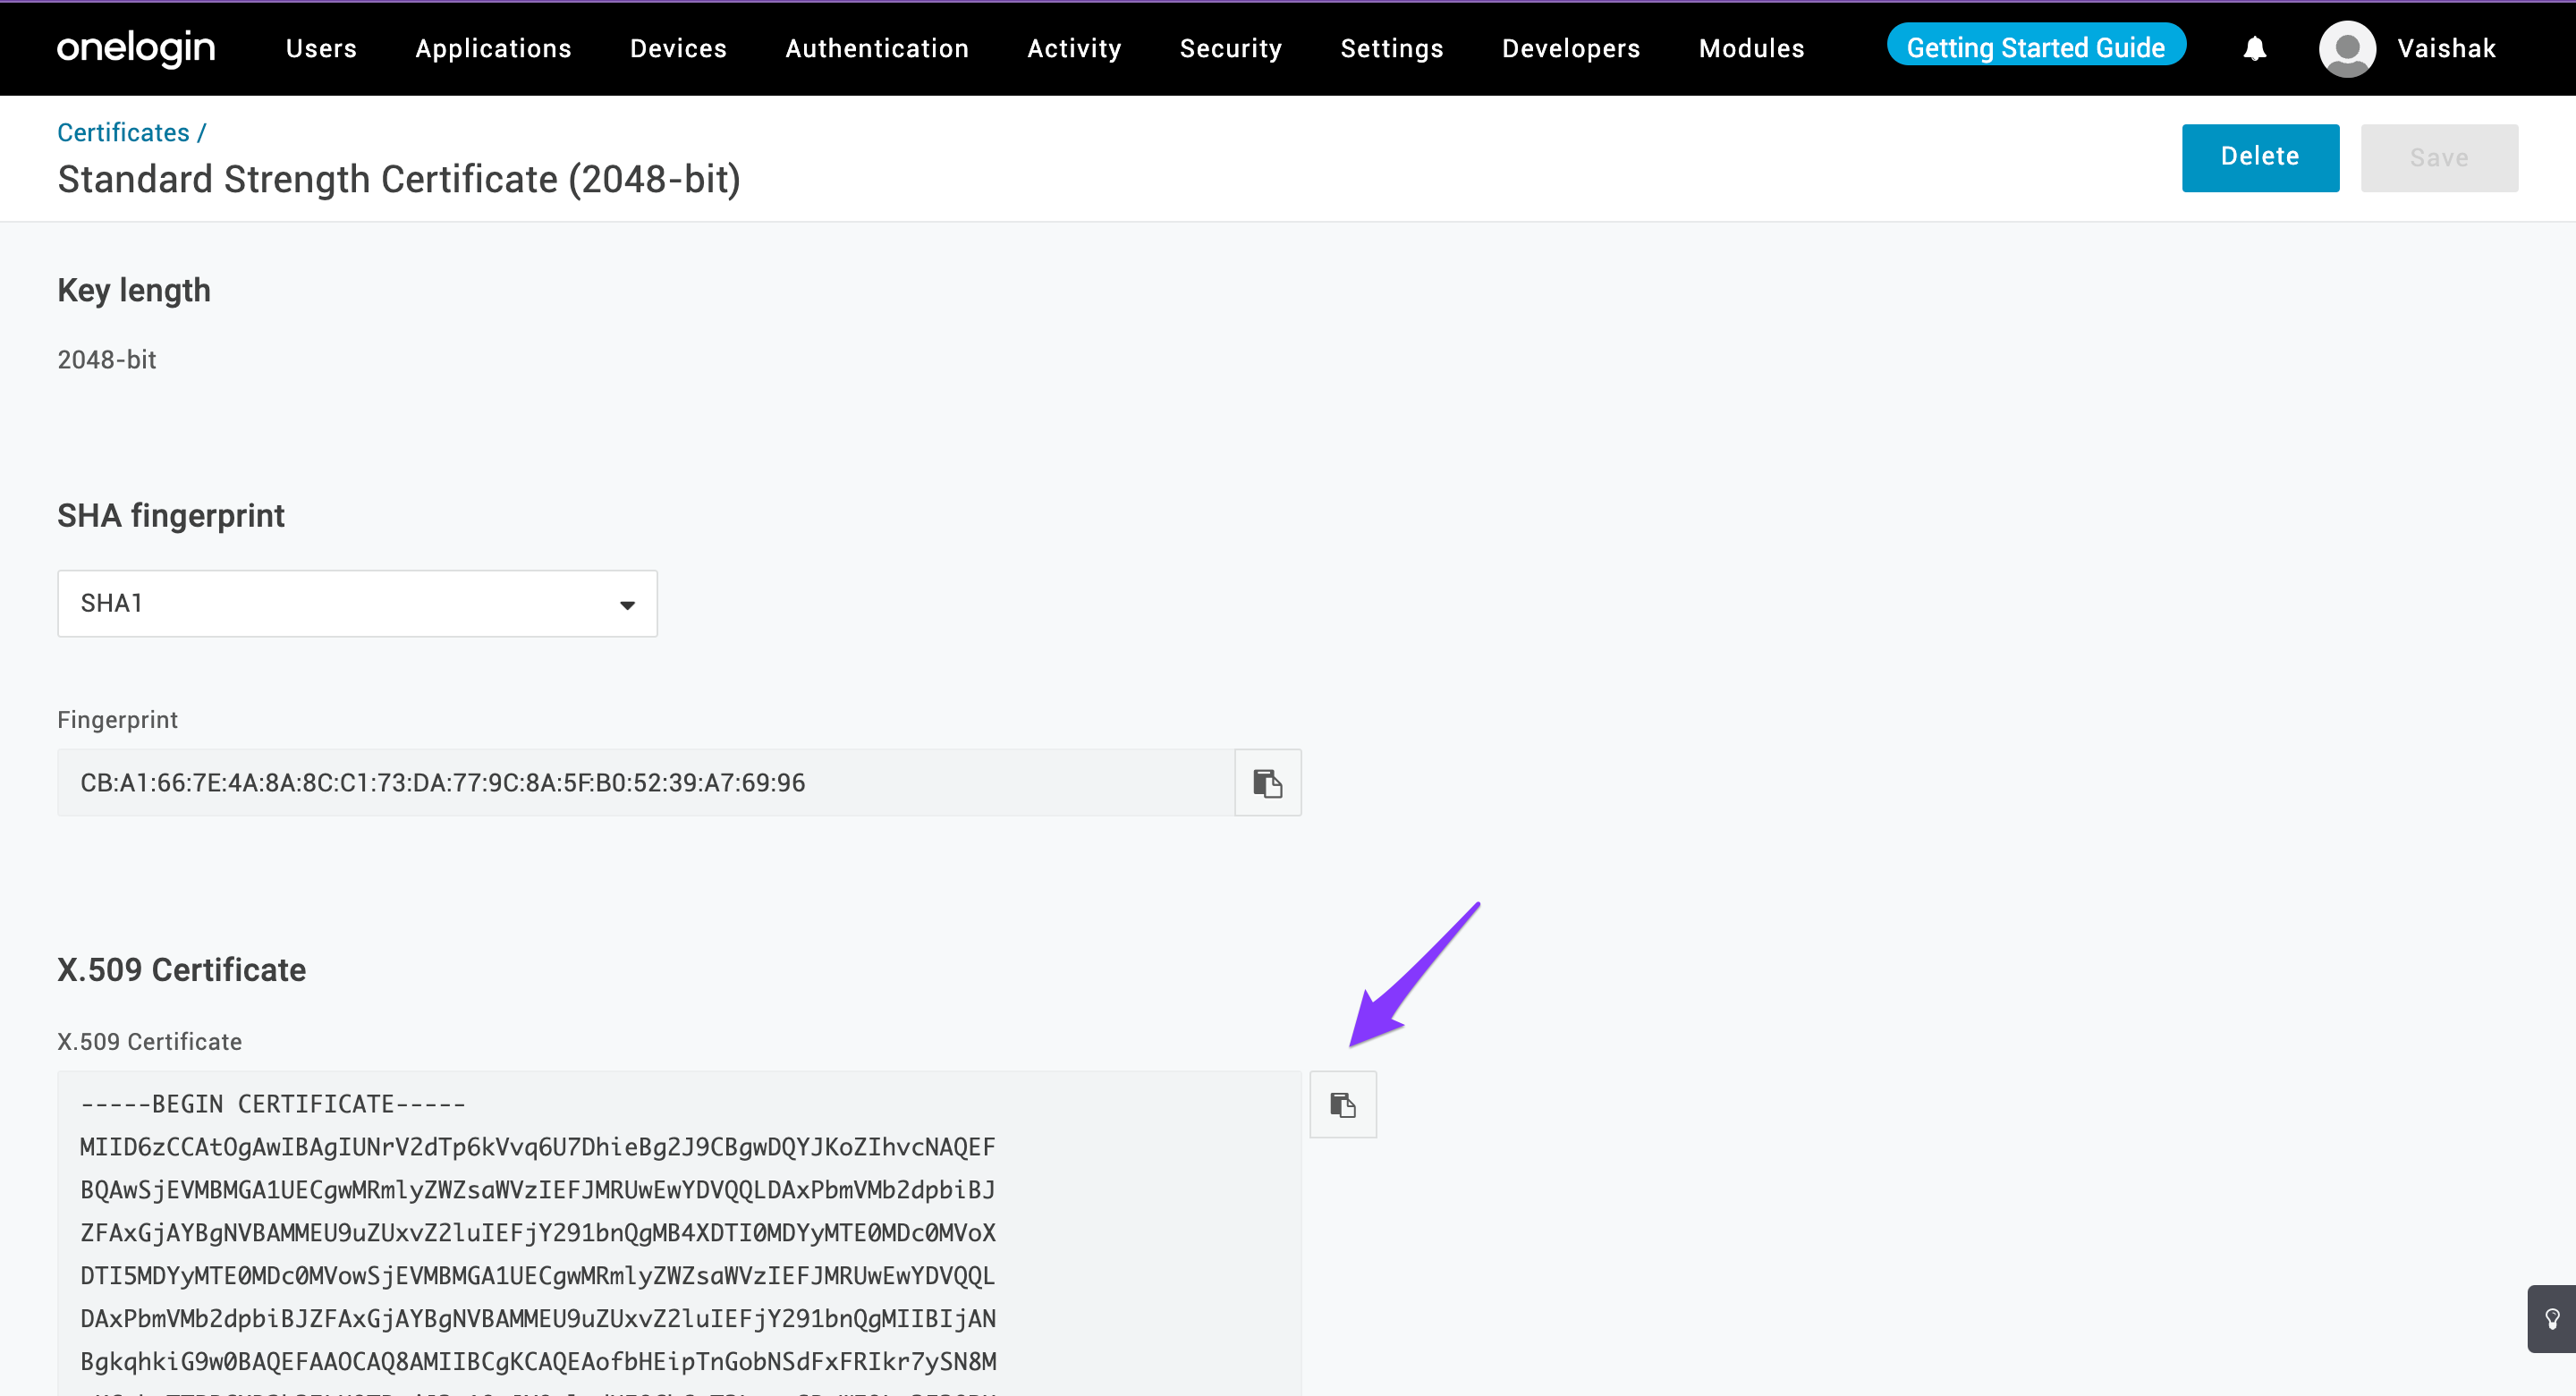
From the SSO tab, click View Details next to the X.509 Certificate.

Copy the X.509 Certificate.
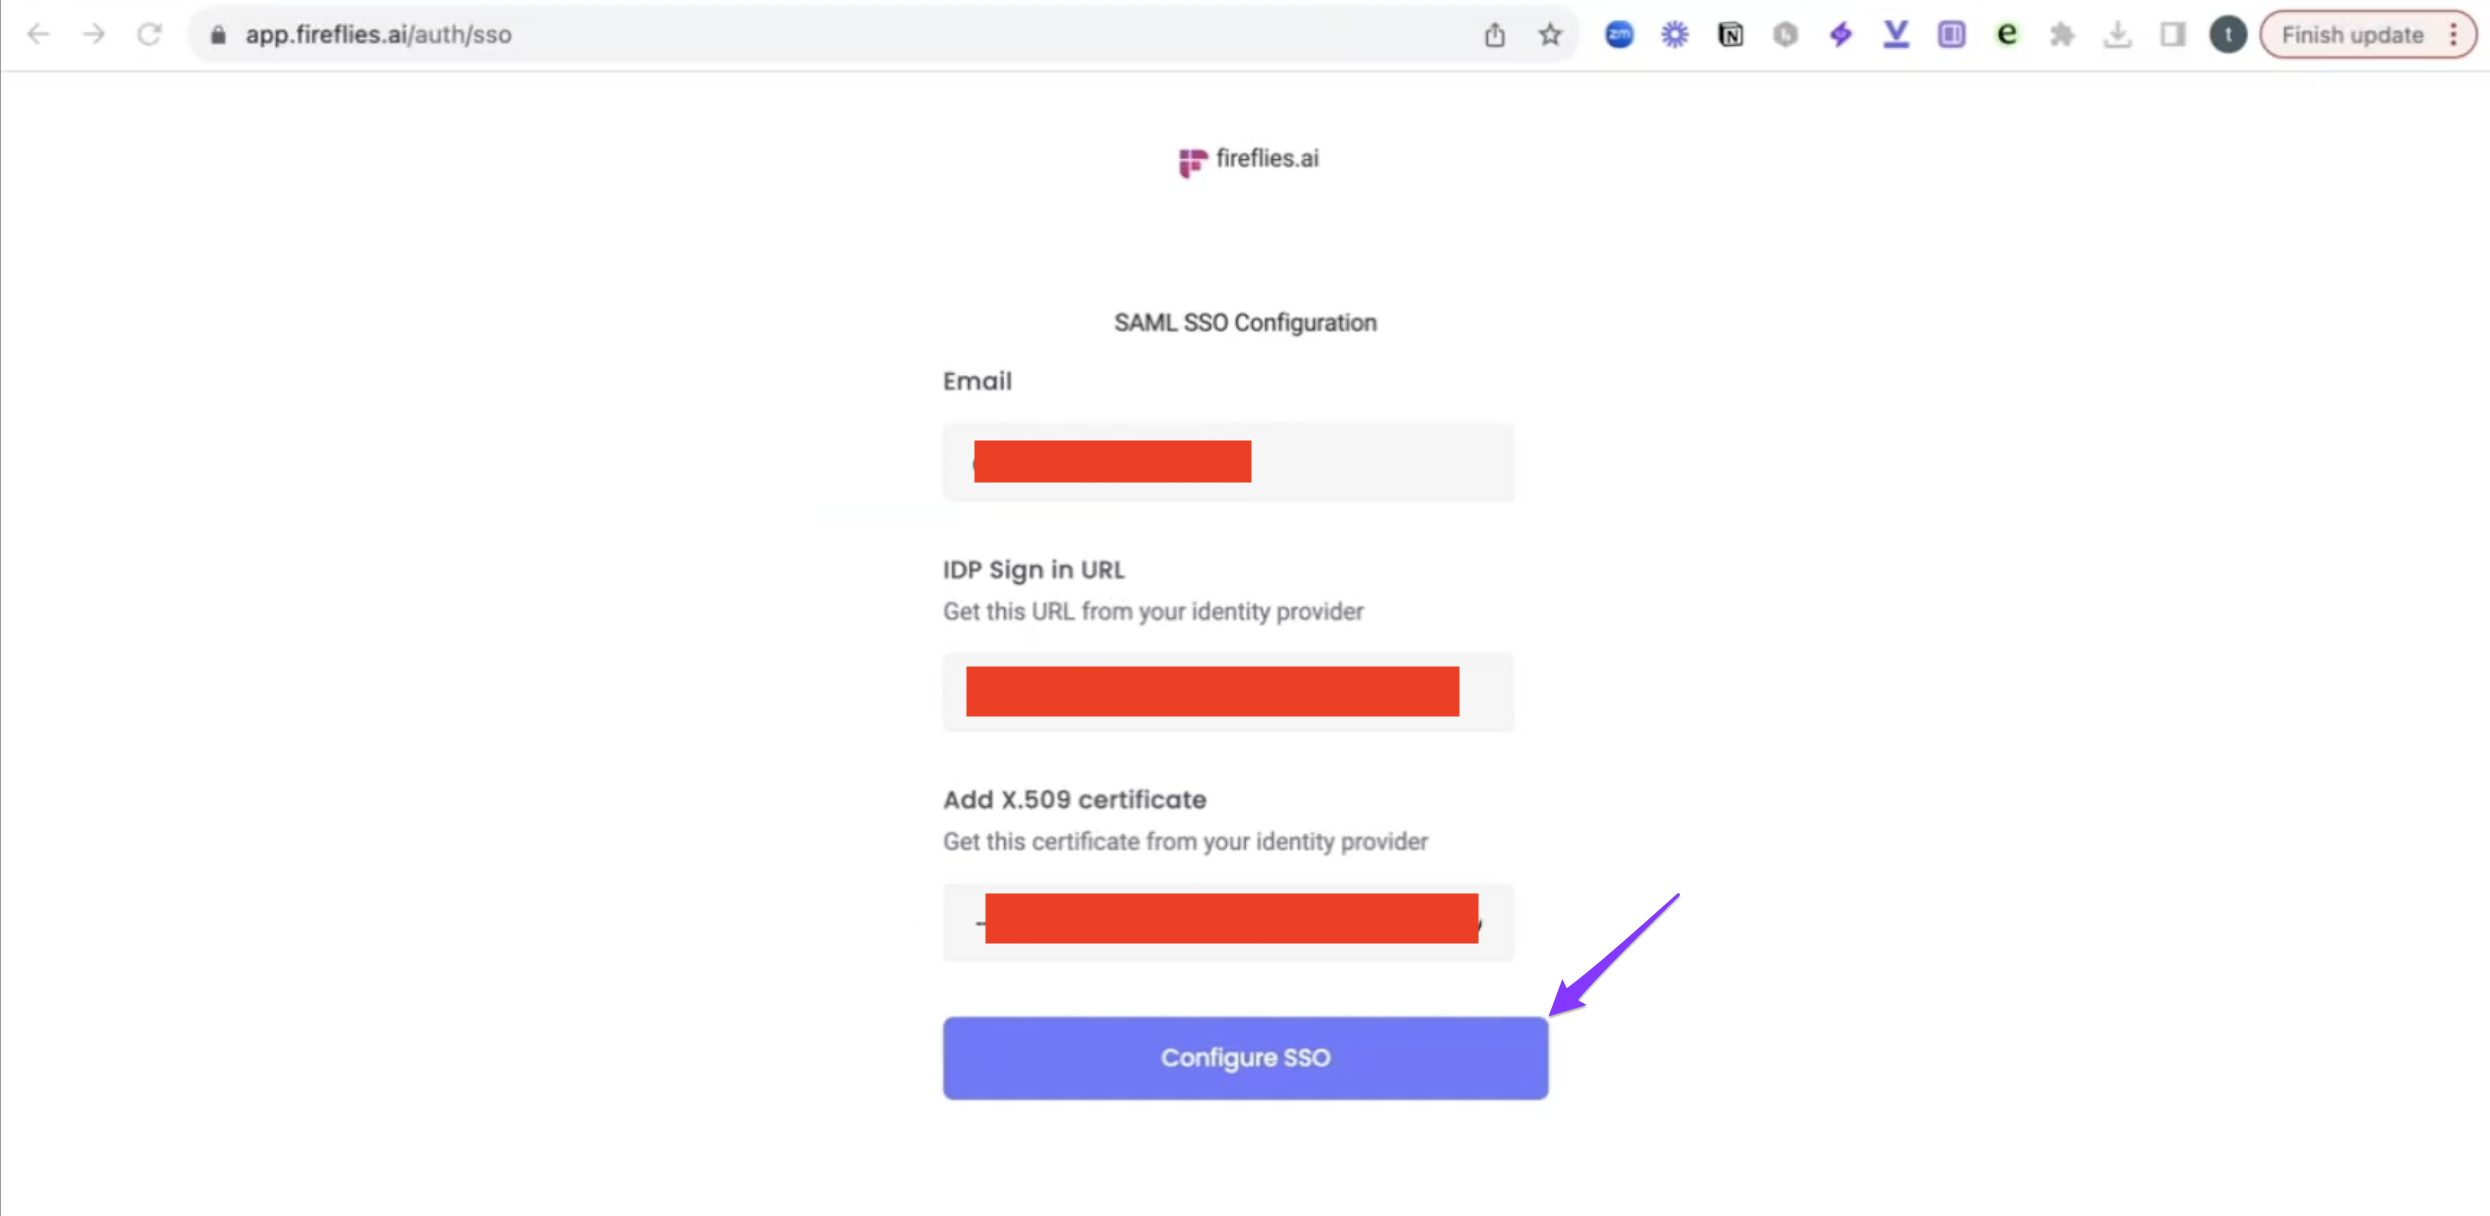
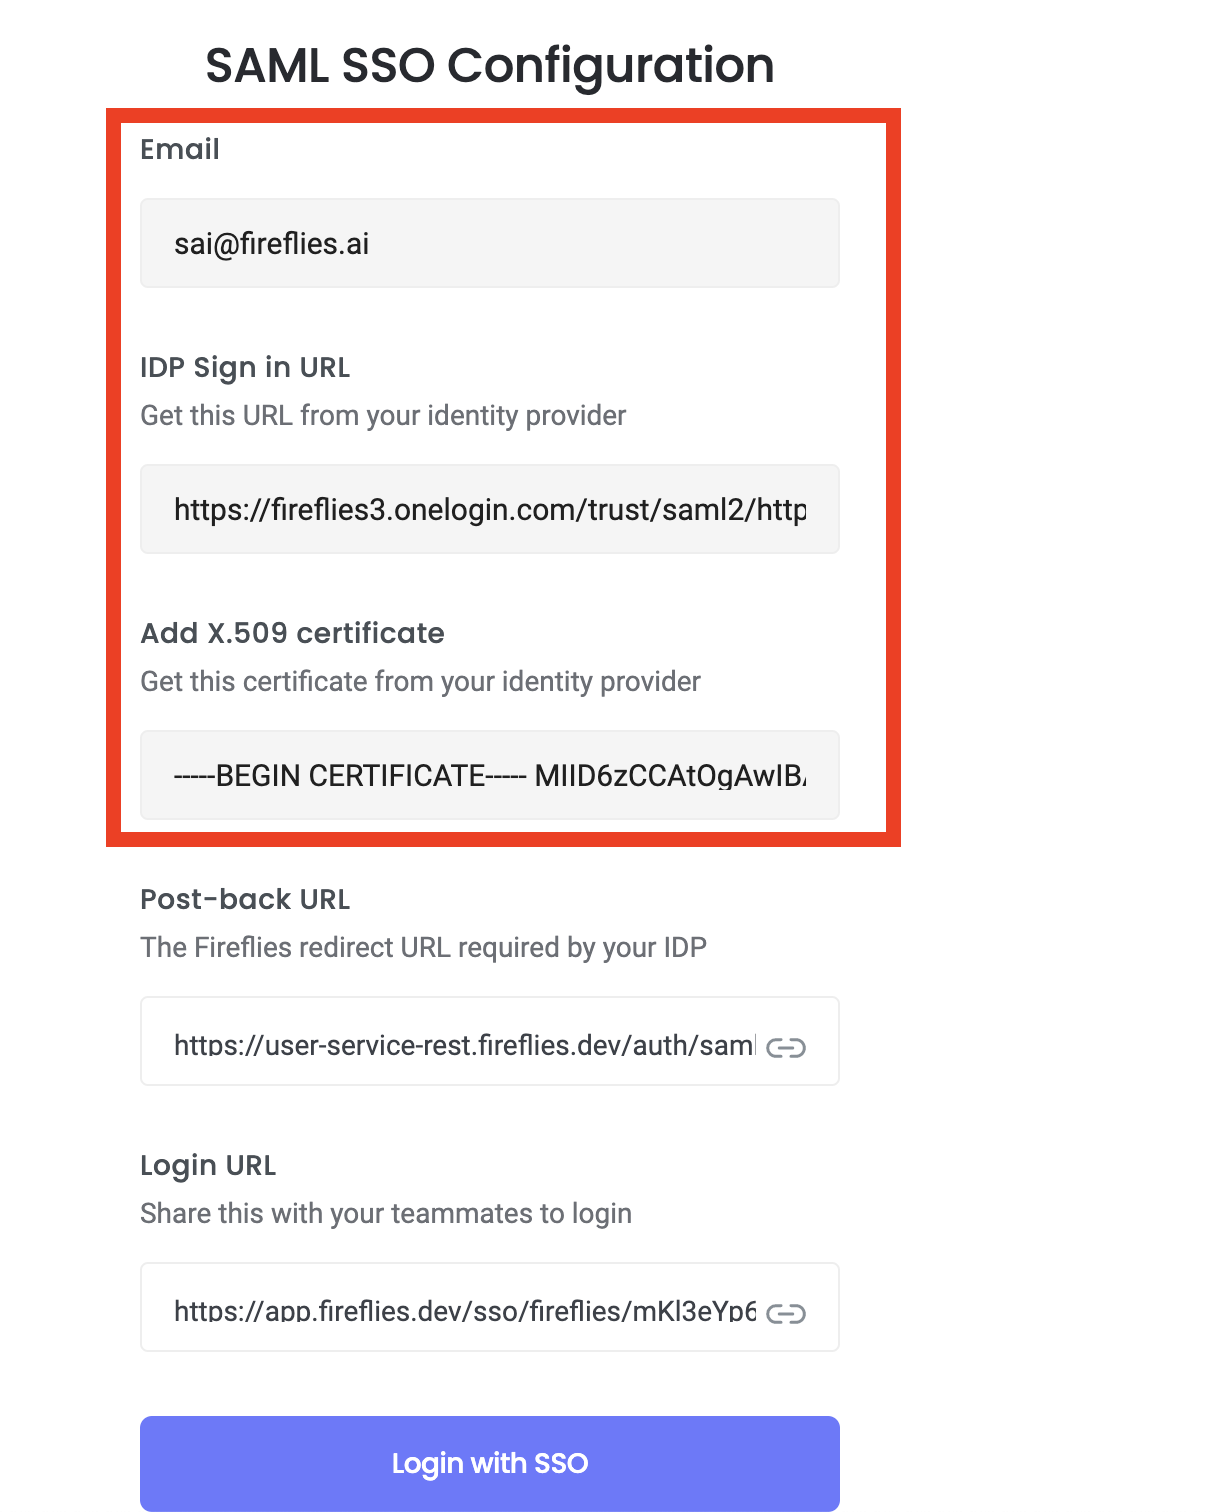
Head over to the link: https://app.fireflies.ai/auth/sso and validate your domain. Then, input the IDP sign in URL and x.509 certificate and hit Configure SSO.
Once this is done, you will receive the postback URL from Fireflies, also known as the ACS consumer URL within OneLogin. This will have to be entered.
The unique login URL for your team that you can share with your team. Your teammates will have to access this URL to log in to Fireflies.
📌Enforced SSO Redirect Behavior
When SSO is enforced on your domain:
Users will be automatically redirected to your organization's SSO login link when they attempt to log in via Google or Microsoft OAuth.
This happens after the OAuth authentication succeeds—at which point Fireflies checks if your domain has an enforced SSO configuration and triggers the redirect.
Avoid this behavior
If your users don't want automatic redirects, have them use your unique SSO login link instead of the generic Google or Microsoft login options.